Option 1: Color Range Selection

Option 1 | Color Range Selection

Color range selection works best for pieces that are graphic and have only a few clear colors.

Select and convert a color to a Spot Channel
  • Select your first color range:
    • Menu Bar > Select > Color range…
  • Sample one of your colors using the eyedropper tool.
  • Use the Fuzziness slider to select more or fewer pixels. The white areas are the pixels selected. 
  • Click OK
  • With selected pixels loaded, go to the Channels menu panel. 
  • Select “New Spot Channel….” from the drop-down menu. 
  • Use the eyedropper to select your desired spot color from the Riso swatches panel.
  • Click OK

Your new Spot Channel will show up with your selected area as a mask. 

Repeat for every color. 

Make sure your composite channel is selected.

Change your mode to Multi-channel 
  • Menu Bar > Image > Mode > Multichannel
  • Delete all non-spot channels

If Option 1 color conversion works for you, skip ahead to Additional Optional Adjustments.

Color Systems & Color Spaces

Understanding RGB vs. CMYK vs. CMY

The primary colors of light RGB (Red, Green, and Blue), represent a visual range that, in theory, can produce any color that can be seen by the human eye. Mixing with light is an additive process. (When you add all the colors together, they make white.)

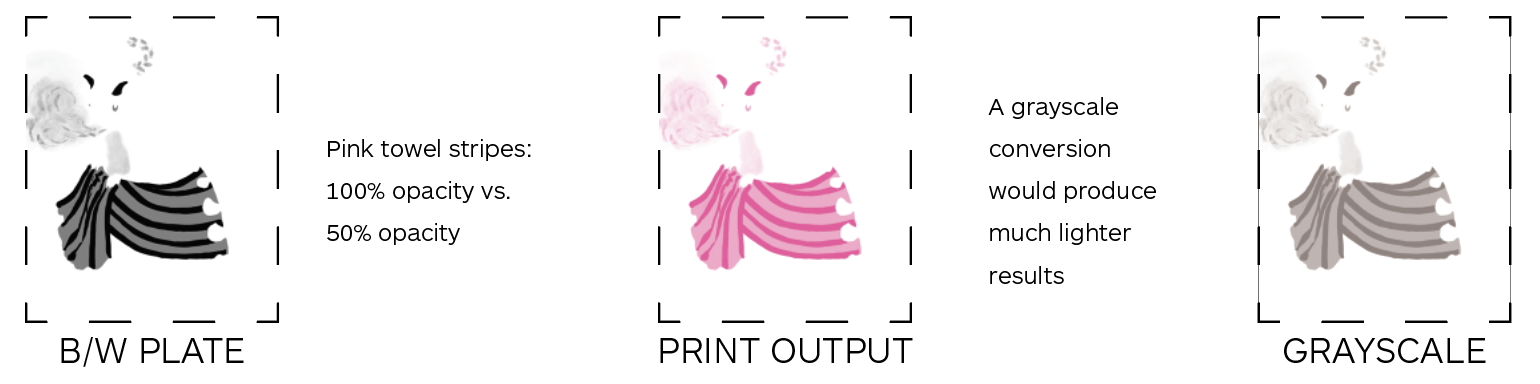
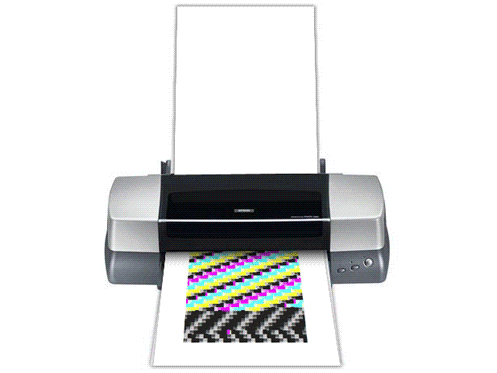
Printing is a subtractive color process and uses the opposite colors, CMY (Cyan, Magenta, and Yellow) to mix and produce an image. Working with physical colors (i.e. dyes, pigments, inks) brings with it the limitations of your materials. In theory, cyan, magenta and yellow, all together should produce black. But in reality, the pigment usually turns to a muddy, inconsistent brownish-black. (The shade of brownish-black is dependent on your materials.)

This is why Black (or K for Key) is added in addition to the CMY gray-blend, giving you a sharper, richer, darker black.

So, when you are printing in CMYK, about half of your grays and blacks are made with an even blend of CMY, and the other half is a layer of black printed on top. In theory, all of your CMY channels should have the same information as your black channels, just at a lighter value.

Overall, subtractive color spaces tend to have a wider spectrum of colors to offer. This is why most people work in an RGB color space such as Adobe RGB 1998 or ProPhoto RGB, instead of CMYK. Side note: All screens use additive color.

What is a Color System?

A color system is a set of colors that represent a specific visual spectrum.* These few colors are mixed together to create a limited usable range, and that range is called a color system. Examples of a color system include RGB, CMYK, and Lab.

* “Appendix A.” Understanding Digital Photography, by Joseph A. Ippolito, Thomson/Delmar Learning, 2003, p. 372.
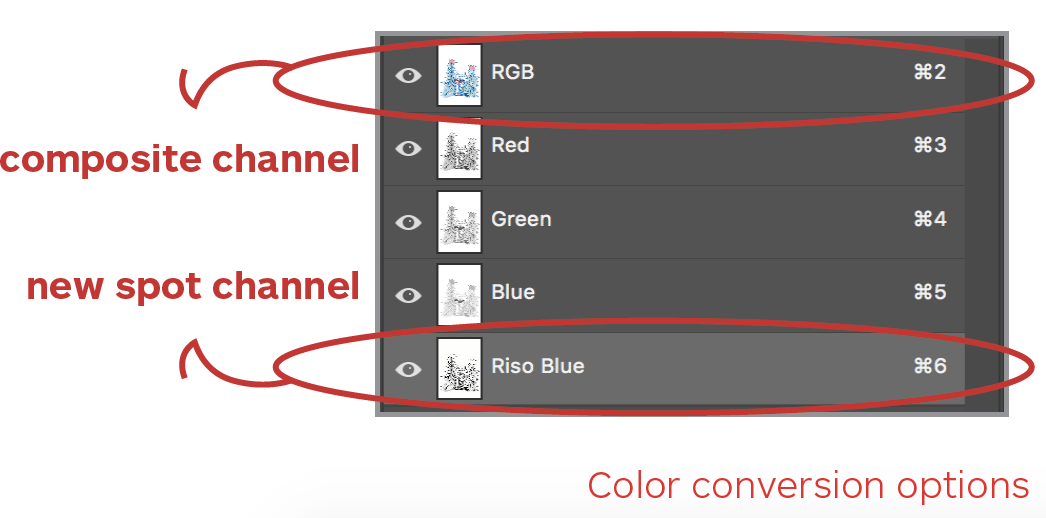
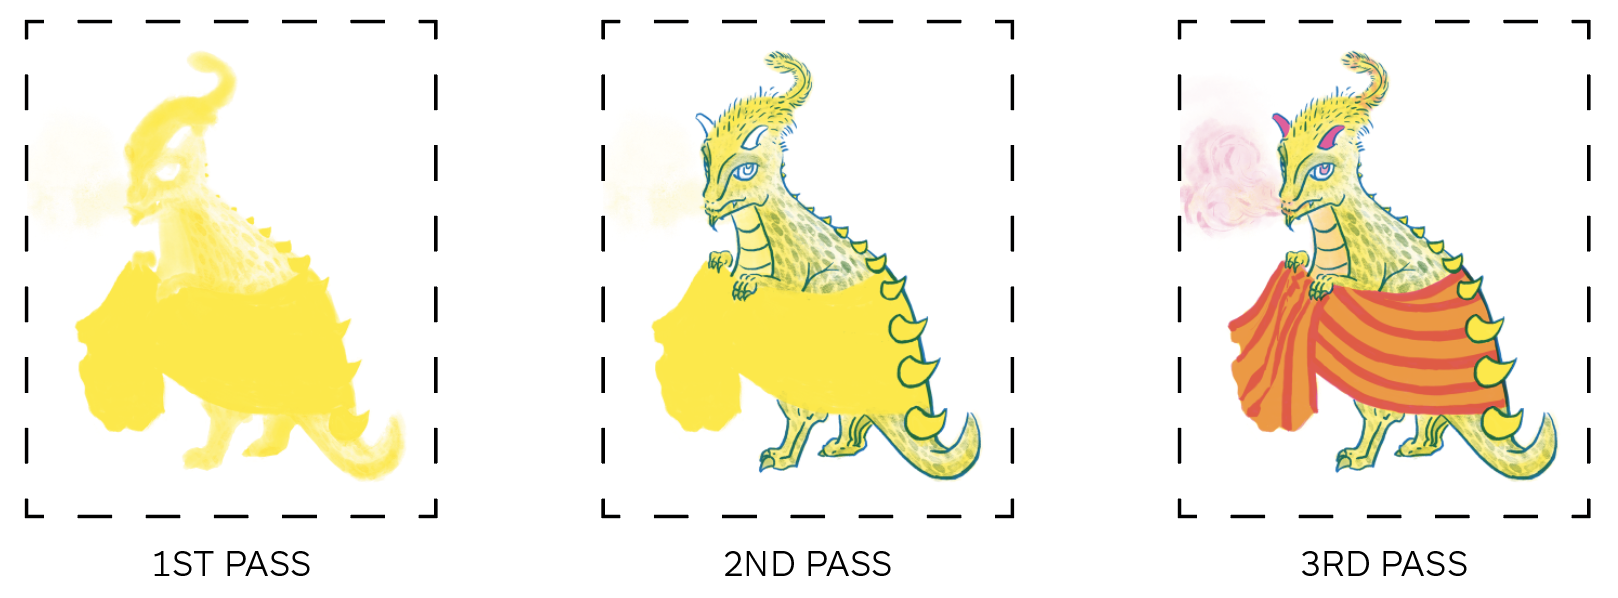
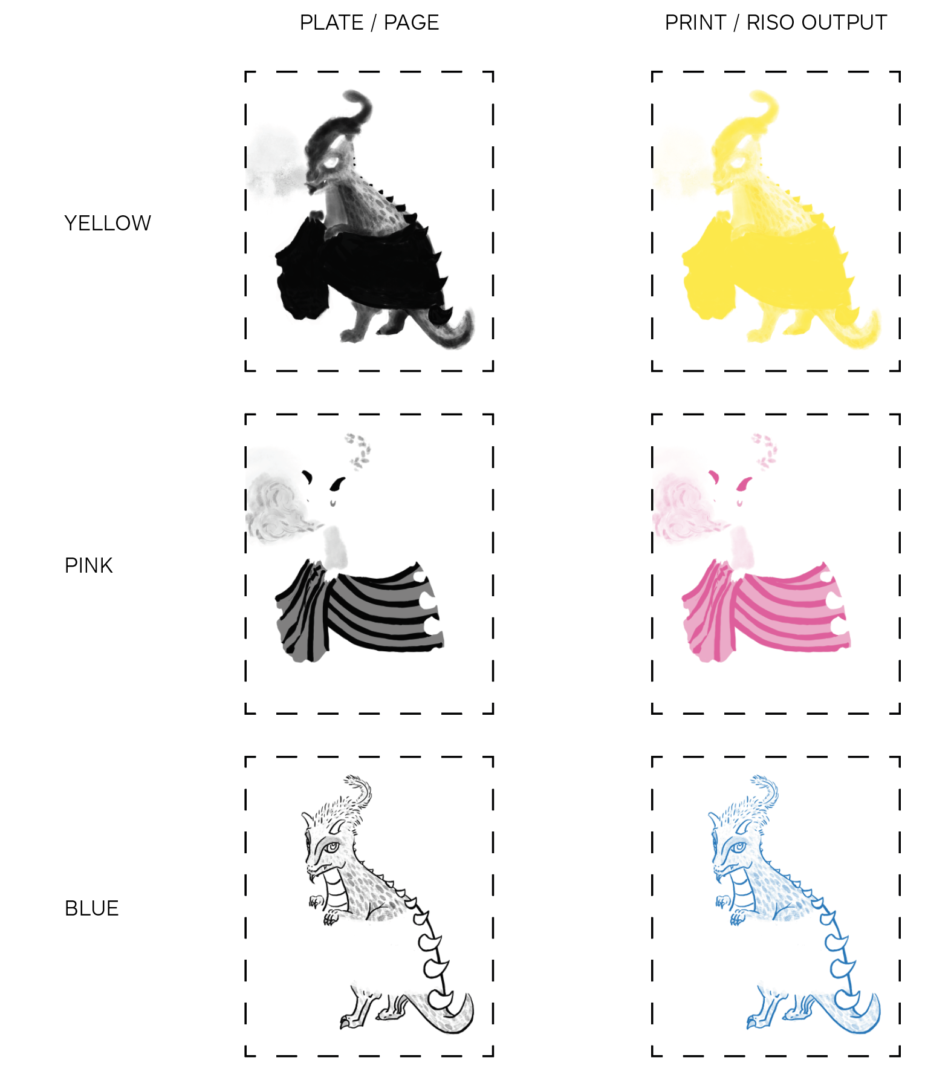
What is a Channel?

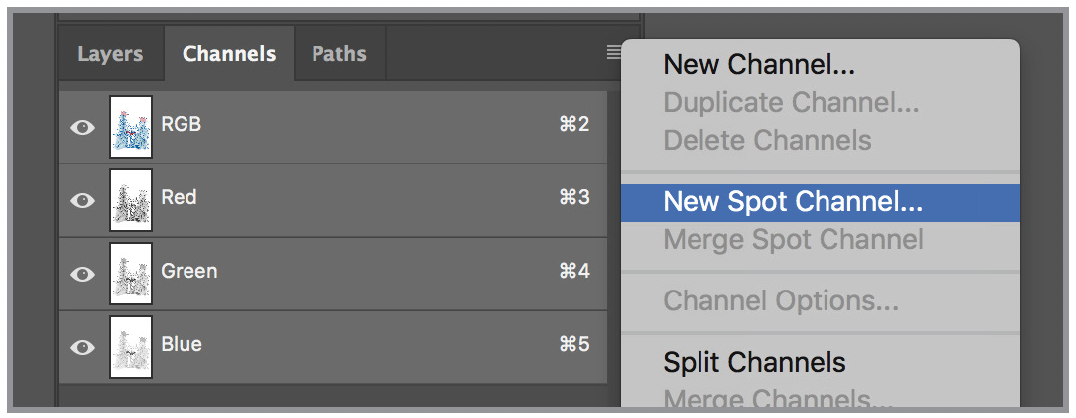
Photoshop organizes your chosen set of colors (e.g. RGB or CMYK) into channels, dividing up your image information by color. For RGB and CMYK, Photoshop also includes a composite channel. Each channel is in grayscale and uses a mask to store each color’s information. You can edit this mask to alter the look of your image and how the channels are mixed.

In RGB and CMYK, you can use the Channel Mixer to change the amount of color information on each channel.

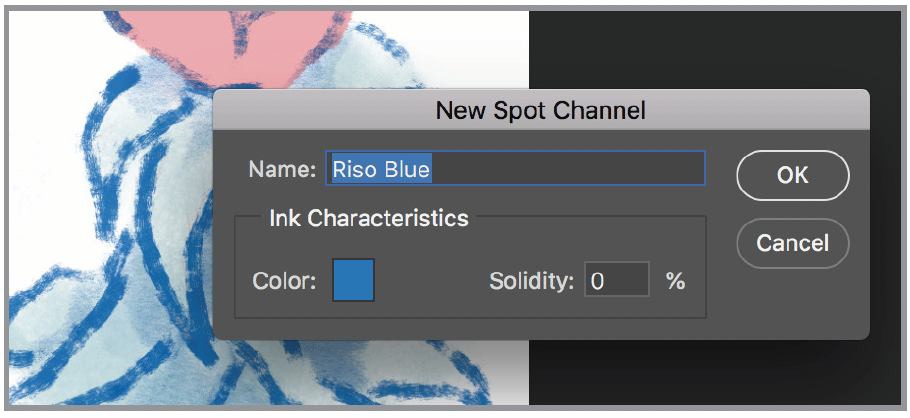
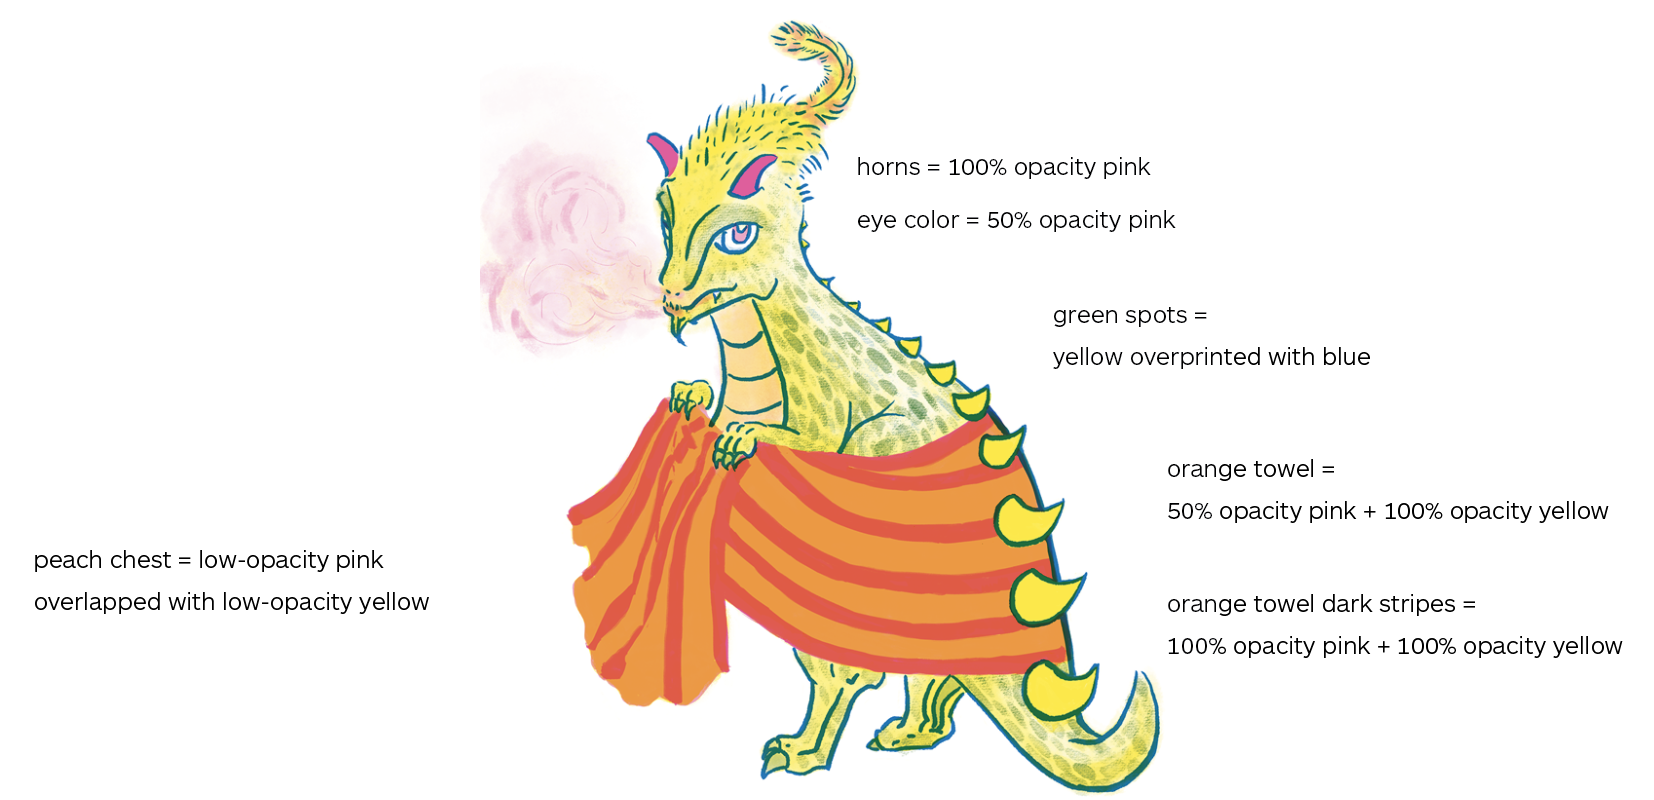
What is a Spot Color?

An additional color that is not a part of an established color system or mode.

For More Information

Linkedin Learning: Understanding CMYK vs. RGB
Linkedin Learning: Understanding Spot Colors
Linkedin Learning: Spot Colors

Registration & Trapping

The Risograph has limits of accuracy. Each color layer requires a separate pass through the printer, registration on multi-color Risograph prints will never be perfect. 

It is recommended that you add registration marks to your image to aid in lining up multiple layers. These can also double as trim marks if you plan on cutting down your print to size. 

Line work printed over solid blocks of color will usually look best.

Registration (aligning overlapping colors) can be tricky and often imperfect on the Risograph.

When colors are misaligned (misregistration), you can be left with a glaring white gap that can detract from your overall piece.

Trapping is a remedy to misregistration. Trapping is the practice of adding a little bit of overlap between adjacent colors to make sure that there are no white gaps between them even when registration is a little uneven. In other words, trapping expands pixels where color channels touch or overlap.

Trapping channels in Photoshop

Select all channels you want to trap.

Trap
Menu bar > Image > Trap…

Select the number of pixels or millimeters you want to trap. (We recommend you do the highest allowable.)

There will only be a slight visual difference in your file, but this will help your colors overlap once you print.

Click OK.

Risograph Image Options

The Risograph can print at 600 d.p.i. and has two gradient techniques to choose from:

  • Grain Touch: a randomized diffusion dither pattern (like a photo or film grain) 
  • Screen-Covered: creates classic halftone patterns on a very small scale.  
    • Screen Frequency controls the size of dots produced (higher numbers = smaller dots).
    • Screen Angle controls the angle that the pattern is set to.

We recommend using Grain Touch over Screen-covered. If you have questions about screen-covered and Riso halftones, please contact the IC.

Reprint Policy

Print jobs must be paid for in their entirety upon pickup. Students must accept all liability with the set-up of their files prior to submitting the print job. This includes all spelling and layout issues.  

Occasionally reprints may be warranted due to printer malfunction or an IC technician’s error. Reprints must be requested before leaving the IC. The student may be asked to fill out a Reprint Request Form if a manager is not available to approve a reprint. Reprints must be approved by a manager.

If the issue can be immediately resolved, the IC will take the defective print and reprint the file in question without delay. The student will be responsible for paying the full price of the print job. If the issue requires printer maintenance or service, the student will be asked to leave the defective print with their completed form, and the IC will reprint the file once the service is complete, which may take several days.

The IC does understand that a student may need to take a defective print to show an instructor that the work was completed. In such cases, the defective print must be returned to the IC within 2 business days of the form being completed so that the printing issue can be addressed. Students are required to exchange the defective print in order to obtain a reprint or, if appropriate, another form of resolution. 

If the defective print is sufficient, the student may choose to purchase it at 50% off the full price. 

If the student wishes to keep the defective print in addition to receiving a reprint, it is their responsibility to cover the full price of the reprint and 50% of the defective print.

In the case of reprints, no changes to the original file will be allowed. The reprint will follow the original print specifications.

The Imaging Center rarely accepts claims of defective prints once they have left the IC. 

However, if a printer-specific defect (example: wrong image size, printer smudge, ink splotch) is discovered after leaving the IC, bring the print back immediately. Students have three (3) business days to return the defective print. If a defective print is reported more than three (3) business days after picking up the job, IC management will not consider a reprint or credit. 

This reprint policy does not apply to prints that are already mounted or framed. 

Once the print leaves the Imaging Center, complaints regarding fingerprint marks, scratches, or paper dents will not be considered.

Refunds are not an option except where a reprint is not possible. 

File Preparation

Print Ready

The Imaging Center will not resize, crop, or alter your file in any way. All files must come in ready for print. All files are printed at their “actual size”.

Recommended File Types

In order to guarantee that you have the best print quality possible, we ask that you save your file in one of the following file formats:

  • Photoshop Files: high resolution .jpg
  • PDF: flattened .pdf (X-1a or X-4) – Combine multiple like-sized PDF files into a single PDF. 

Note: The Imaging Center does not accept Illustrator, InDesign, or Microsoft Office files.  

Printer Resolution

It is often assumed that the higher the printer resolution, the better the prints will look. Remember, the final print quality actually involves various factors such as: how the image was captured, and processed, as well as, what printer the image was printed on, (which includes age & condition of the print heads), the version of print driver/RIP, inks, media, and the viewing distance. 

  • The maximum resolution that our printers reproduce is 360 PPI. 
  • The minimum resolution we recommend is 180 PPI (however, depending on the viewing distance and application, less resolution can work.) 

Storage Device Information

The IC only accepts files via our online submission site. Though there may be instances where you will have to submit a file on a USB drive.

The IC is not responsible for the loss or damage of storage devices after leaving the premises. All files to be printed must be located in a Print Me folder on your USB drive. 

Monitor Calibration

The monitors in the IC are calibrated on a weekly basis. We use X-Rite i1Profiler software and hardware to calibrate our monitors. To simulate daylight and the IC paper selection, the color temperature of our monitors is calibrated to 6500 degrees Kelvin. 

Remember the range of reproducible colors available for a printed-out photographic image will always be smaller than the range that can be displayed on a monitor. 

Color Space

The IC works in both an Adobe RGB 1998 and U.S. Web Coated CMYK (SWOP) v2 color space. 

The Imaging Center will not color correct your file. If color accuracy is important, we highly recommend that you first print a test strip or sample page.