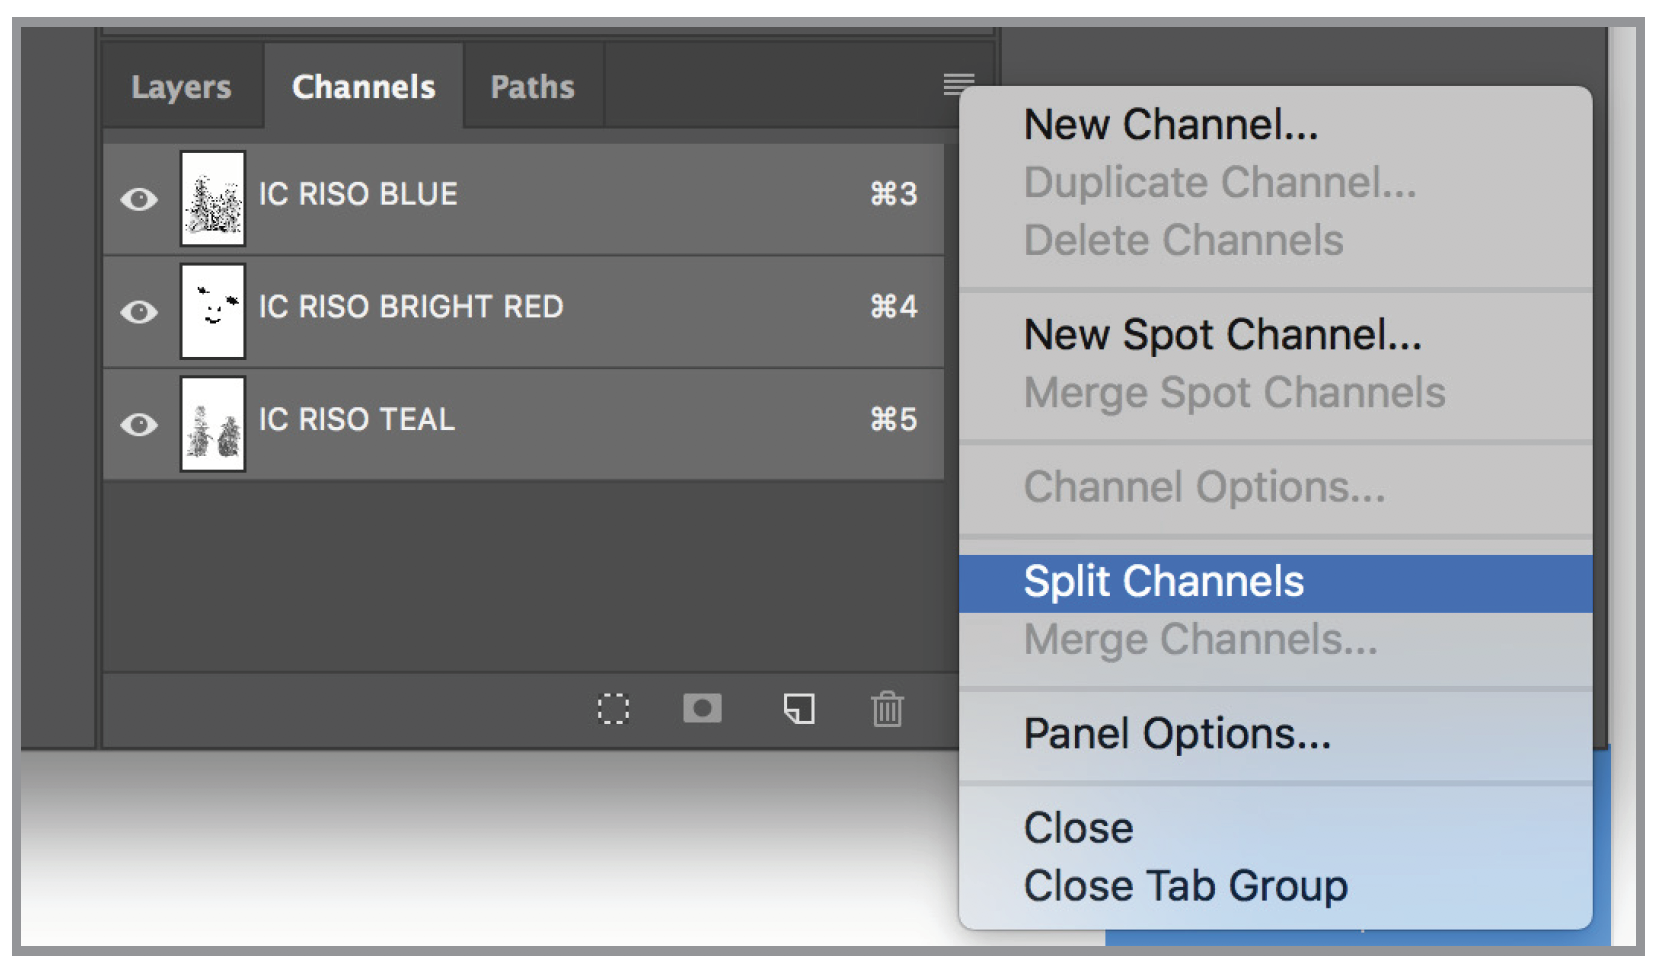
Each channel needs to be its own separate pdf file. The easiest way to do this is to split the channels. First, save your work.
Split your channels using the Channels menu
Photoshop will generate 3 separate grayscale files.
Save each as a pdf.
Combine these newly separated pdfs into one single pdf file with a screenshot of your composite image. You are now ready to print in the Imaging Center!
If you prefer to add the Riso colors manually, be sure to add them as SPOT PANTONE colors
Save your document as a new file.
Note: these methods all require switching your color mode and deleting channels, which can be a destructive workflow (e.g., layers get flattened or color information is discarded). When working with channels, it is difficult to revert back to the previous look. It is best to keep your final piece, with all its layers and edits, as a separate file.
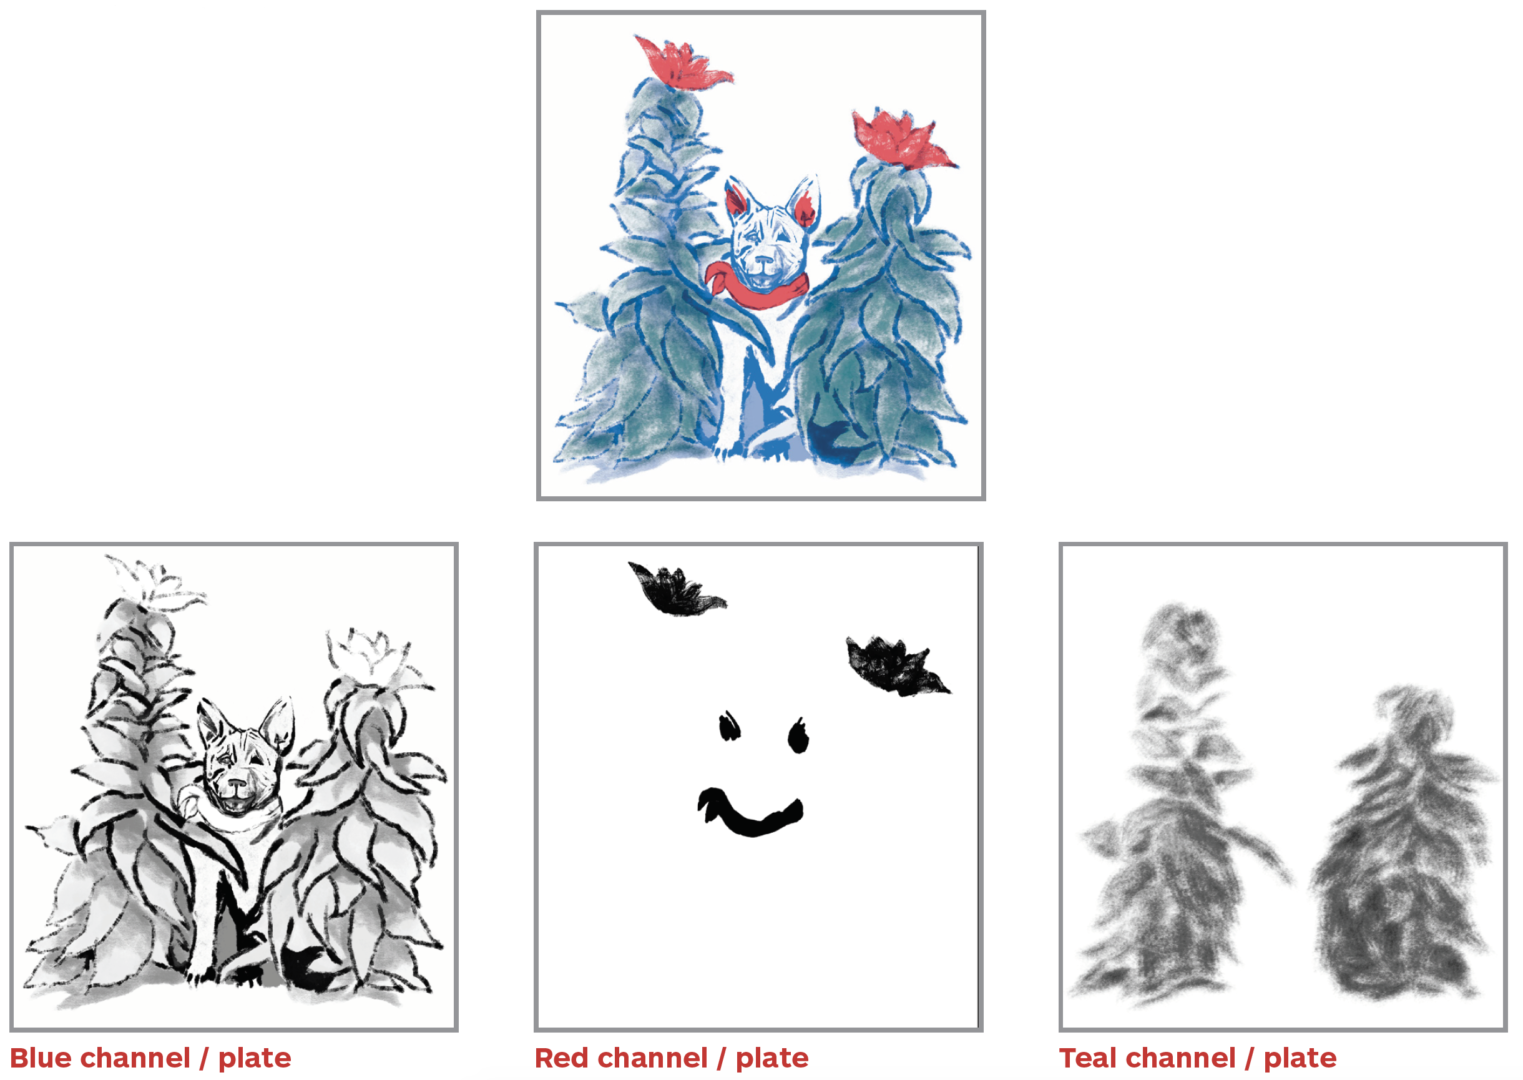
At this point (one way or another) all your colors should be divided into channels:
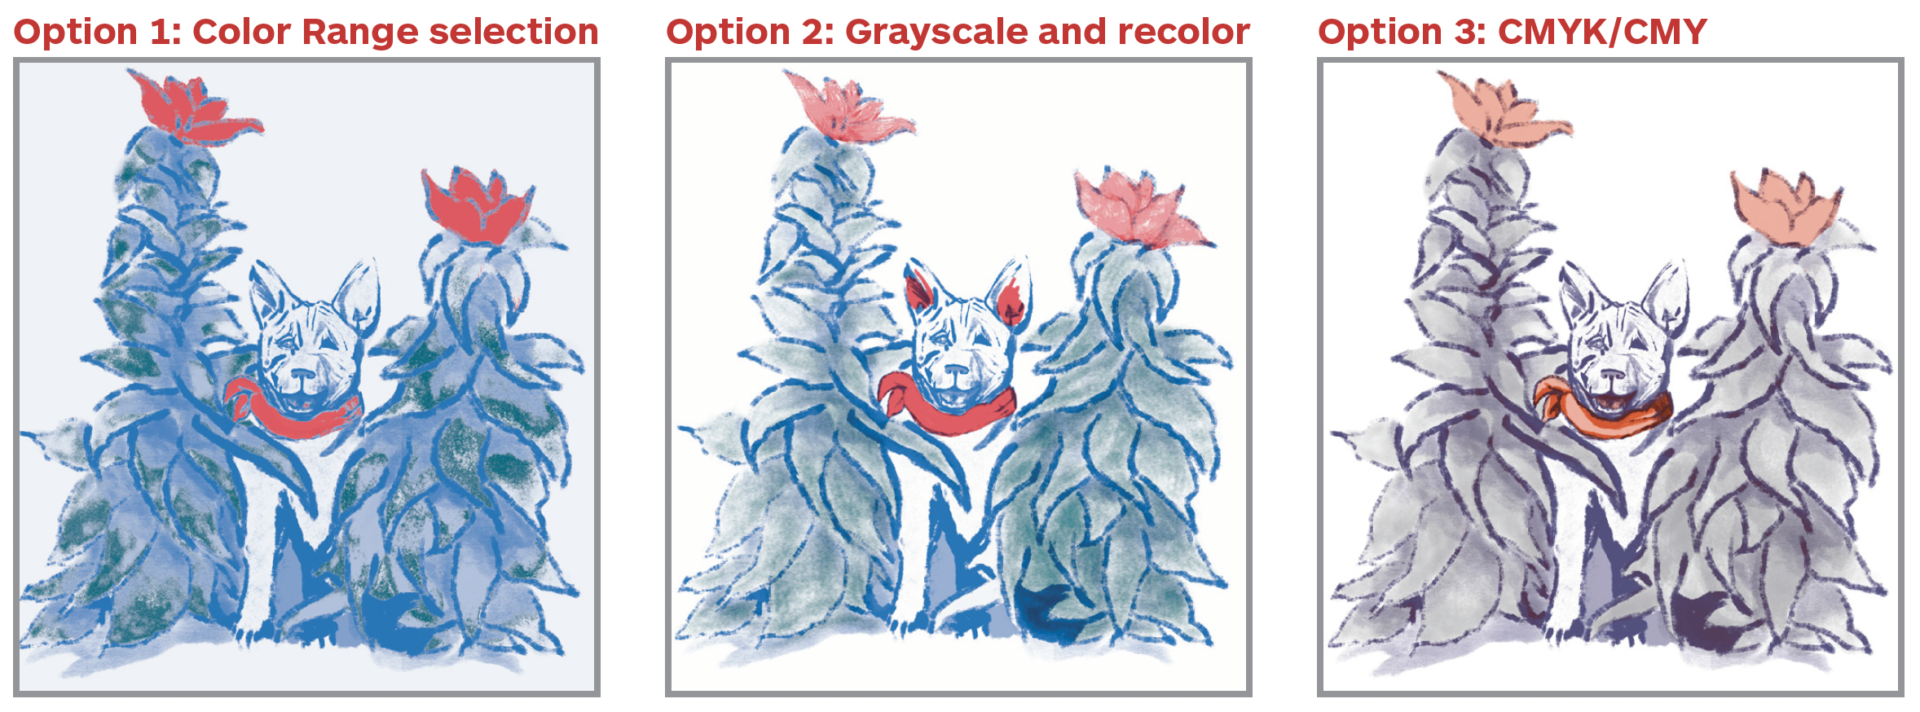
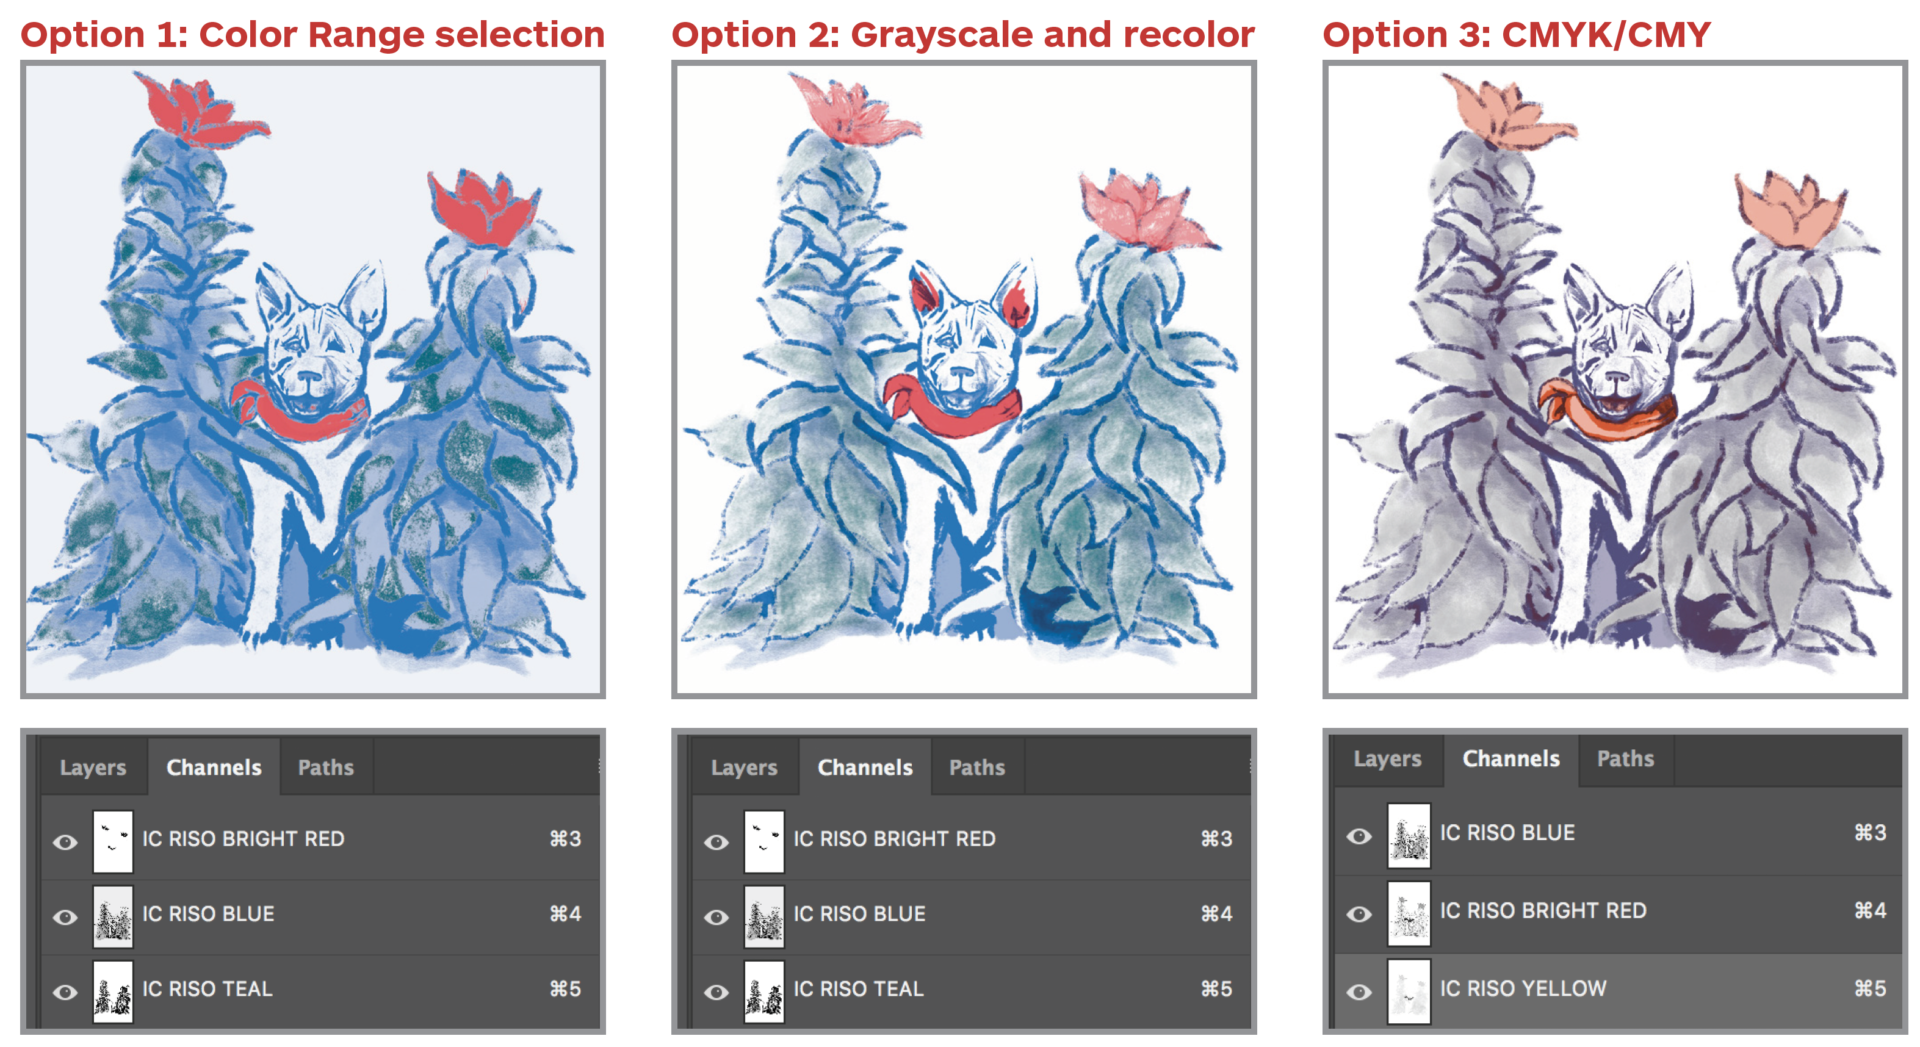
None of these is a perfect conversion, so you may want to make some adjustments directly to the channels.
If you are happy with your conversion, skip to Split Channels!
Adjust Color Using the Brush Tool
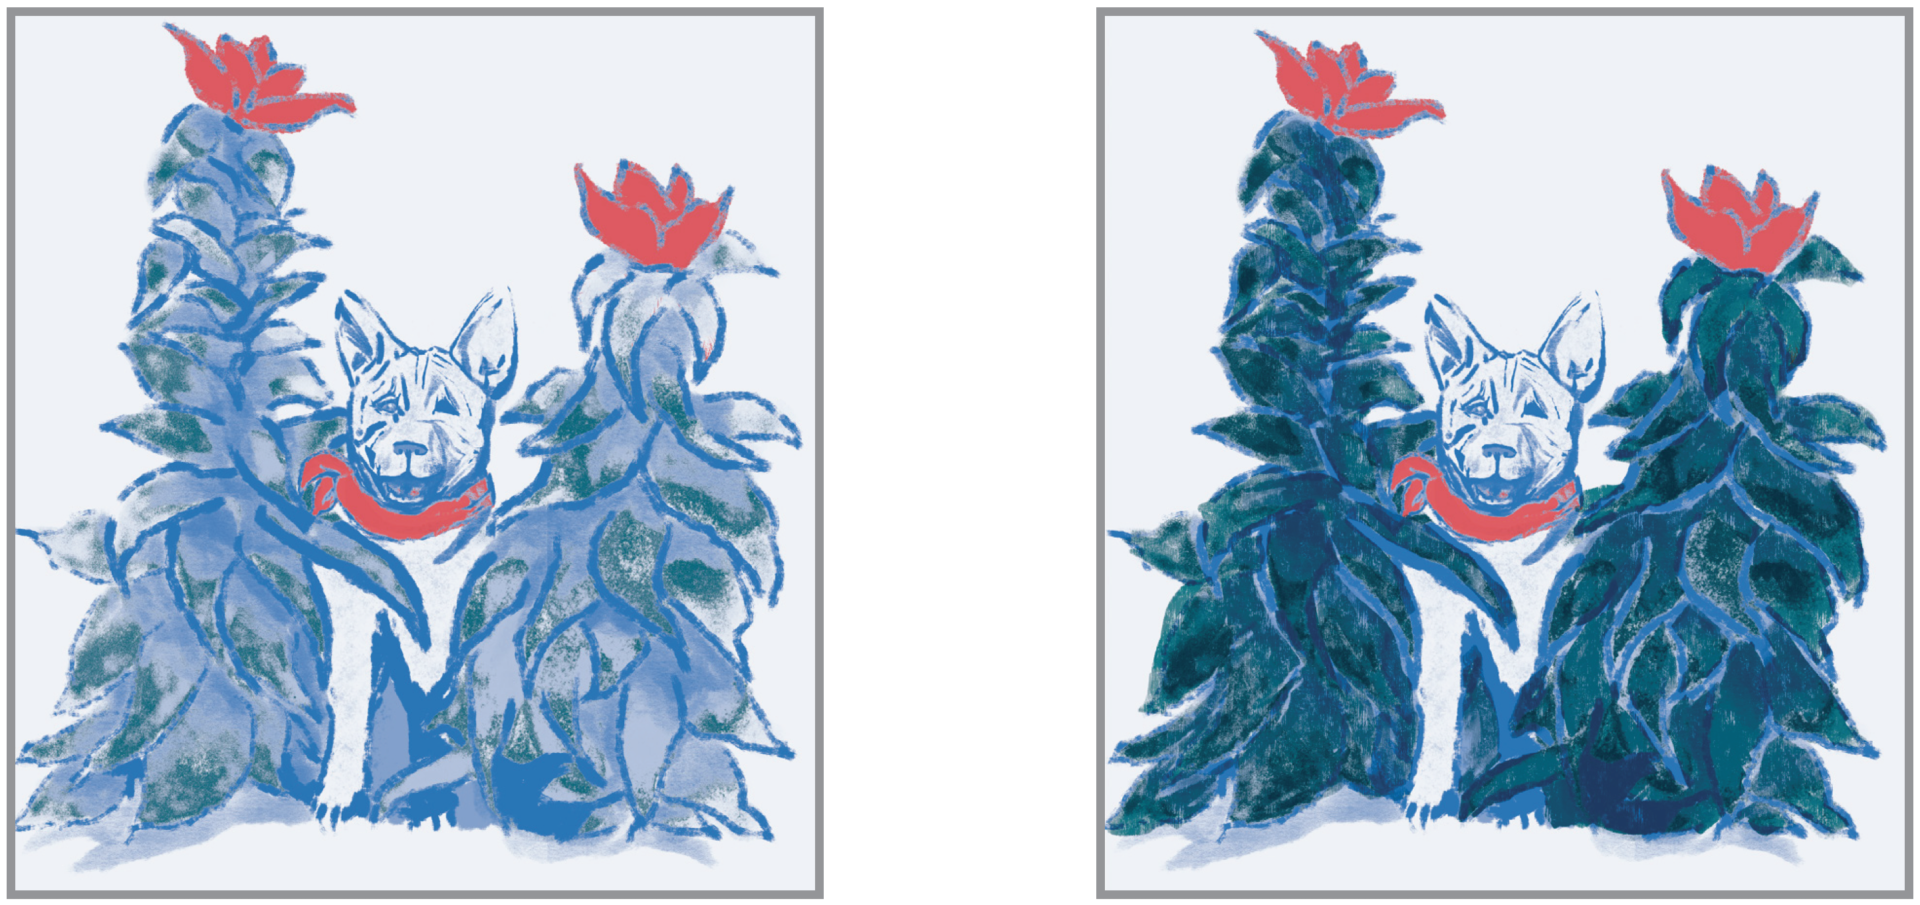
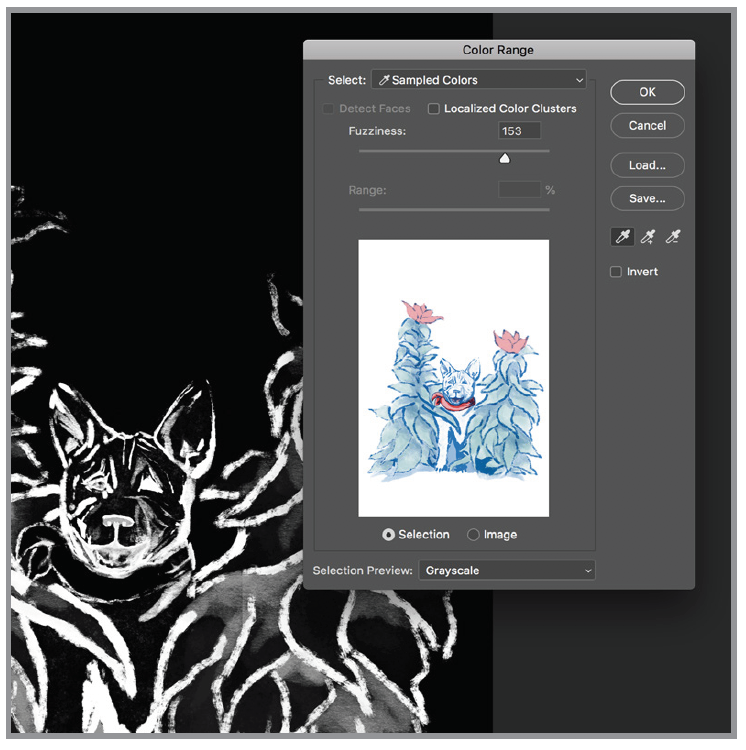
Color range selection doesn’t deal with blended or overlapped colors very well. You may want to go back in with a brush and fill in (or remove) areas on each channel.
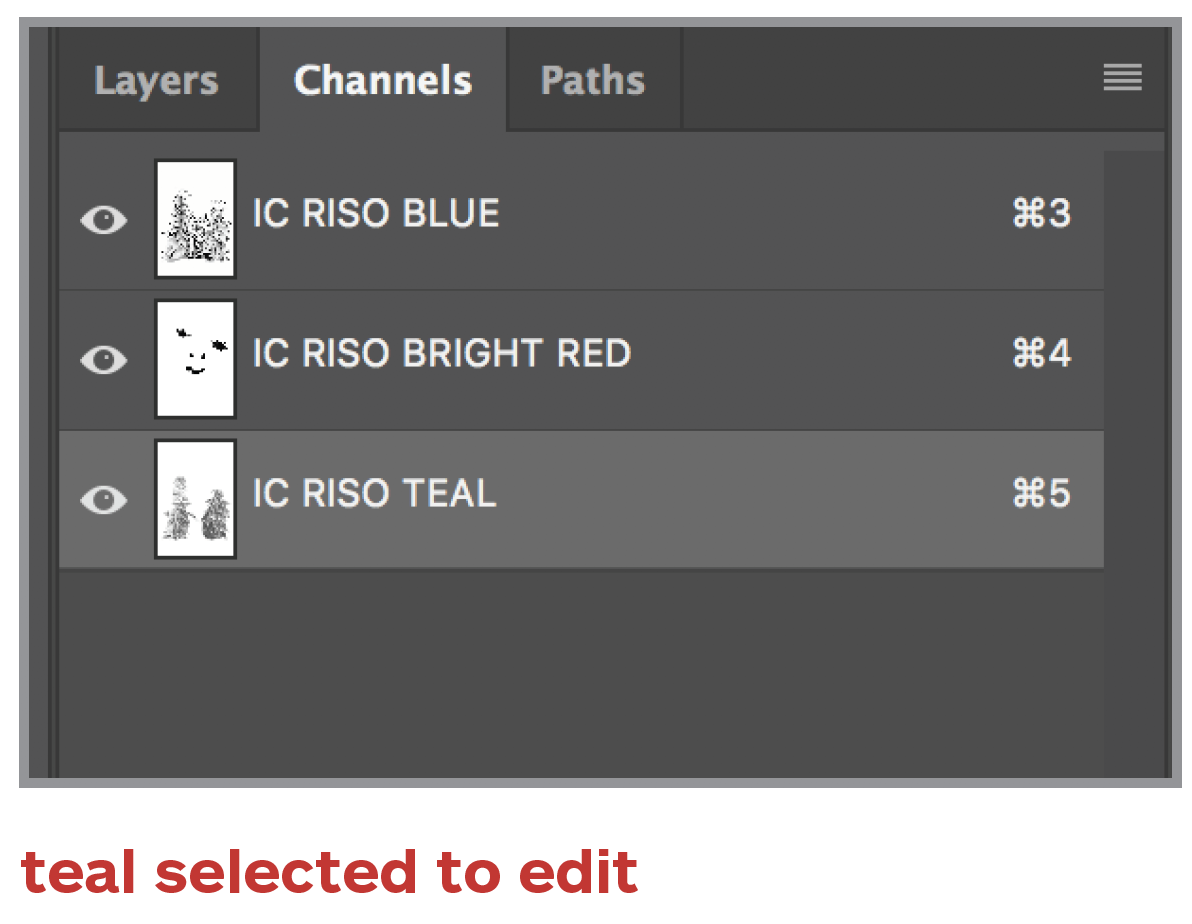
Select the spot channel you want the change.
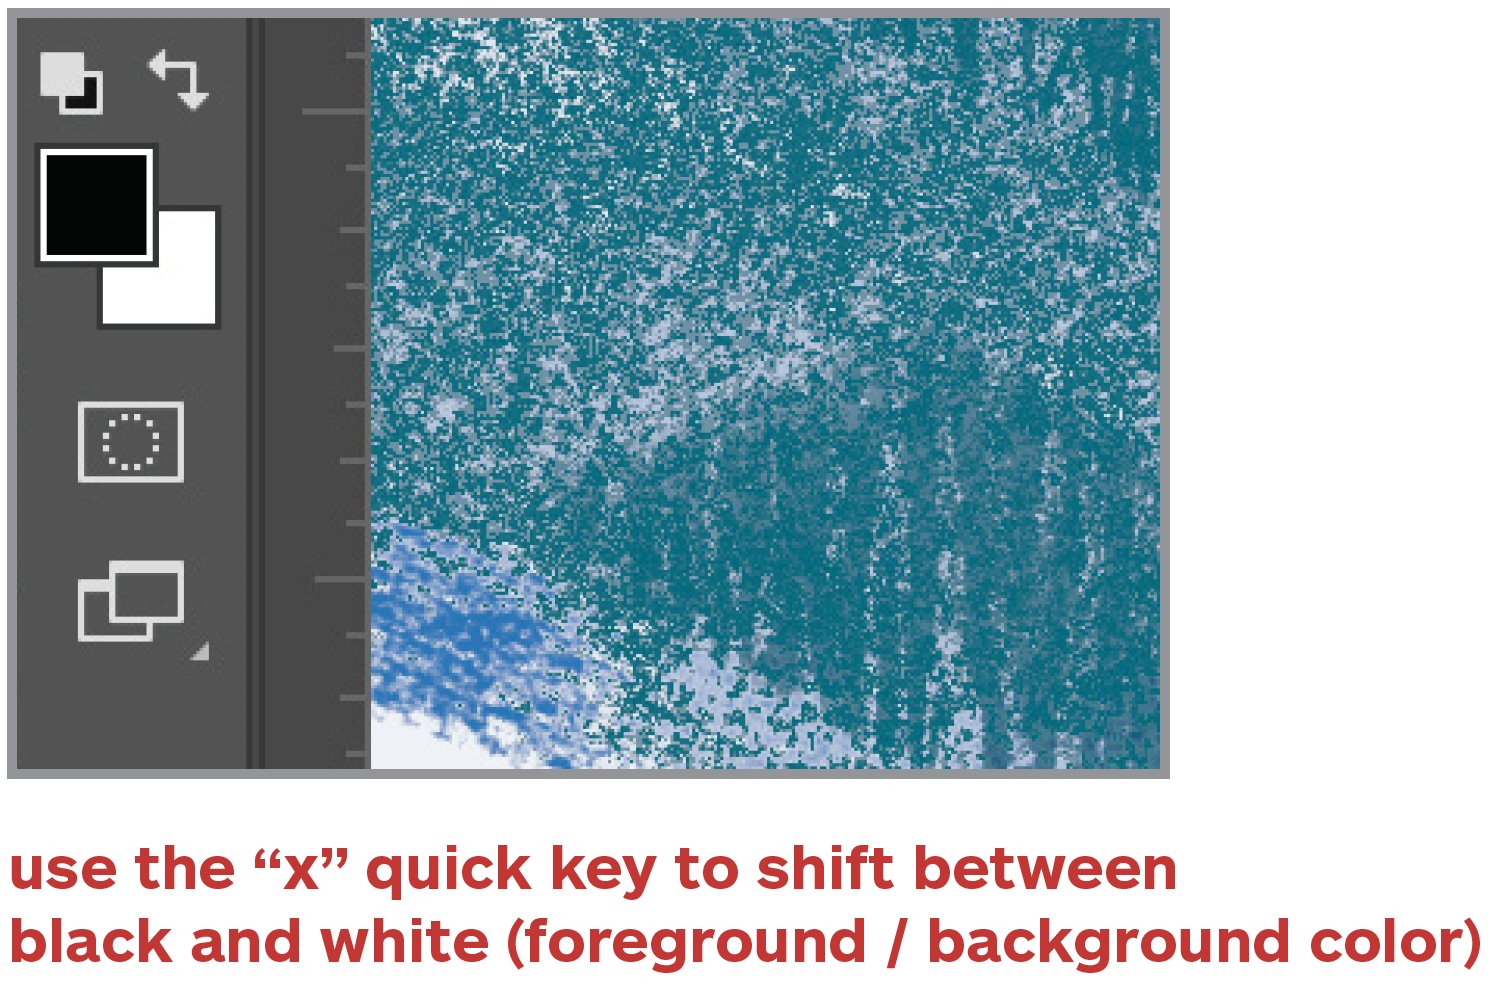
Set your foreground color as black and background color as white.
Use the brush tool to paint in or remove color.
Black adds color and white erases. Grey can be used to paint in a lower opacity.
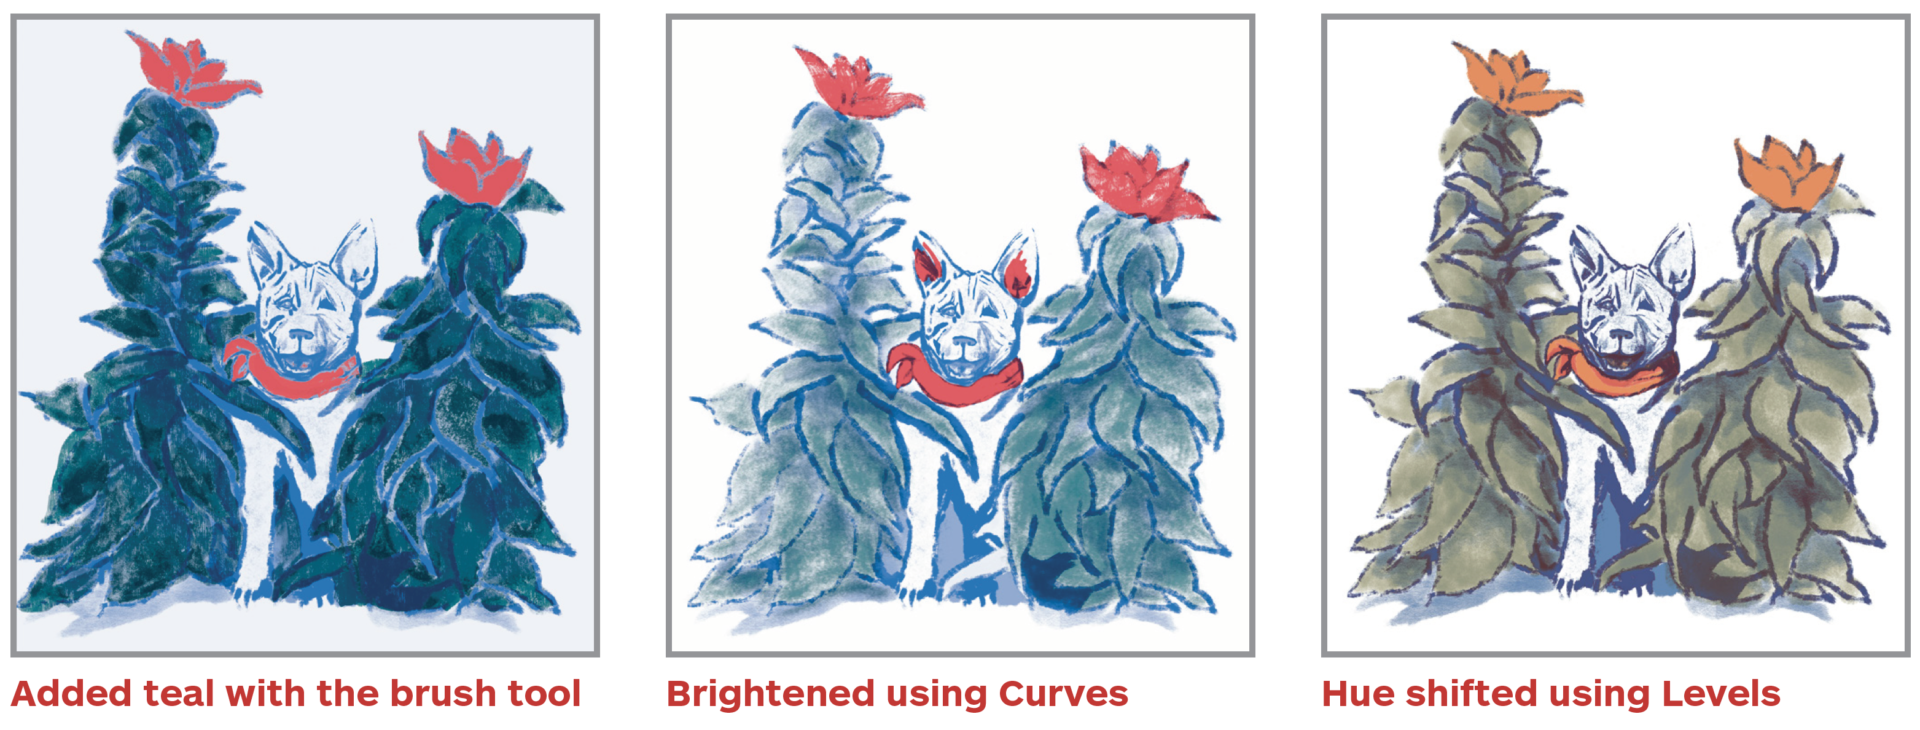
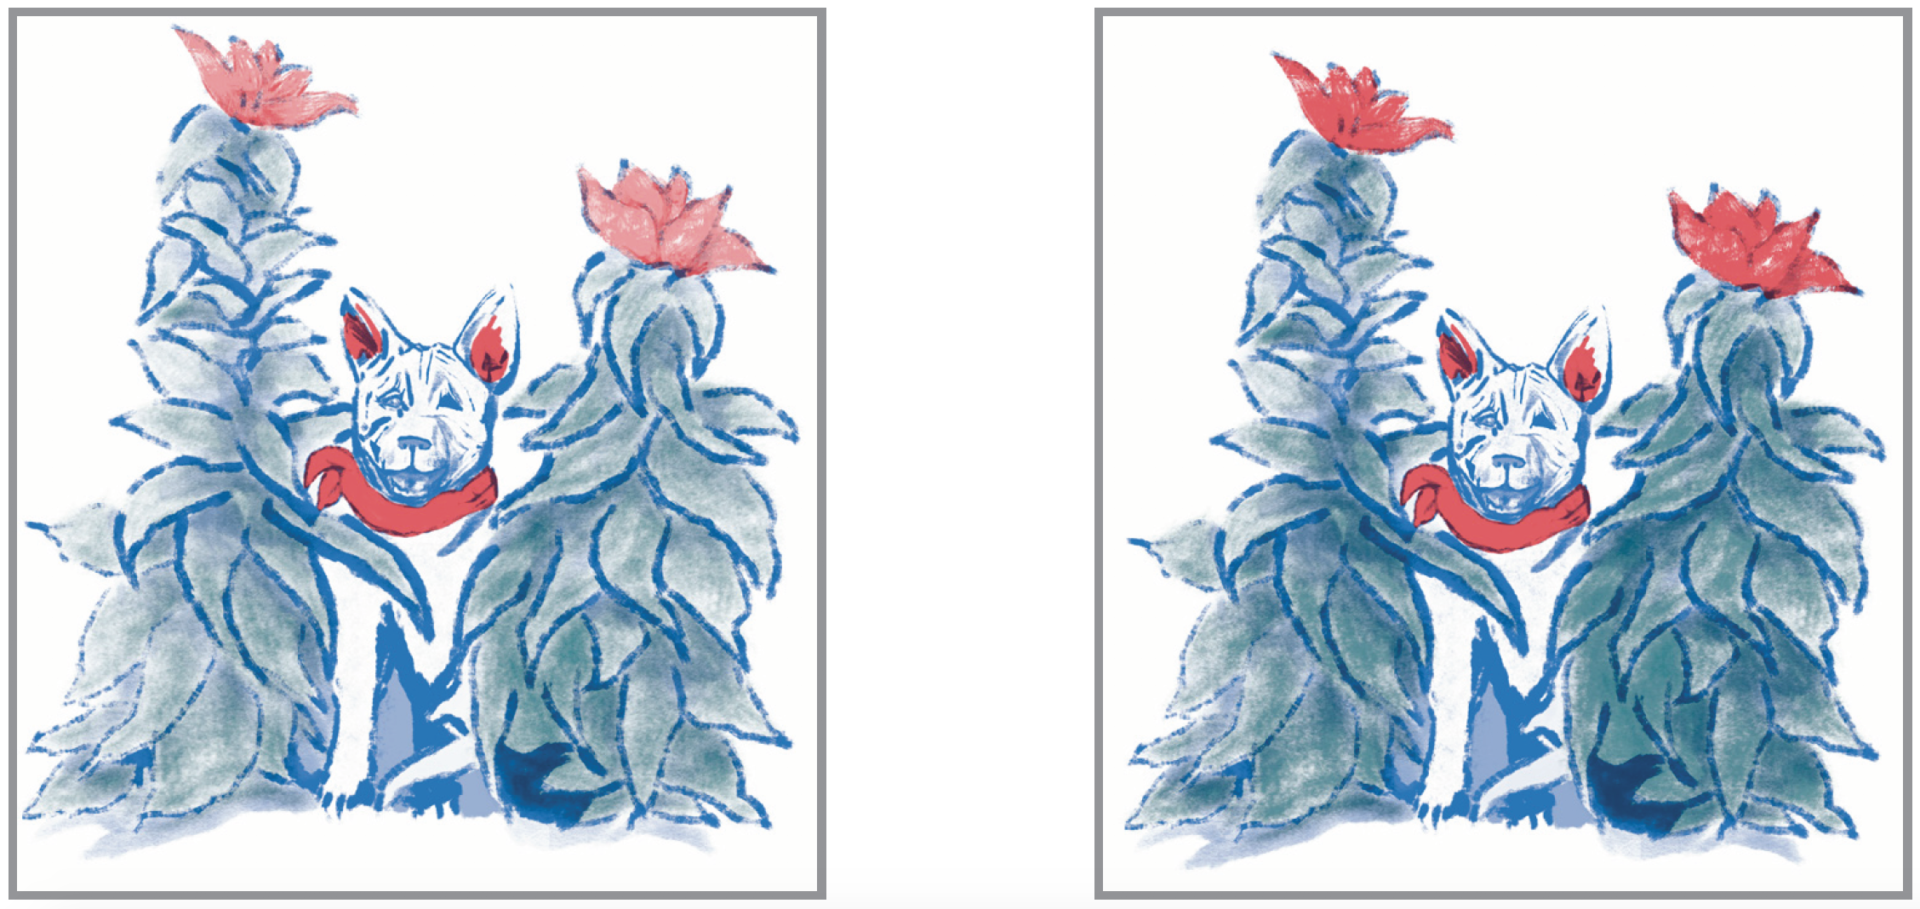
Example: we added teal with the brush tool
If you are happy with your conversion, skip to Split Channels!
Change the Value Using Curves
Select all your channels and open up the Curves Adjustment. Sometimes the grayscale image is too light. This allows you to control the luminosity of each color.
Menu Bar > Image > Adjustments > Curves…
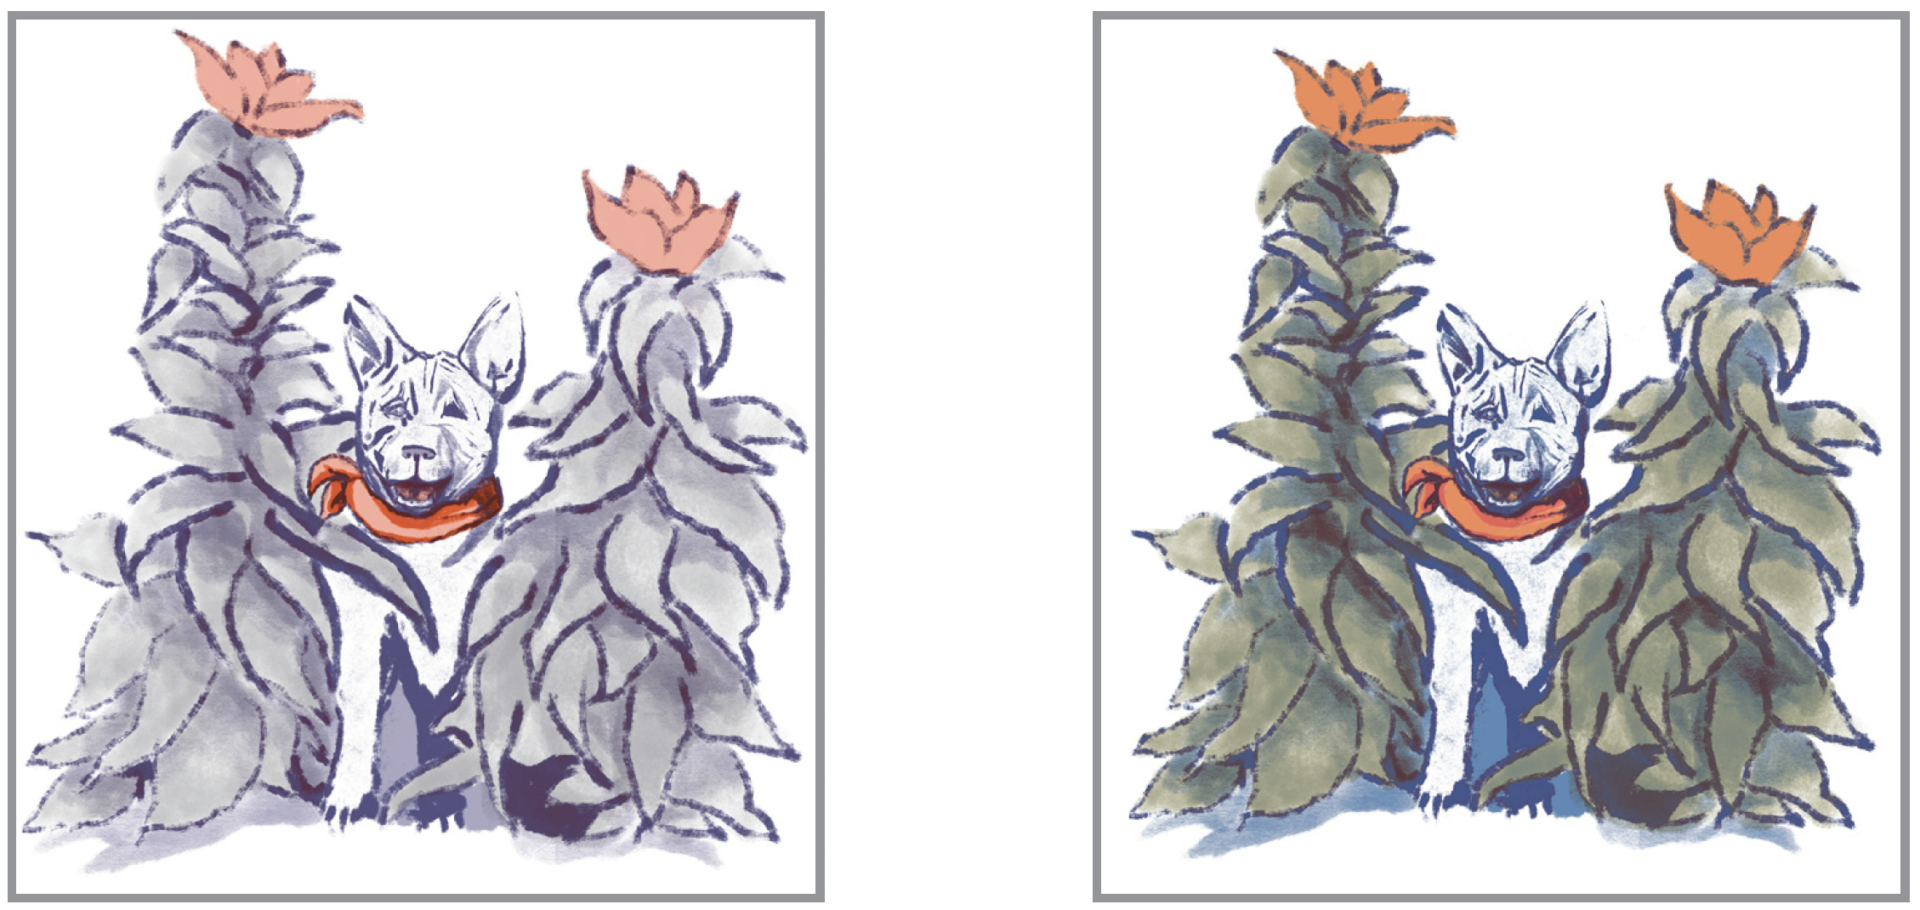
Example: we brightened our image by adjusting the curves
If you are happy with your conversion, skip to Split Channels!
Change Hues Using Levels
Select all your channels and open up the Levels Adjustment. This allows you to control the intensity of each color. You can adjust your hue by adjusting the levels. The color usually needs to be adjusted when converted from CMY to BRY:
Menu Bar > Image > Adjustments > Levels…
Example: we shifted the hue of this image by adjusting the levels
If you are happy with your conversion, skip to Split Channels!
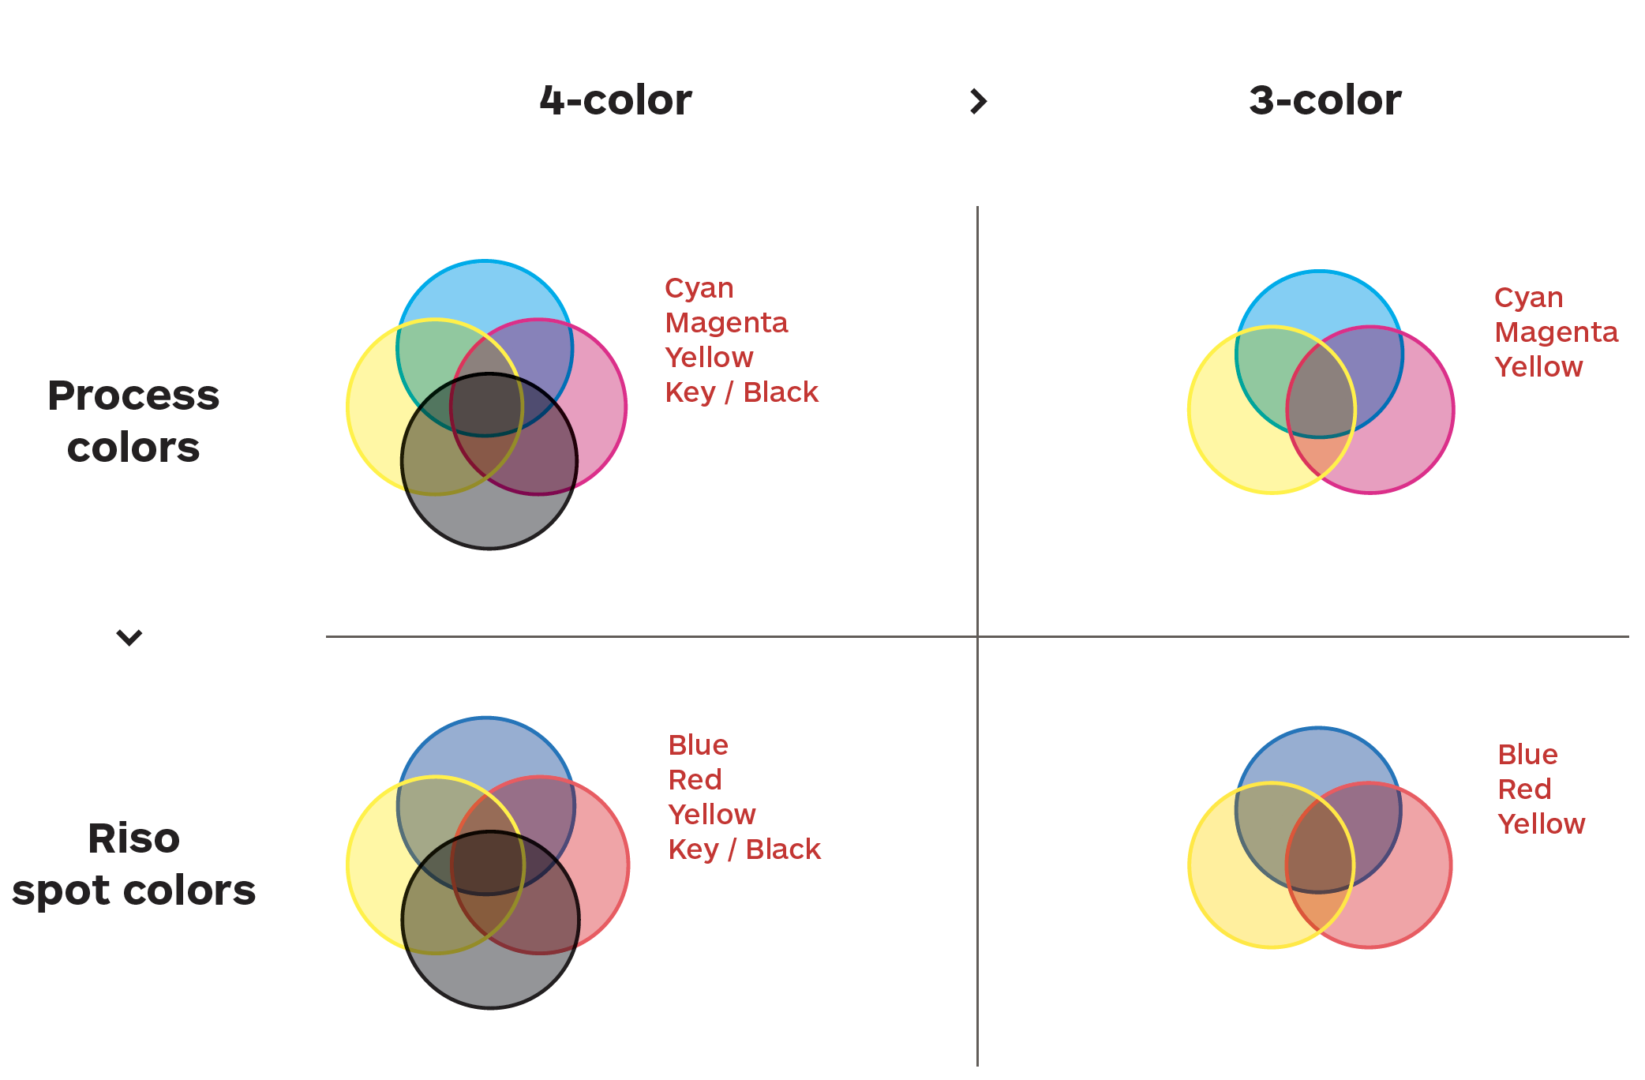
This version involves working with color systems. Rather than print every single color in your image, most printers use process colors, such as CMYK.
Set your color space to Working CMYK
Menu Bar > Edit > Convert to Profile… >
Destination Space: Working CMYK – U.S. Web coated (SWAP) v.2
You can print with CMYK channels by using Blue, Red, Yellow, and Black (BRYK). However, we recommend eliminating the Black channel through the following method. This will leave you with a three-color CMY (or BRY) print.
CMY / BRY printing
CMYK process printing creates roughly half of its blacks using the color black, and the other half using a combination of the other three colors. We can use the CMY channels to cover part of the shadows and black portions of the print.
Using the Channel Mixer, you can increase the amount of black information covered by each of the three channels.
Channel Mixing
Select all your channels. While keeping all channels selected, turn off the visibility for the black channel. Notice the value difference when you turn it off the black channel. You will try and simulate this value level using the other three channels.
Open the Channel Mixer Menu Bar > Image > Adjustments > Channel Mixer… >
Output Channels Switch between the different Output Channels (Cyan, Magenta, Yellow) to see how the Source Channels change with each color.
You can see that the sliders are all set to 0% for all colors except their own. For example, on the Cyan Output Channel, the sliders are set as follows: Cyan 100%, Magenta 0%, Yellow 0%, Black 0%)
Adding Black information to your CMY colors
Starting with Cyan, move the black source channel slider up. (e.g. Move the Black slider from 0% to 50%. This will increase the black content printed on the Cyan channel. You will see the color mix into your piece in the background.
Repeat this step with Magenta and Yellow.
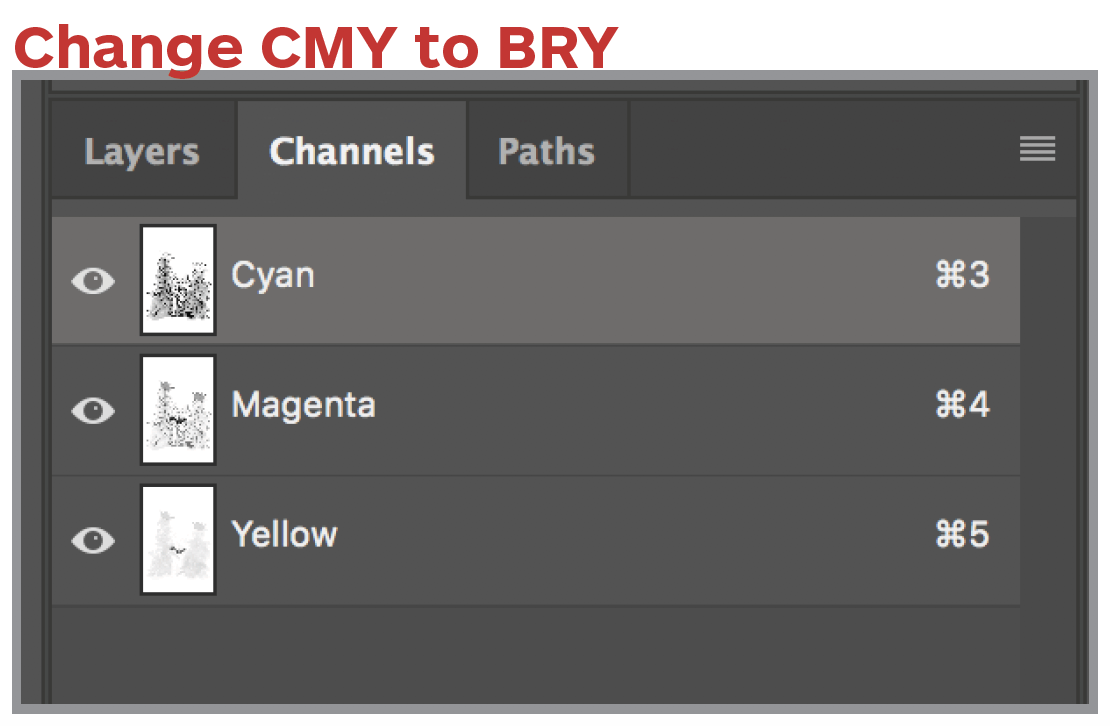
Convert CMYK channels to BRY Spot Colors
Change your mode to Multichannel
Menu Bar > Image > Mode > Multichannel
Delete the black channel from the Channels panel.
Convert CMY channels to Riso BRY spot colors
Double-click on a channel, and use the eye dropped to select the corresponding Riso color.
Cyan > RISO BLUE/3005 U | Magenta > RISO RED/185 U | Yellow > RISO YELLOW/Yellow U
If you are happy with your conversion, skip to Split Channels
This method changes your piece to grayscale. You will manually add the colors back in by painting on Spot Channels. This can be time-consuming if you have a detailed color image.
Change your mode to Grayscale
Menu Bar > Image > Mode > Grayscale
Click OK through the “Discard other channels?” warning. This process will also flatten your layers.
Your piece will be in black and white without any color information. You should only have one Gray channel.
Change your mode to Multi-channel
Menu Bar > Image > Mode > Multichannel
Click OK through the “Flatten layers?” warning. (This process will flatten your layers.)
Your single Gray channel should change to Black.
Change your Black Channel (your first color) to a Riso spot color
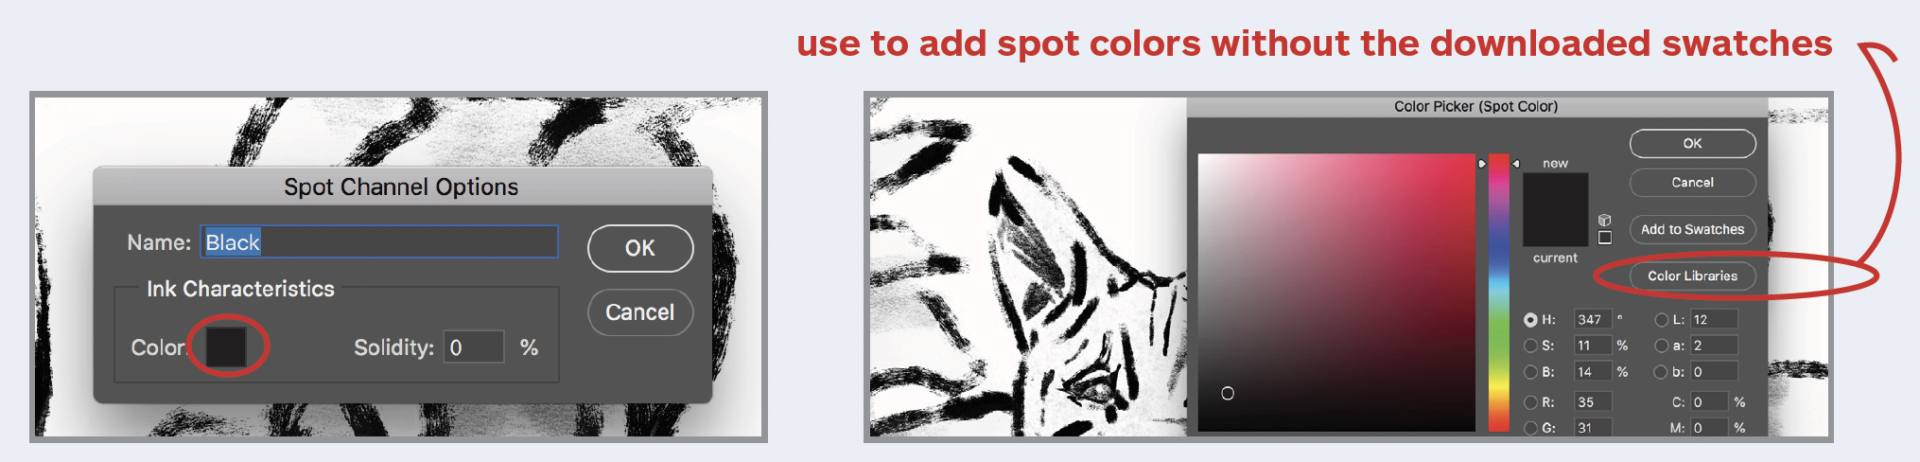
Double-click on your black channel.
Use the eyedropper to select your desired spot color from the Riso swatches panel.
If you did not download the swatches file, you can find and add the Pantone equivalent color.
Click on the black swatch to pull up the Color Picker box.
Click on Color Libraries and type in your desired Pantone color using the Riso color guide.
Because you only have one channel, the content in your piece will appear in grayscale. Click OK.
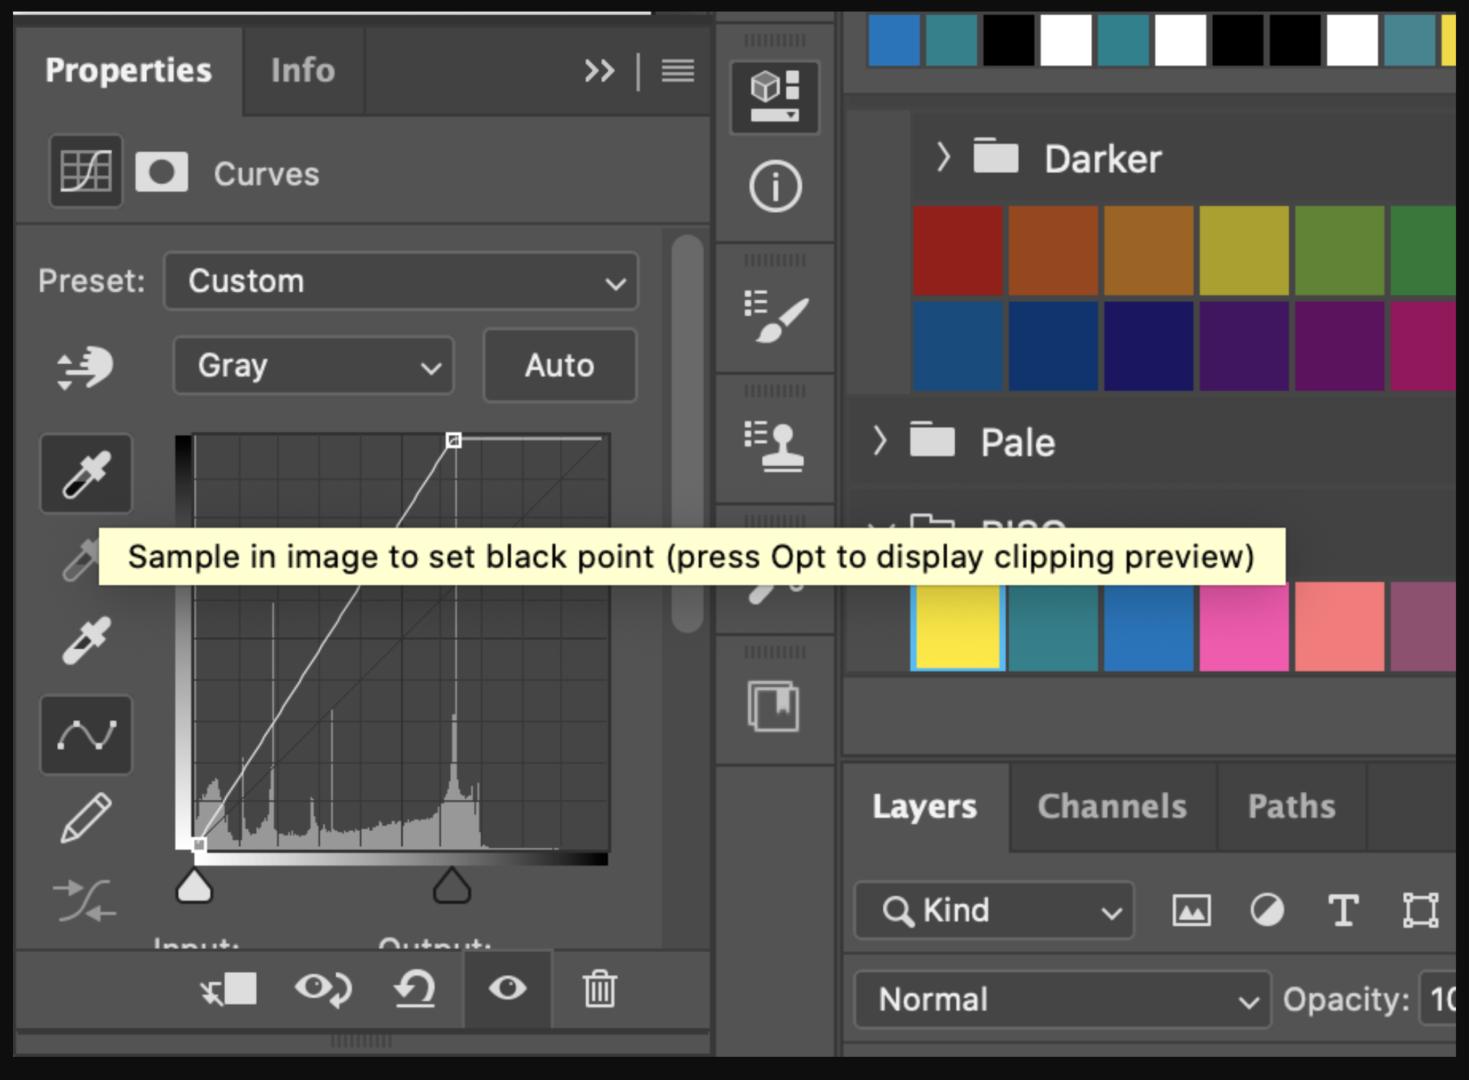
If your image appears washed out, feel free to change the values using Curves, Levels, or your own favorite method of adjusting Luminosity. I would suggest re-setting your black point using Curves:
Menu Bar > Imaging > Adjustments > Curves
Select the black point dropper and click on the darkest point in your image.
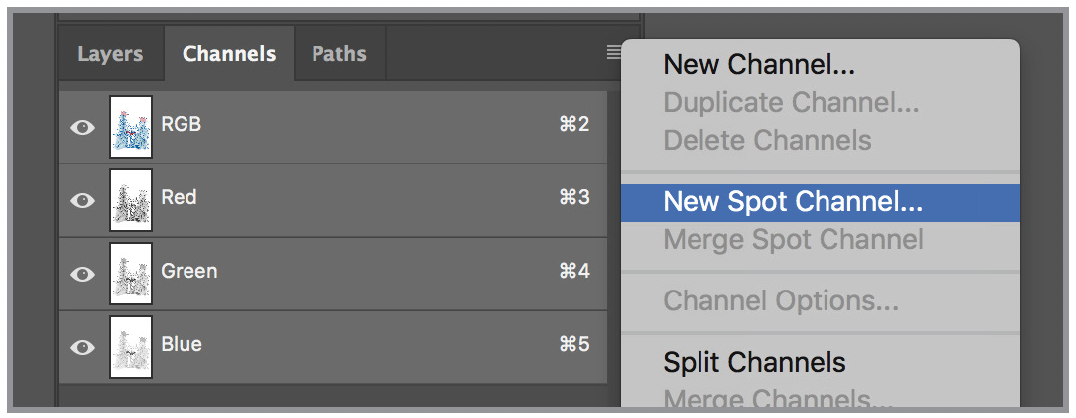
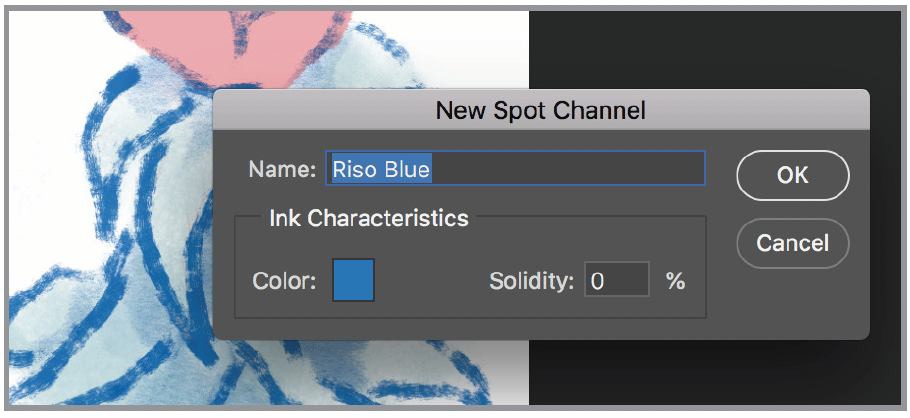
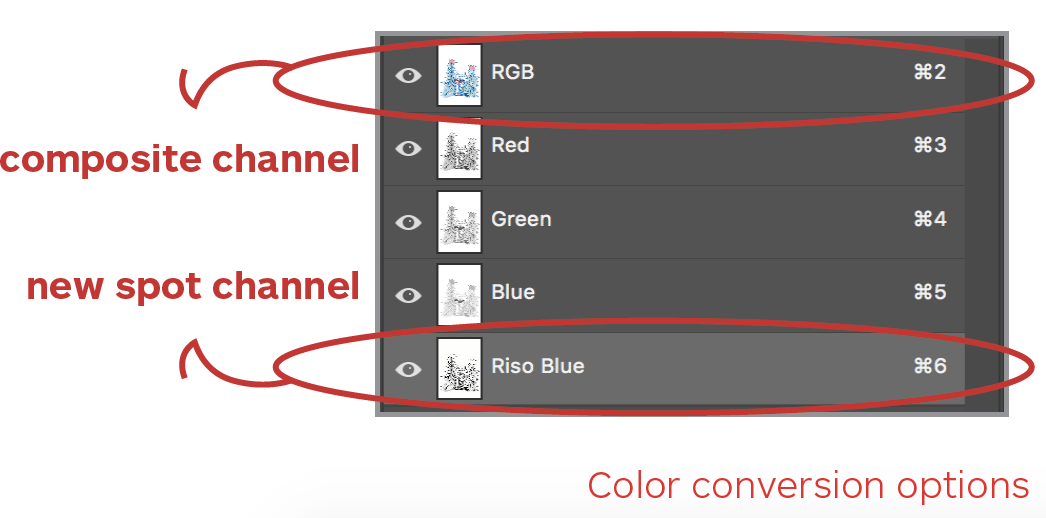
Add a second (or third or fourth) spot color as desired for your piece:
Go to the Channels menu panel.
Select “New Spot Channel…” from the drop-down menu.
Use the eyedropper to select your desired spot color from the Riso swatches panel. (Your first channel will now show up in color)
Click OK
With your new channel selected, use the paintbrush tool to add in your new spot color. (Use a black swatch.)
Add a channel for each color you want to print.
If Option 2 color conversion works for you, skip ahead to Additional Optional Adjustments.