Illustrator Overview

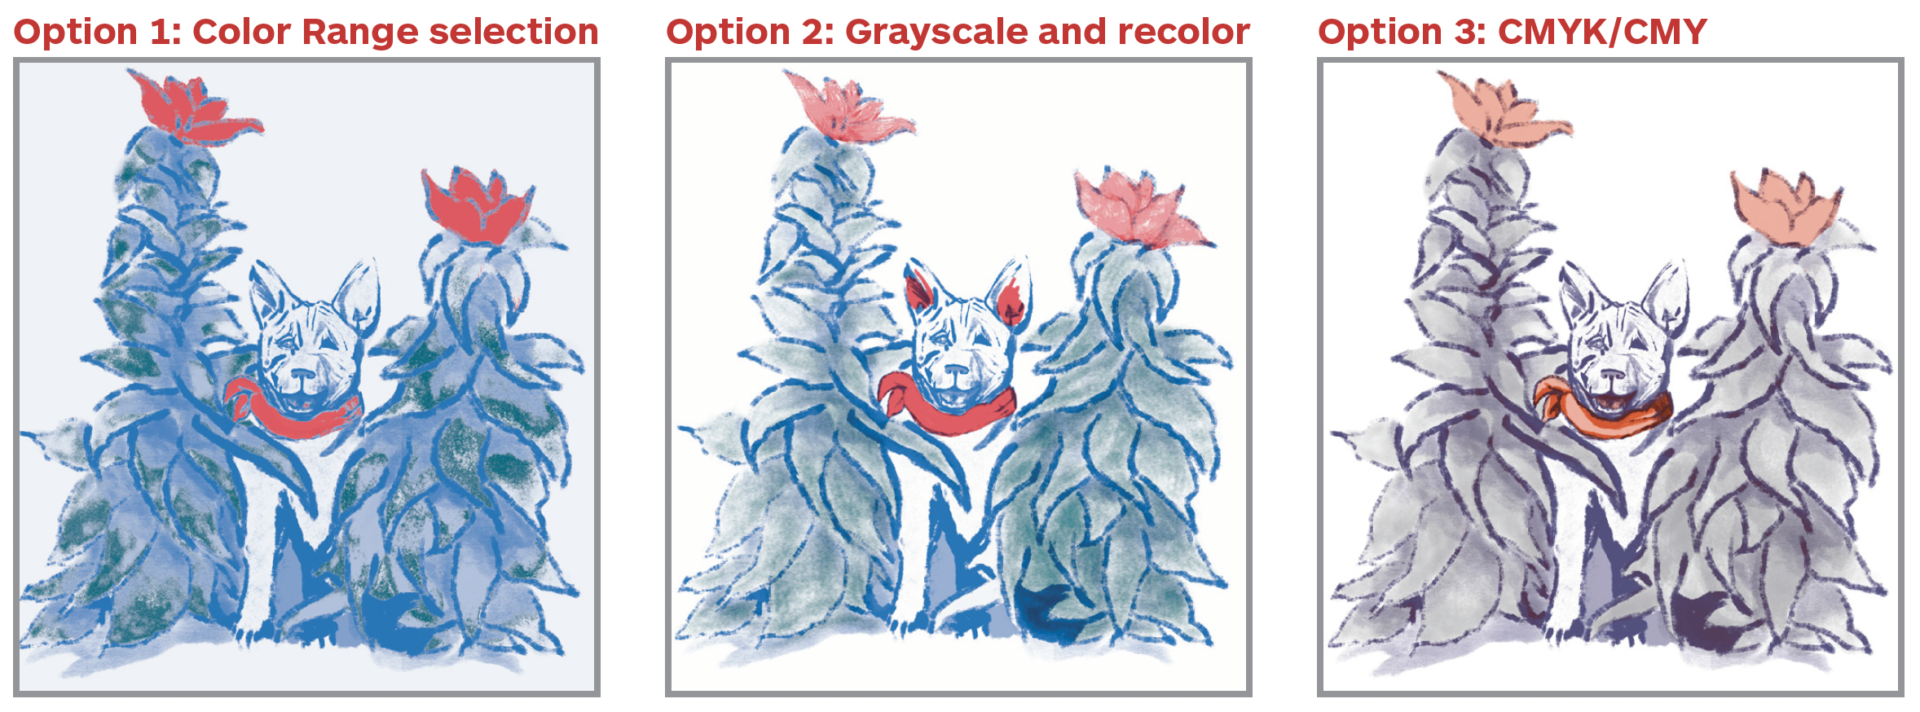
When designing artwork in Adobe Illustrator, make sure you are only using the Pantone spot color swatches. Do not try to create your own spot colors. The automated color separations consistently recognize Pantone spot colors. The swatches that we have available also are clearly labeled so you’ll always know what colors you are using.

Pull up the print menu in Illustrator:  File > Print or ⌘P

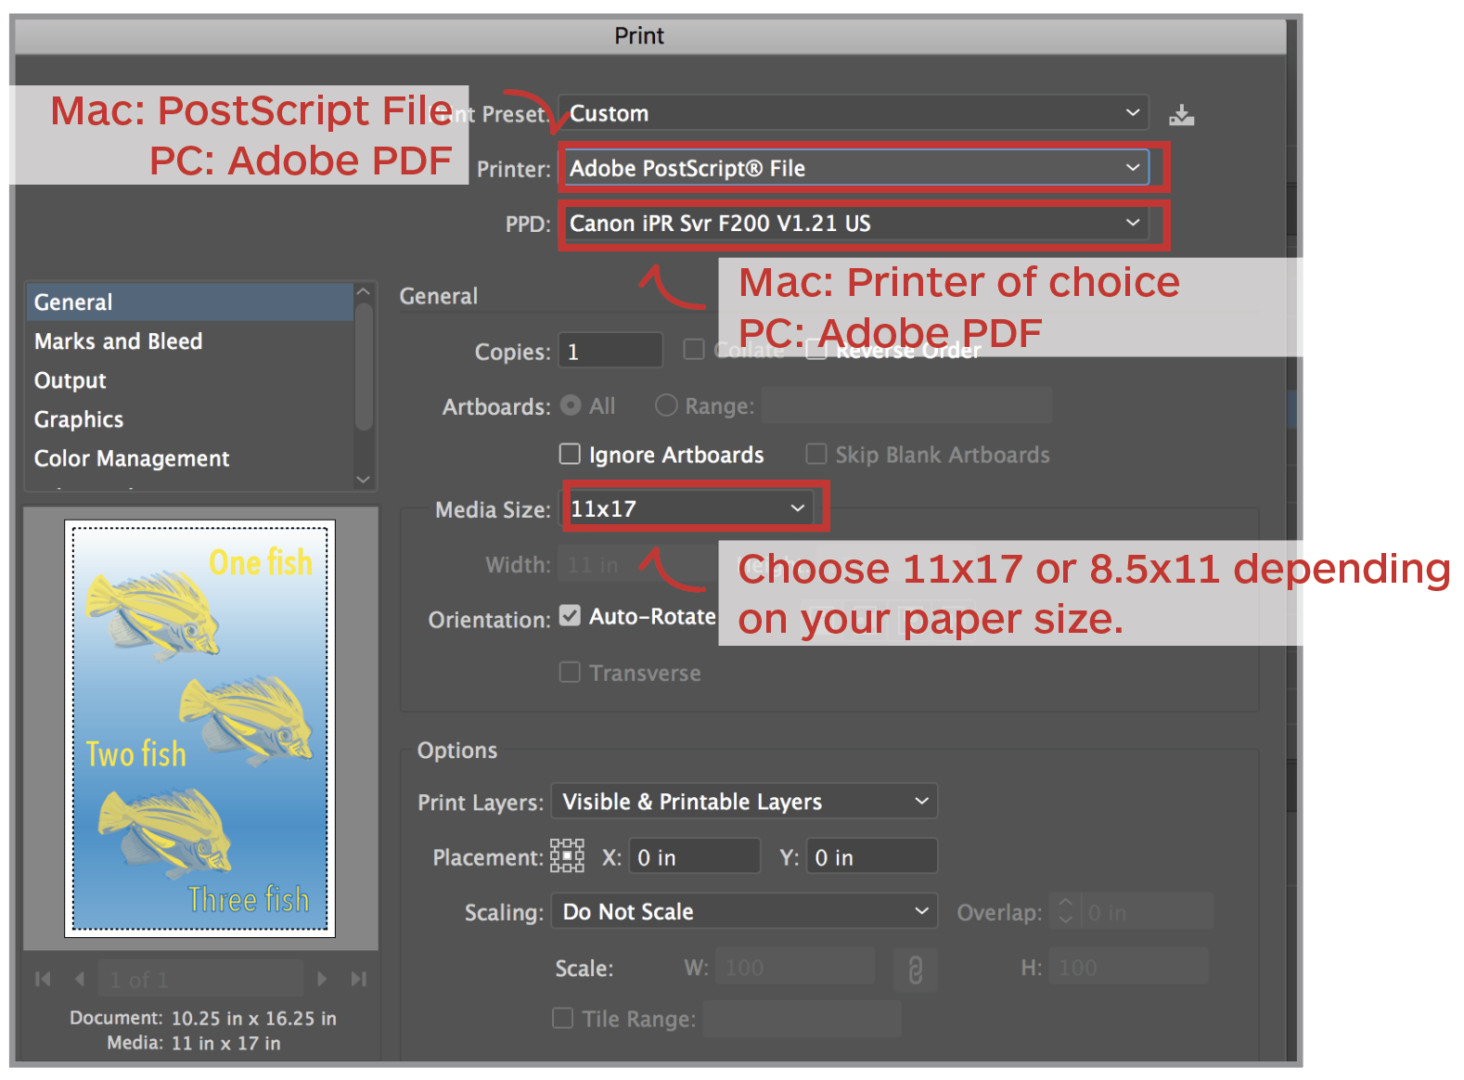
Mac Users: For the Printer, select Adobe PostScript File. This will allow you to “print” to a pdf.

Set Media Size to 11″ x 17″ or 8.5″ x 11″, depending on the size of your document.

For the PPD, select any printer that you have installed on your computer. If you don’t have any printers on your laptop, (or you don’t have an 11×17 printer installed on your laptop) install the Xerox Print Driver found on our Drives & Downloads page

PC users: For the Printer, select Adobe PDF. This will allow you to print to a pdf.

Set Media Size to 11″ x 17″ or 8.5″ x 11″, depending on the size of your document.

Marks & Bleeds Menu

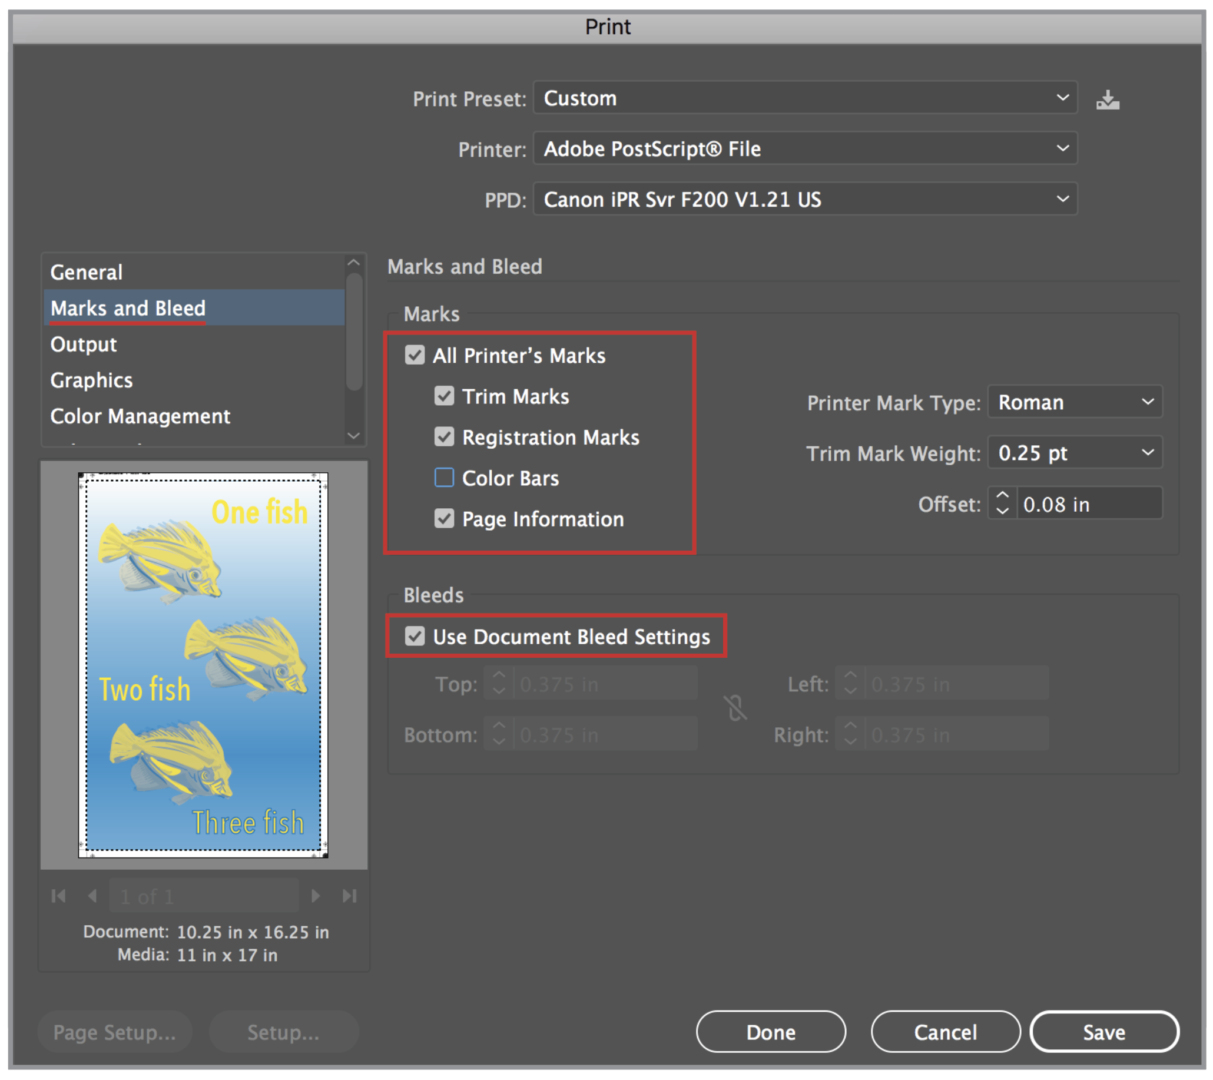
Check “All Printer’s Marks”

Select “Use Document Bleed Settings.”

If you use the Illustrator template, your document should be exactly 11”x 17” or 8.5” x 11” with bleed. This depends on the template size you chose to make your work. Template files have a 1/2” bleed on all sides.

Output Menu

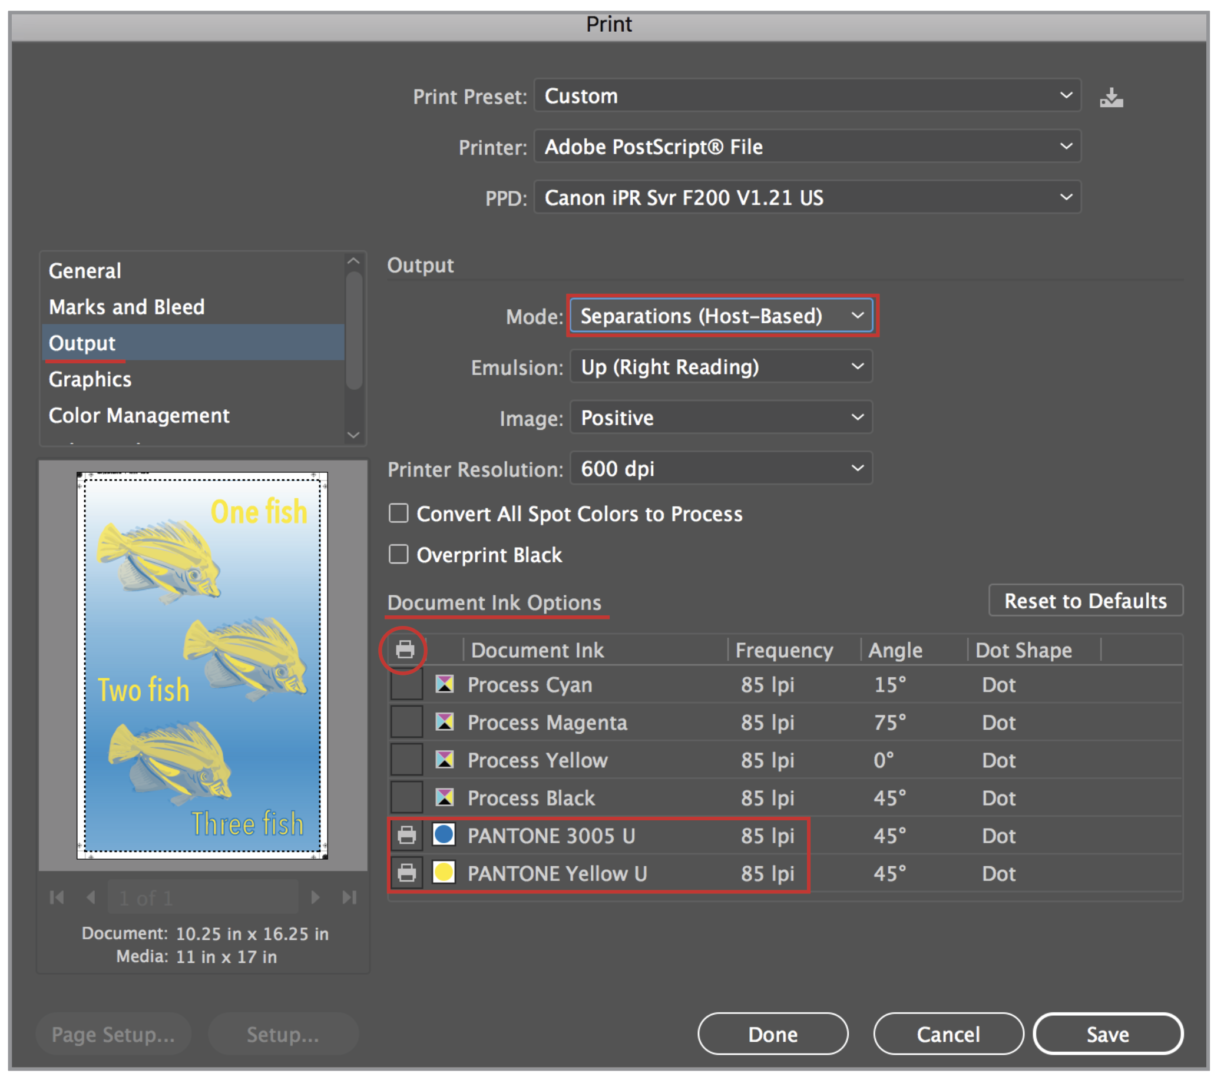
Change the Mode from Composite to Separations (Host-Based).

In the Document Ink Options, make sure that the print icon is on for the Pantone spot colors you are using and off for all of the Process/CMYK colors. 

If the process colors are checked on, this means you have something in your file that is set up for CMYK. This is not a viable printing option for the Risograph. 

Advanced Menu

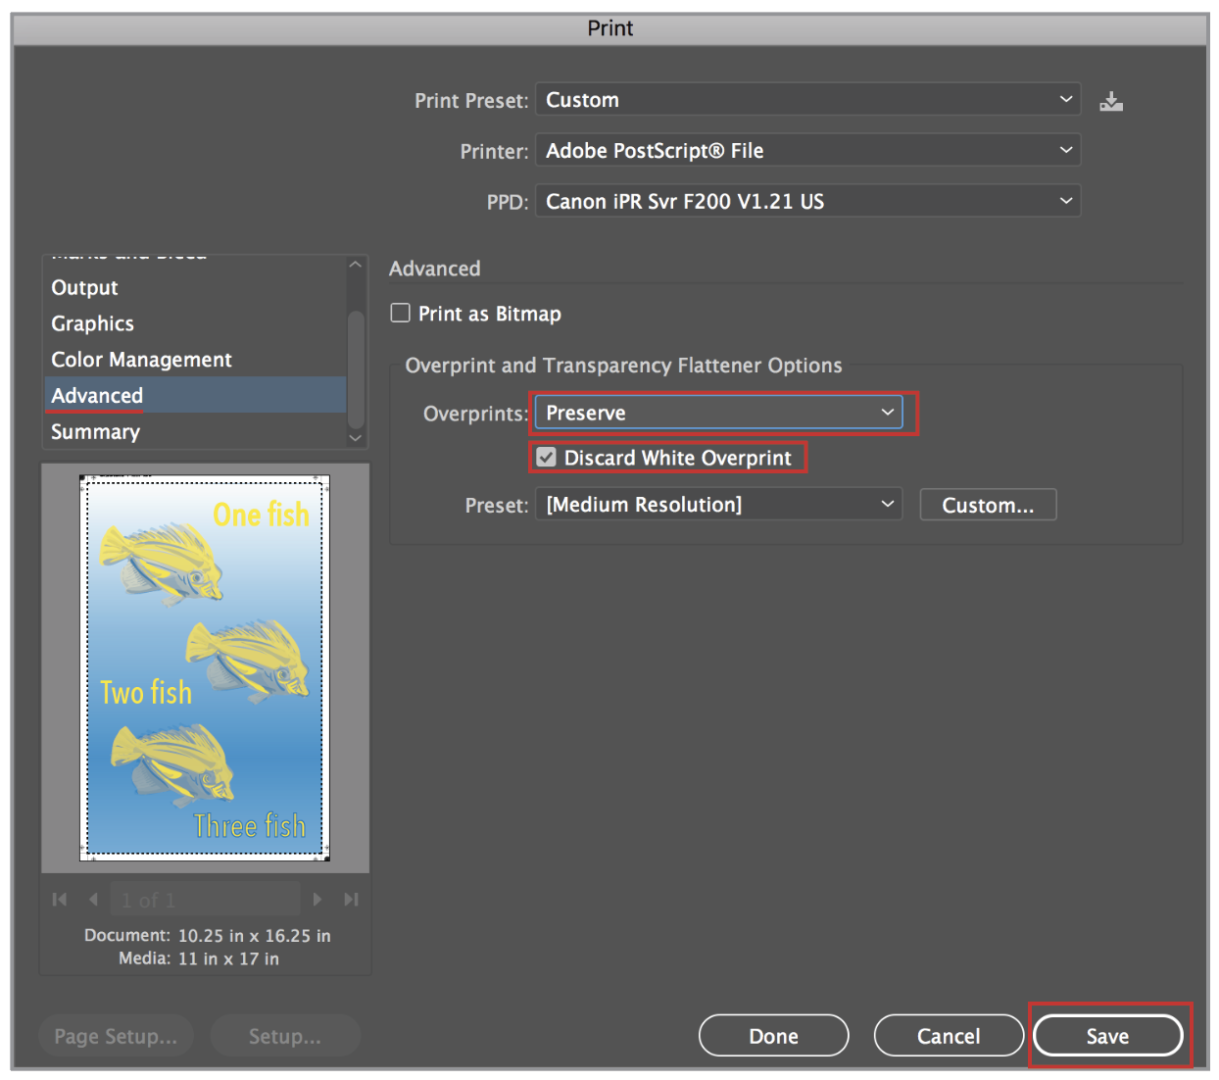
Change the Overprints option to Preserve. 

Check on “Discard White Overprint.”. Click Save

This will create a postscript or .ps file. Open in Acrobat Distiller or Preview to convert the file to a pdf.

Save the file as a pdf. Your colors should be separated into black and white pages with the Pantone number listed at the top of each page. 

For More Information

Photoshop Overview

Introduction: Before you Begin

If you didn’t separate your colors into layers while you made the piece, you have a few options:

  • Option 1: Separate out the colors using the Menu > Select > Color Range (try a few different tolerances) and make spot channels with that.
  • Option 2: Convert the whole image to Grayscale, and re-color the whole image using the multi-channel color space.
  • Option 3: Simulate a four-color process print (CMYK) by using the channels as they are.

Adjust your document setup by checking the following:

  • Check your image size
    • The maximum printable area is 10” x 16″.
    • This allows room for crop and registration marks.
  • Set your resolution to 600 dpi
    • Menu Bar > Image > Image Size > Resolution: 600
  • Set your color space to Adobe RGB (1998)
    • Menu Bar > Edit > Convert to Profile > Destination Space: Adobe RGB (1998)
  • Download the IC Riso swatches HERE
    • If you prefer to add the Riso colors manually, be sure to add them as SPOT PANTONE colors
    • Save your document as a new file.
      • Note: these methods all require switching your color mode and deleting channels, which can be a destructive workflow (e.g., layers get flattened or color information is discarded). When working with channels, it is difficult to revert back to the previous look. It is best to keep your final piece, with all its layers and edits, as a separate file.
Examples of different conversion options

All Information Can be Found Here

Color Systems & Color Spaces

Understanding RGB vs. CMYK vs. CMY The primary colors of light RGB (Red, Green, and Blue), represent a visual range that, in
Read More

Additional Image Adjustments

At this point (one way or another) all your colors should be divided into channels: None of these is a perfect conversion, so
Read More

Photoshop Overview

Introduction: Before you Begin If you didn’t separate your colors into layers while you made the piece, you have a few option
Read More

Troubleshooting

Common Questions If I want to switch out the color of a plate (print on a blue plate using the teal drum), do I need to alter
Read More