Risograph Studio

Location & Hours of Operation

Located in the CCS Imaging Center
6th floor, Taubman Building
313-664-1507
ic@collegeforcreativestudies.edu

Riso Studio Hours
Monday – Thursday // 8:30am – 6:30pm
Friday // 8:30am – 3:00pm
Saturday – Sunday // Closed
The Riso Studio is also closed during finals & school breaks

Busy periods are October (before the Detroit Art Book Fair and the Ann Arbor Wayzgoose), after Thanksgiving, before Noel Night, the last month of any semester, and Fridays.

Reservations can be made HERE
Contact us with questions HERE

Risograph Training

Introduction Training

  • Students must complete training in order to reserve the room. This consists of a three-week training workshop (6 hours in total). Students learn how to care for the machine, change the drums, print “off-the-glass” and prepare a digital file. Students are required to attend all three sessions.
  • Make-up session requests will be accepted on a case-by-case basis.
  • This semester, workshops are taking place from September 20 – October 8, 2021!

All mandatory training sessions must be completed by October 15.

  • This includes make-up sessions.
  • All refresher and intro training sessions are free of charge.

Returnee Training (optional)

  • Trained returnees can sign up for a 1-hour refresher session at the beginning of the school year or at any point during the semester with a Riso tutor or IC staff.

Independent Printing Sessions

Reserving the Riso Studio

  • All reservations must be made via the Imaging Center Calendly.
  • Reservations can only be made by students who have completed their Risograph training.
  • There will be an opportunity for you to purchase French paper at a discounted rate when you make your reservation.
  • For big runs, we encourage students to purchase their own paper. French is a great resource but often regular construction paper purchased from Staples or Amazon is a great alternative.

At the Beginning of your Riso Session

  • Check-in at the front of the Imaging Center.
  • If you requested French paper when making your reservation, it will be prepared and waiting for you in the Riso Studio.
  • If you ask for additional French paper in the middle of your session, we may or may not be able to accommodate, so try to predict how much you will need before you start.
  • A current list of our French papers can be found HERE.

During your Riso Session

  • Studio rental includes individual access to the studio, inks, and proofing paper.
  • If you listen to music, wear headphones.
  • If you need help loading the drums, changing ink, or emptying the master disposal box, please ask for help from a Riso tutor or IC staff.
  • If you need a new master roll installed, ask Rachel, Michelle, or a Riso tutor (if available) for help.
  • For troubleshooting with the machine, please ask Rachel, Michelle, or a Riso tutor (if available) for help. Let us know when you first start having issues.
  • For file prep issues, please ask the Riso tutor or IC staff. You can make an appointment with a Riso tutor or Riso consultation on Calendly.
  • Leave prints on the drying rack with the corners tucked in. If you are planning on running another color at a later date, please clip a note to the drying rack using a pink form.
  • Prints on the drying rack may be left for up to a week. If someone else needs the space, or it has been more than a week, we may move your prints to the Imaging Center.
  • If you are missing prints off of the drying racks, check at the pick-up counter in the IC.

At the End of your Riso Session

  • Turn off the printer. If the printer is asleep, wake it up before you turn the machine off.
  • You can leave your prints to dry on the drying racks. (Corners tucked underneath the bar, to keep them from falling off.)
  • Take any instruction handouts with you that you would like, or put them back in the rack.
  • Please leave the Riso books on their magazine rack.
  • We cannot store paper, backpacks, boxes, or any other items in the Riso room, so please take them with you.
  • Pay for your session or any French paper at the cash register. The IC accepts cash, credit card, or CCS Flex.
  • Clean up any excess paper or collage clippings around the Riso room.

Renting the Riso Studio

Rental Fees

  • Students are charged for time in the Riso room, rounded to the nearest quarter-hour.
  • If you are working with a Riso tutor in a planning capacity, rather than printing, you will not be charged.
  • Student rental is $10/hour up to $200 per semester. Once you have paid for 20 hours, you will not be charged for the remainder of the semester.
  • If you are working with another Riso member in the room, you will not be “double-charged”. Either member may pay for the room, or you can split the cost between you at the register. If no payment is made, the person who makes the reservation is responsible for payment.
  • IC Management will keep a running tally of hours spent in the Riso Studio.

Late / No Show Policy

  • Your reservation will be held for 20 minutes, after which the Riso room will be made available for other students.
  • Please call the Imaging Center if you are running late or if you need to cancel at 313-664-1507.
  • Three “no shows” will result in a suspension of Riso room privileges

Riso Tutors

Booking time with the Riso Tutors

  • The IC Riso Tutor oversees students making work on the Risograph in the Riso Studio. The tutor will guide students through project management, file preparation, and the operation of the machine. The Riso Tutor will not print your project for you.
  • Students can book an appointment with a Riso Tutor on Calendly.
  • Booking with a Riso Tutor automatically books the room for that time.
  • Riso Tutors are a free service unless you use the machine, in which case you will be charged the normal hours rate ($10/hour) for use of the Riso printer.

F. A. Q.

Can a non-trained friend be in the Riso Studio?
Yes, but you need to let us know at check-in. Please include their names on your Calendly form. A non-trained friend cannot touch the machine – this includes changing the drums!

If two Riso-trained people schedule time & print together, will they be “double charged”?
No, you are paying for use of one machine and one room. The rate remains the same whether or not you are printing as an individual, or as a pair, or as a group.

The time spent also will be split on the 20-hour benchmark as well. For example, each trained person would receive one half-hour towards their completed 20 hours.

Online Resources

Stencil wiki | stencil.wiki/

Run by Issue Press, this site has lots of tutorials and an interactive map locating Risograph studios across the globe.

YouTube channel | Oliva and Pindot

Pindot press makes helpful videos that cover file setup and how a Riso differs from other printers and the general use of the machine.

YouTube channel | Risolve Studio

Risolve Studio makes helpful tutorials that cover file setup, particularly in Photoshop.

Risograph Printer Outline: Rachel DeBoard // Risograph Doodles: Lilia Neill

Risograph Workshops

Riso Training in Fall 2022
Want to learn more about Riso printing?
Apply for a 3-week Intro to Riso workshop series.

The Intro to Riso workshop series will run for 2 hours, once a week, for 3 weeks beginning in September 2022. Learn to print off-the-glass, the basics of color separations, and Riso file prep.

Upon completion of the course, you will be able to rent time on the Riso for $10/hour up to $200/semester. Once you have paid for 20 hours, you will not be charged for the remainder of the semester. Studio rental includes individual access to the studio, inks, and proofing paper. As a Riso Room member, you will have access for the full school year.

Availability is limited! We try to accommodate as many students as possible. Selection is based on graduation year, scheduling, and first come, first serve.

Open House Events
Tuesday, 9/13 & Wednesday, 9/14
11:30am – 12:30pm in the IC Riso Room!

Please note:
If you are not able to go through training this year, you are still welcome to attend pop-up Riso events, Riso-related club events, one-day mini-workshops, and submit Riso jobs to the IC online, with or without Riso basic training. We also do zoom consultation if you would like help setting up your file for service printing.

Basic Training Overview

Week 1 | September 19 – 23
Printing “off-the-glass” | Riso Room overview | 2 hours

Week 2 | September 26 – 30
Digital File Prep via Photoshop | 2 hours

Week 3 | October 3 – 7
Printing day with creative mini-workshop options | 2 hours

Risograph Printer Outline: Rachel DeBoard // Risograph Doodles: Lilia Neill

Designing for the Risograph & What to Expect When Submitting a Request

The more you use the Riso the easier it will become to design with Riso in mind. Here are some design tips to diminish Riso printing variations:

  • Lower ink opacities to <80%-95%.
  • Set overlapping colors and color blocks and background colors to <80% opacity.
  • Limit the number of colors you use. (Four colors at 100% = 400% saturation.)
  • Leave the top 2” of your image blank, or lightly inked. 
  • Use font size 6pt or higher.

Surplus Prints

You may have extra copies of some pages in your order. For Riso prints, the IC starts a print run with a 10-20% excess. This is because a certain number of prints jam, or misregister beyond a ¼”, and we throw these out. 

However, we will include any extra copies that go through undamaged. This is why you may have a different number of copies than you ordered. For example, if you order 10 copies of a 3-page book, you may have 12 copies of pages 1-2 and 10 copies of page 3. 

You will not always have extra prints, so make sure you order the correct amount without accounting for extra copies.

There is No “Perfect” in Riso

There are some common imperfections in a Risograph print. These imperfections are part of the Riso printing process

Registration Marks

You may see crosshair or crop marks in the four corners of your prints. The IC adds these to help the printer align the color separations in your print. If you have a “full bleed” print, there will probably not be registration marks. You can add in the notes to leave them out. However, the registration is more likely to be askew without them.

Ink smudges

Riso ink dries through absorption. Similar to a newspaper, Riso prints never fully cure. Rubbing the ink with your finger, even once” dry”, can result in smudging. Ink can also transfer from one sheet to the next during the printing process.

Roller Marks

Roller marks typically show up as a rhythmic line down the center of the paper towards the top. They are more common in 2nd, 3rd, and 4th color passes on the Riso, but they can happen on a 1st pass.

Misregistration

Each color is printed separately, so colors rarely match up perfectly. We aim to keep our registration within  3/16” between colors, and 1/4“ for double siding.

Cleaning up a Finished Print

Riso ink marks can sometimes be removed with light erasing. Prints that will be heavily handled (e.g. book covers, or flipbooks) can be sprayed with fixatives to help prevent smudging.

For more information on Riso printing, check out our complete Riso Guide.

Risograph & Imaging Center Technician: Teddy in Winter 2021

Troubleshooting

Common Questions

If I want to switch out the color of a plate (print on a blue plate using the teal drum), do I need to alter and re-save my file?

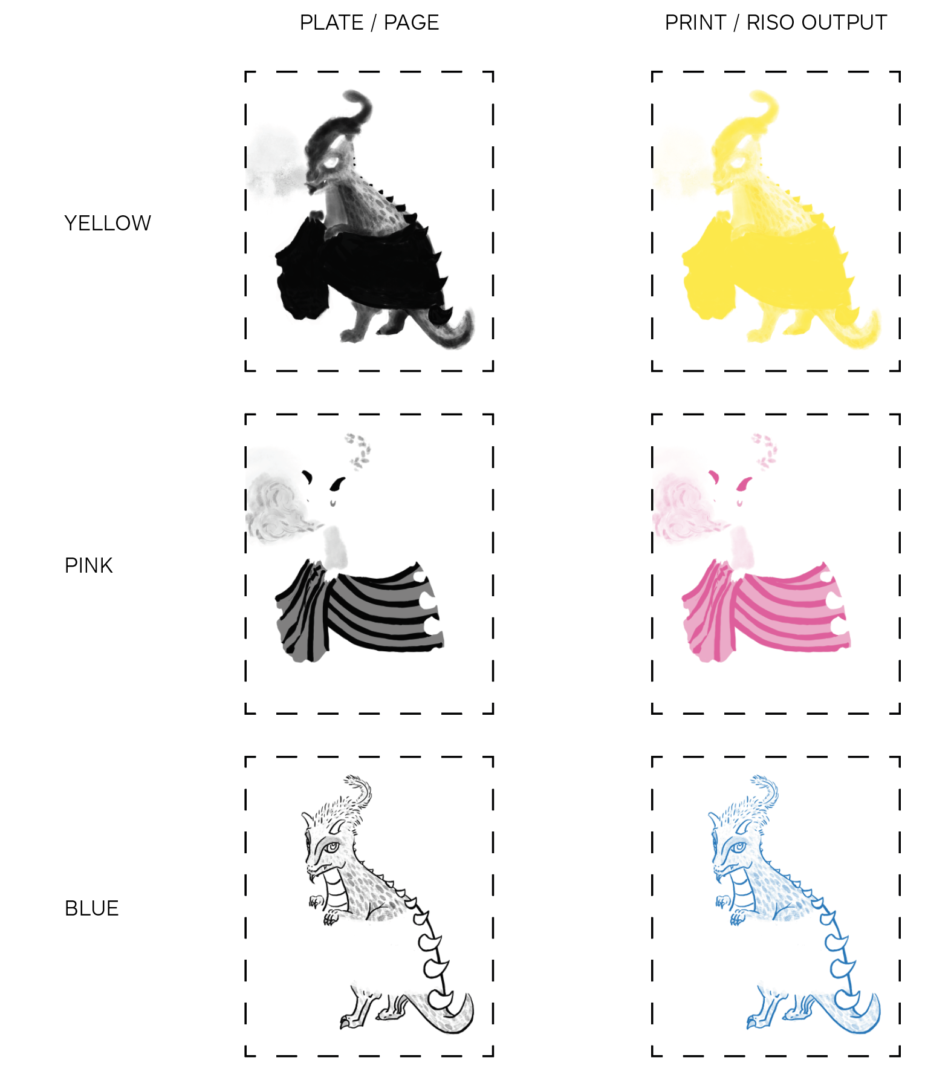
No. The printer reads your plate as a grayscale file and prints in whatever color is loaded into the machine.

Is this the only way to save a Photoshop file?

No. There are a lot of ways to prepare a Photoshop file. You are welcome to research and use other methods on your own.

Troubleshooting

I can’t add a new adjustment layer to my file

Once you add spot colors and/or switch to Multichannel mode, you cannot add any more adjustment layers. However, you can make channel adjustments using Image > Adjustments > Levels (or Curves).

If you want to make major adjustments to your file, go back to CMYK or RGB mode and make the adjustments. Note that this will delete the spot colors that you’ve already made. But if you are making drastic changes, it is better to do so in CMYK or RGB. After you’ve made your changes, repeat your preferred process of color separation.

The Multichannel or CMYK mode is grayed out

Some of the color modes won’t convert between each other. You may need to switch to grayscale first, and then switch to your chosen color mode. Grayscale will discard color information, so you will need to re-color if you use it as an in-between mode.

Tips

Double-sided printing tips

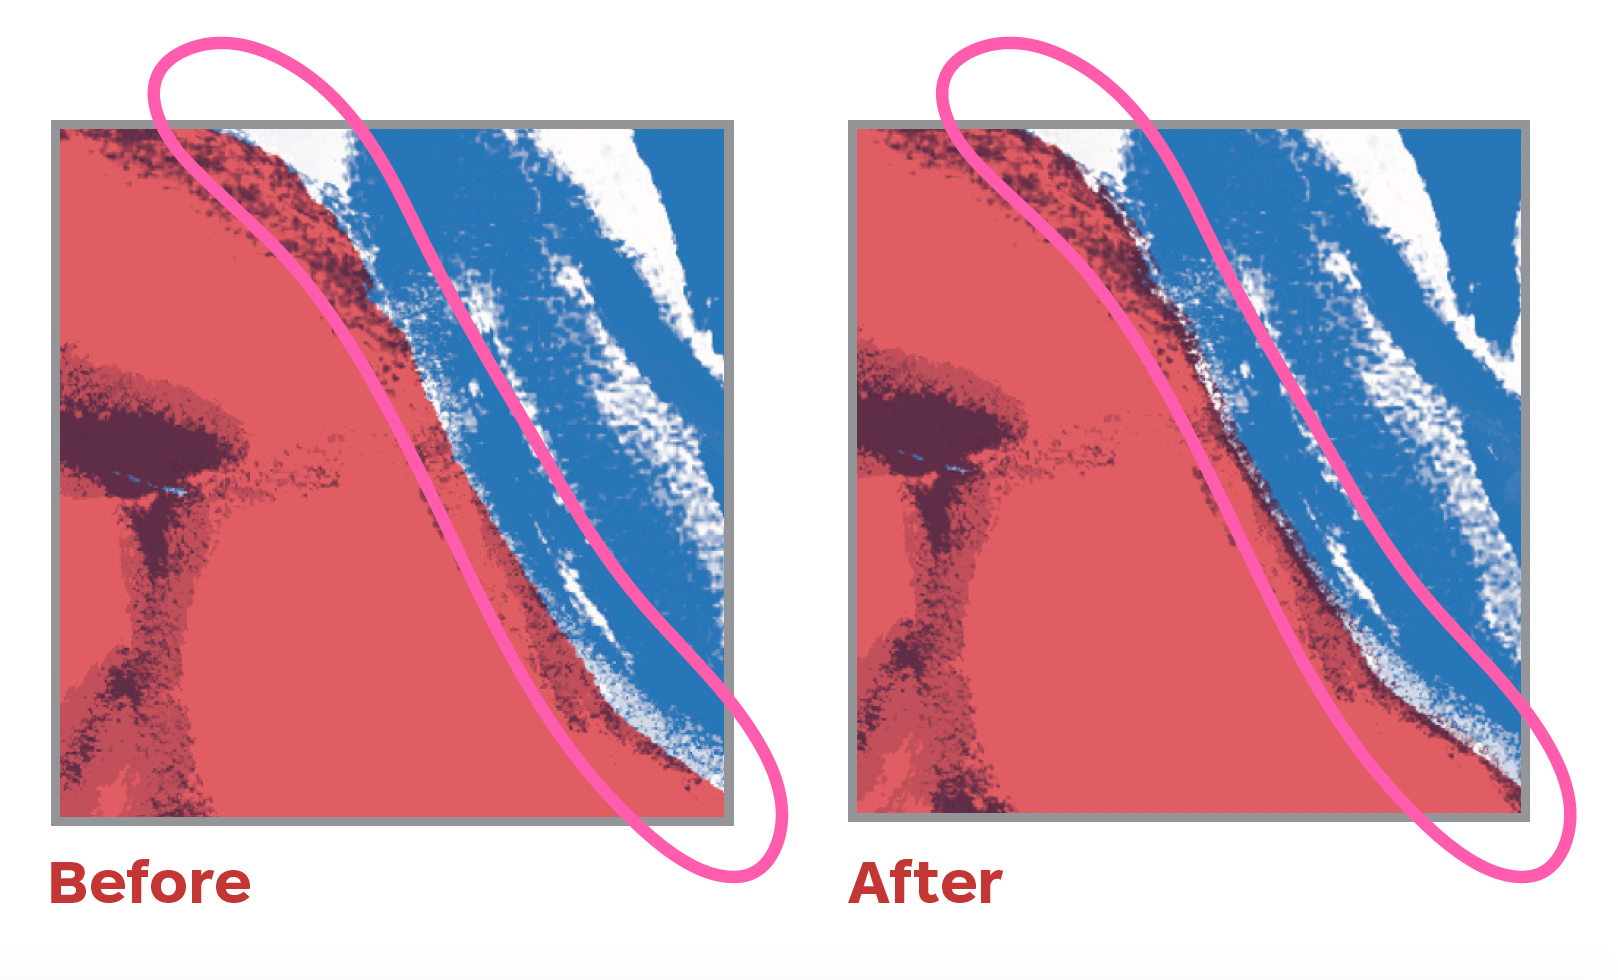
There will always be roller marks when double-siding. But they can be minimal if you take the following steps

  • Print the side with the least amount of ink coverage first.
  • Bring back your opacity to 80% across the board.
  • Roller marks tend to appear towards the top and center of the page. The more ink in that area, the more prevalent the roller marks.

Interactive Pieces

Anything that is being handled a lot (like a flipbook or resume) should be at 80% max.

Color Systems & Color Spaces

Understanding RGB vs. CMYK vs. CMY

The primary colors of light RGB (Red, Green, and Blue), represent a visual range that, in theory, can produce any color that can be seen by the human eye. Mixing with light is an additive process. (When you add all the colors together, they make white.)

Printing is a subtractive color process and uses the opposite colors, CMY (Cyan, Magenta, and Yellow) to mix and produce an image. Working with physical colors (i.e. dyes, pigments, inks) brings with it the limitations of your materials. In theory, cyan, magenta and yellow, all together should produce black. But in reality, the pigment usually turns to a muddy, inconsistent brownish-black. (The shade of brownish-black is dependent on your materials.)

This is why Black (or K for Key) is added in addition to the CMY gray-blend, giving you a sharper, richer, darker black.

So, when you are printing in CMYK, about half of your grays and blacks are made with an even blend of CMY, and the other half is a layer of black printed on top. In theory, all of your CMY channels should have the same information as your black channels, just at a lighter value.

Overall, subtractive color spaces tend to have a wider spectrum of colors to offer. This is why most people work in an RGB color space such as Adobe RGB 1998 or ProPhoto RGB, instead of CMYK. Side note: All screens use additive color.

What is a Color System?

A color system is a set of colors that represent a specific visual spectrum.* These few colors are mixed together to create a limited usable range, and that range is called a color system. Examples of a color system include RGB, CMYK, and Lab.

* “Appendix A.” Understanding Digital Photography, by Joseph A. Ippolito, Thomson/Delmar Learning, 2003, p. 372.

What is a Channel?

Photoshop organizes your chosen set of colors (e.g. RGB or CMYK) into channels, dividing up your image information by color. For RGB and CMYK, Photoshop also includes a composite channel. Each channel is in grayscale and uses a mask to store each color’s information. You can edit this mask to alter the look of your image and how the channels are mixed.

In RGB and CMYK, you can use the Channel Mixer to change the amount of color information on each channel.

What is a Spot Color?

An additional color that is not a part of an established color system or mode.

For More Information

Linkedin Learning: Understanding CMYK vs. RGB
Linkedin Learning: Understanding Spot Colors
Linkedin Learning: Spot Colors

Registration & Trapping

The Risograph has limits of accuracy. Each color layer requires a separate pass through the printer, registration on multi-color Risograph prints will never be perfect. 

It is recommended that you add registration marks to your image to aid in lining up multiple layers. These can also double as trim marks if you plan on cutting down your print to size. 

Line work printed over solid blocks of color will usually look best.

Registration (aligning overlapping colors) can be tricky and often imperfect on the Risograph.

When colors are misaligned (misregistration), you can be left with a glaring white gap that can detract from your overall piece.

Trapping is a remedy to misregistration. Trapping is the practice of adding a little bit of overlap between adjacent colors to make sure that there are no white gaps between them even when registration is a little uneven. In other words, trapping expands pixels where color channels touch or overlap.

Trapping channels in Photoshop

Select all channels you want to trap.

Trap
Menu bar > Image > Trap…

Select the number of pixels or millimeters you want to trap. (We recommend you do the highest allowable.)

There will only be a slight visual difference in your file, but this will help your colors overlap once you print.

Click OK.

Risograph Image Options

The Risograph can print at 600 d.p.i. and has two gradient techniques to choose from:

  • Grain Touch: a randomized diffusion dither pattern (like a photo or film grain) 
  • Screen-Covered: creates classic halftone patterns on a very small scale.  
    • Screen Frequency controls the size of dots produced (higher numbers = smaller dots).
    • Screen Angle controls the angle that the pattern is set to.

We recommend using Grain Touch over Screen-covered. If you have questions about screen-covered and Riso halftones, please contact the IC.