Epson T777D & T7270D

Students will be able to receive proof-of-concept or draft-quality large format prints at a reasonable price. Plotter prints are not considered final, production prints. Paper and print quality are suitable only for draft printing.

The plotter printer is a dual-roll plotter printer and copier with a multi-function scanner. It can print up to 43.75” wide on the short side of your piece. Printing on the plotter is a great option for prototype printing, 1st critique, graphic, or poster-type work . 

Turnaround Times

Your print job will be completed in the order it was received. 

The standard turnaround time for the plotter inkjet printers is approximately 1-2 full business days. This does not include weekends or holidays.

At this time, there are no “Rush” options available. Please be aware that during midterms and finals, turnaround times can increase up to 2-3 business days. 

Information on test strips can be found HERE.

Epson P5000

Desktop inkjet printing offers unmatched resolution, color accuracy, archival properties, and larger media sizes. Inkjet printing is used for high-quality posters, photography, oversize book covers, or anything else where the highest quality or largest print sizes are needed. Inkjet printers are used for low-volume quantity print runs since they can get expensive. 

The Imaging Center has two Epson P5000 printers, which can print up to 16.75” wide (17” paper) on various media. This is a great option for small photographs (5” x 7” or 8” x 10”) or banner-type work (15” x 60”). 

Turnaround Times

Your print job will be completed in the order it was received. 

The standard turnaround time for the desktop inkjet printers is approximately 1-2 full business days. This does not include weekends or holidays.

At this time, there are no “Rush” options available. Please be aware that during midterms and finals, turnaround times can increase up to 2-3 business days. 

Soft Proofing

Soft proofing is a representation or simulation on a computer monitor of what an image is going to look like on an output device, such as a printer. 

Soft proofing only simulates the appearance of an ink-on-paper proof, also known as a hard proof. The reliability of the soft proof depends upon the quality of the monitor, the profiles of the output devices, and the ambient lighting conditions of the working environment. 

Please rent an i1Display profiling device in order to color calibrate your monitor.

Color Management Information

Soft Proofing

Soft proofing is a representation or simulation on a computer monitor of what an image is going to look like on an output device, such as a printer. 
Read More

Color Systems & Color Spaces

Understanding RGB vs. CMYK vs. CMY The primary colors of light RGB (Red, Green, and Blue), represent a visual range that, in theory, can produce any c
Read More

Math 101

All of our inkjet printers are billed by the square foot. You are only charged for your image size and not the excess white paper. There are a few instances where the IC has sheets of inkjet media but the majority of all inkjet prints are printed on roll media.

This formula shows how to calculate the final price of your print job. All measurements must be in inches. 

Length” × Width” = Square Inches”

Square Inches” / 144 = Square Feet’

Square Feet’ × Paper Cost = Cost of Print

For example, if you wanted to print an 27” x 38” image on the Epson 9900 on Enhanced Matte.

Step 1: 27” × 38” = 1026”

Step 2: 1026” / 144 = 7.125 sq. ft.

Step 3: 7.125 (round up to 7.13) sq. ft. × $6.00 = $42.78

The total cost for this print job would be $42.78 before tax and $45.35 after tax.

To figure out the price of your poster with tax, multiple the before-taxed amount by $1.06. 

Calculator

Square Foot Calculator

Test Strip Package

The Imaging Center offers a FREE test strip package for our inkjet printers. This includes the Plotter/Graphic Inkjet printer and our Desktop and Wide-Format Inkjet printers. Test strips are highly recommended because they allow you to see exactly what the final print will look like. A test strip or hard proof is the most accurate kind of proof since it is an actual print made using the same materials that will be used to make the final print. Test strips should be checked for color accuracy, contrast, and resolution. 

If you would like to do a test strip, please fill out an Inkjet Test Strip form.

Test strips can take up to 1 business day. Once you are satisfied and “approve” your print, you may then submit the final order for the full-sized image. Remember to save your test strip file in the same exact way as your final image (.jpg test strip for a .jpg final print OR a .pdf test strip file for a .pdf final print).

Once a test strip has been approved, the file can be submitted for processing. Complaints will only be considered if a test strip was printed and approved by the customer. 

Test strips are FREE!! (within reason of course!). Students can print the same test strip for free on three different types of media.

Test strips should be no larger than 2” tall by the width of the document and contain areas of the file that offer the best representation of color and contrast. Please label the file test-strip.

Creating a Test Strip in Photoshop

From the toolbar, select the Crop Tool (c). You can specify the Crop options using the Control bar at the top.  

Choosing W x H x Resolution from the Aspect Ratio menu displays a Resolution field in the options bar and can auto-fill the Width and Height values.

Remember test strips can be 2” by the width of the document, in this case, 27”.

Creating a Test Strip in Illustrator

The quickest way to crop an image in Illustrator is to change the size of your artboard. 

Document Setup > Edit Artboards (Shift+O)

Enter the width and height of the test strip, in this case, 18” x 2”. You can also create a custom name for the test strip.  

File > Save As > Format > Adobe PDF (Print)        

General Information about Inkjet & Plotter Printing

All of the IC inkjet printers process through the same RIP software, Onyx Thrive.  

Each of our print media is color profiled with an i1Pro 2 Spectrophotometer utilizing the i1Profiler software. 

All inkjet printers are on a regular maintenance schedule with nozzle checks and print head alignments. The printers are color profiled at the start of each semester and are adjusted as necessary throughout. 

Crop “corners” can be requested for all inkjet print jobs, however, if you require true crop marks, you must export the file with crop marks.

By default, the Imaging Center will print your image in the center of the paper roll. We can not determine the white border on your image. If you need a 1” white margin on each side of your image, save that within your file in addition to crop marks. You will be charged accordingly.

If submitting a PDF with multiple pages, make sure to note the different image sizes on the print request form.

The Imaging Center may “gang files up” in order to provide quicker turnaround times and to save media. This will not affect your price quote as the IC bills by the square foot of the image. If files are “grouped together”, there will be at least .5” between each image.  

Remember to outline all of your type before saving/exporting your file as a PDF.

Turnaround Times

Your print job will be completed in the order it was received. 

The standard turnaround time for the plotter & inkjet printers is approximately 1-3 full business days. This does not include weekends or holidays.

At this time, there are no “Rush” options available. Please be aware that during midterms and finals, turnaround times can increase up to 2-3 business days. 

If you would like to do a test strip, please select the “Please print a test strip” option. Test strips can take up to 1 business day. Once you are satisfied and “approve” your print, you may then submit the final order for the full-sized image. Information on test strips can be found HERE

You will be notified via your CCS email when your job has been completed. 

Saddle-Stitch Booklets

Stuff You Should Know

A saddle-stitched bind is among the cheapest and most common methods of bookbinding. Folded sheets are nested by the printer, one inside the other, and stapled through the fold line.

The Imaging Center can print saddle-stitch booklets that are 100 pages or less. The more pages you have, the thicker the book will be. Ideally, this process is most effective with booklets of 64 pages or less. Books with more pages will become bulky once folded and will not lie flat.

A saddle-stitched booklet needs to have pages in multiples of four. This means that your book should have a number of 4, 8, 12, 16, 20, 24, 28, 32, 40, etc. pages.

If your book is not in multiples of four, the RIP software will add a blank page to the end of your document, causing your book to print incorrectly.

There are two ways to submit files for printing saddle-stitch booklets. If you don’t require a full bleed, jump to the section: Printing Saddle Stitch Booklets (the Easy Way). If you do require a  full bleed, this requires extra planning; jump to the section: Printing Saddle Stitch Booklets with Crops and Bleeds (also known as the more thought-out way).

Remember, none of our printers can print to the edge of the paper. There will always be approximately a 1/8” white margin around the entire document.

The minimum height for a saddle-stitch booklet is 5.5”.

Students can designate a thicker stock for the cover and a thinner stock for the insides. If there is nothing specified, the booklet will be printed on the same media.

Printing Saddle Stitch Booklets (the Easy Way)

The size of your document will depend on the size of your folded, final booklet.

Since saddle-stitch booklets are folded sheets of paper, you should determine your document size by using standard paper sizes.

There are two standard options when printing without a full bleed in the IC. 

  • 5.5” × 8.5” (letter/8.5” × 11” folded in half)
  • 8.5” × 11” (tabloid/11” × 17” folded in half)

Your booklet will have a thin white border.

To utilize this method, export your final document to PDF as single pages with no crop or bleed marks.

File > Export > Adobe PDF (Print)

Adobe PDF Preset > PDF/X-1a or PDF/X4 

Export As > Pages
Confirm that the Pages option is selected. You want single pages when exporting this way. 

Marks & Bleeds > Make sure all marks & bleed options are unchecked.

Export.

Open your file to make sure that all the pages are in the correct order

Printing Saddle Stitch Booklets with Crops and Bleeds 

There are a few different ways to properly prep your saddle-stitch booklet document to print with crop and bleed marks. This will help achieve a clean and accurate cut after printing.

You will need access to Adobe Acrobat Pro and Adobe Distiller. These programs are available in all computer labs on campus.

You will also need to export your document using InDesign’s Print Booklet feature. This process will help you create an imposed file.

Step One – Creating a PostScript file using InDesign

File > Print Booklet

Select Print Settings 

  • Printer > PostScript File
  • PPD > Device Independent
  • Print Blank Pages > Checked

Select the Marks and Bleeds tab in the Print Booklet dialog

  • Crop Marks > Checked On
  • Bleed Marks > Checked On
  • Offset > 0.0833”
  • Use Document Bleed Settings > Checked On

Click OK. This will return you to the Print Booklet dialog window.

Select the Setup tab in the Print Booklet dialog

  • Pages > All 
  • Booklet Type > 2-up Saddle Stitch
  • Margins > Auto
  • Print Blank Printer Spreads > Checked On

Select the Preview tab. Make sure your file looks correct.

Click Print.

Your file will now be saved as a .ps file (PostScript file)

Step Two – Creating a PDF file using Acrobat Distiller

Open Acrobat Distiller

Default Settings > PDF X-1a:2001

Settings Menu > Edit Adobe PDF Settings

You will have to know what your exact document size is. This example is for an 11” × 17” booklet exported with crop marks, using document bleed settings.

Enter the exact width and height of the document.  

Select Save As. 

Save the .joboptions file with the image size and brief description of the PDF settings.

Click Save.

With Acrobat Distiller Open, you should now see your newly saved setting.

File > Open

Select and open the .ps file.

The .ps file will process and then be replaced with a PDF file with the same name. If saved correctly, the progress bar should say Status: Ready.

Open the file in Acrobat to double-check that your file has been saved properly, in the correct page order, and in the center of the page. 

For More Information

Copier & Scanner Functions

General Information

All copy and scan requests must be submitted in hard copy form. The Imaging Center will not copy from books, magazines, or other published materials due to copyright reasons.

Original copies should neatly be assembled in the correct order with no tears or damaged pages. Staples or tape should be removed prior to submitting copy/scan requests.

The IC can make high-quality scans up to 11” × 17” from an original document and send them directly to your CCS email. Scanning Request forms can be requested from an IC Tech.

The Canon 750/850 can attach your document as a PDF or JPG. If your scan is larger than 10mb, it will automatically break up the file into several attachments. The IC will scan your document at the standard resolution (300 × 300).

Standard turnaround time for the scanning process is between 1-2 hours. Please be aware during midterms and finals, turnaround times will increase up to 24 hours.

The Canon 750/850 has the ability to corner staple and double staple.

Scan-to-Email Pricing

The cost to scan documents to email is $0.05/sheet. Make sure that you know the actual page count prior to submitting the scan job. If interested, please see an IC technician for details.

Bringing Your Own Paper

General Information

The Imaging Center accepts student-supplied paper to be printed on our Canon 810/910 laser printer. All paper must be for LASER printers and not inkjet printers.

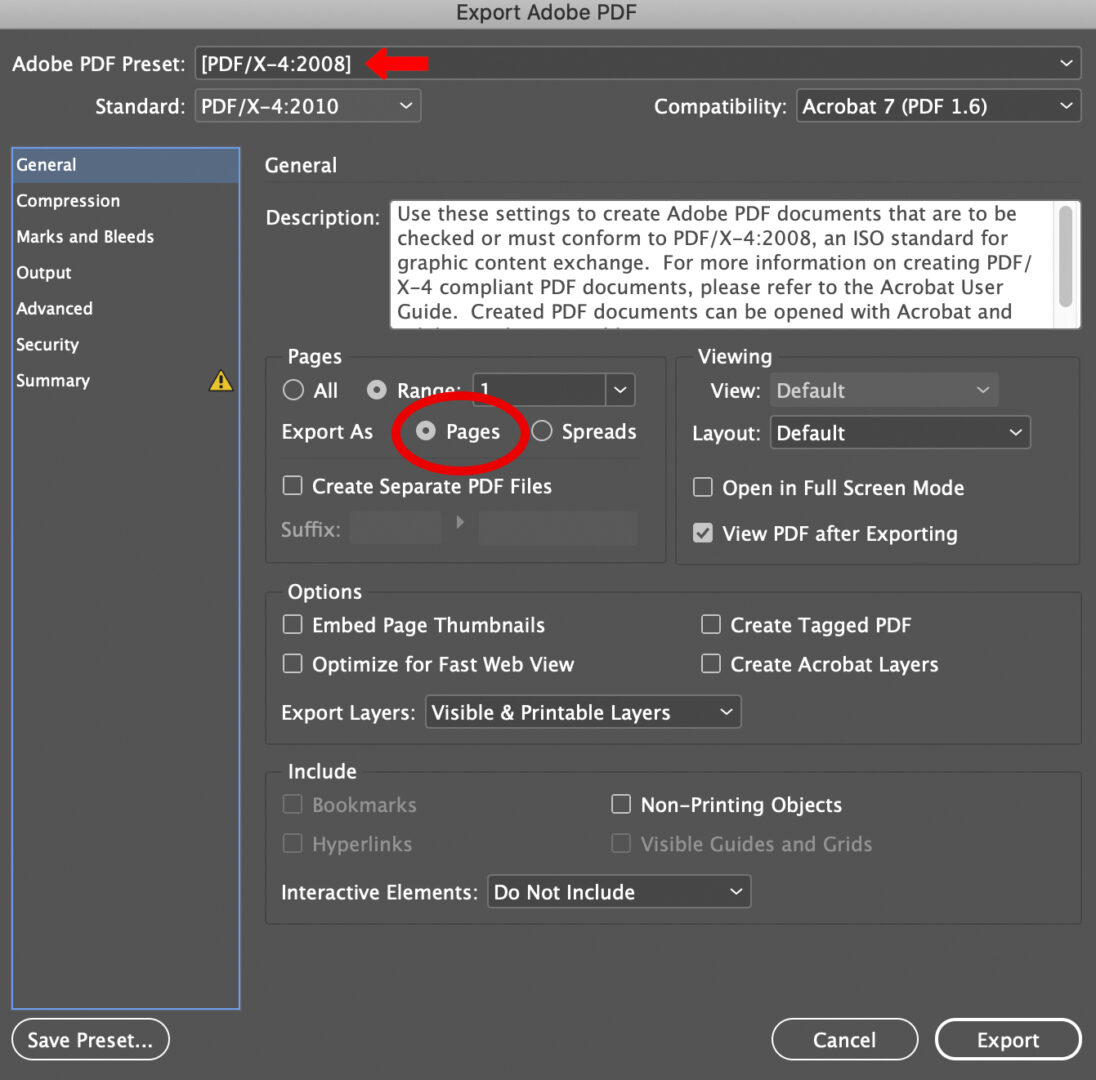
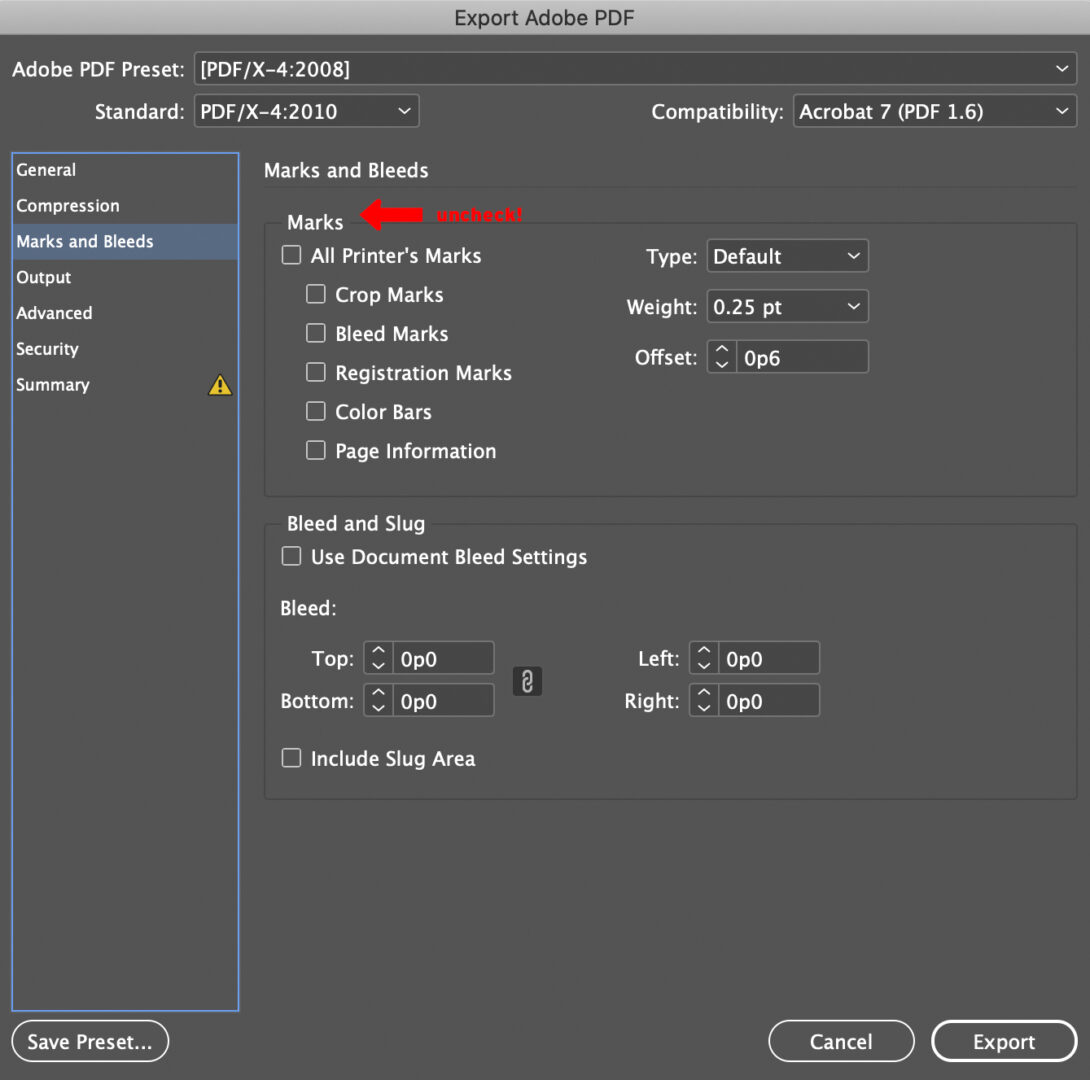
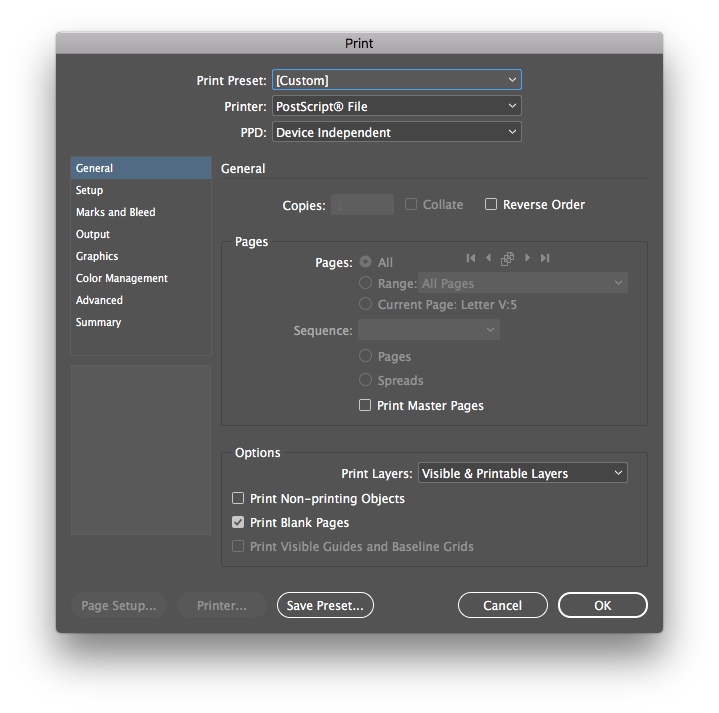
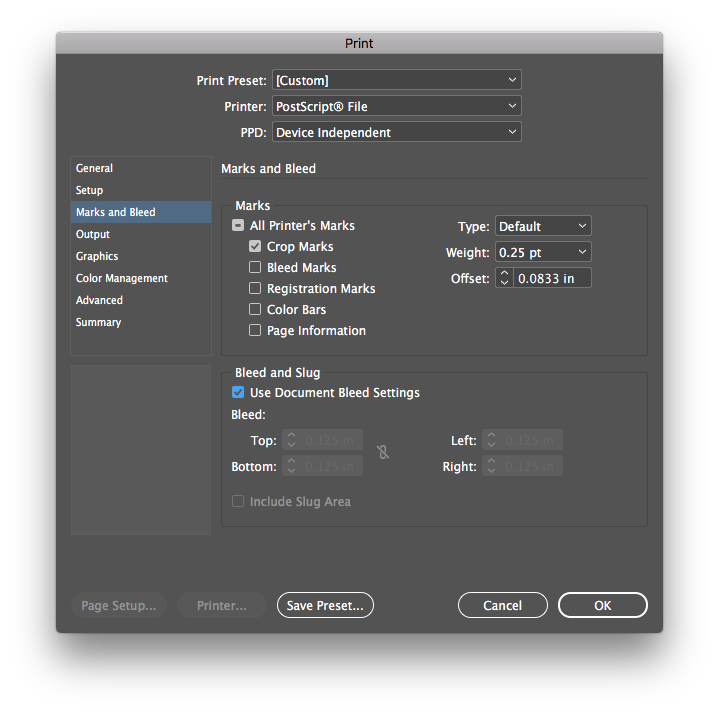
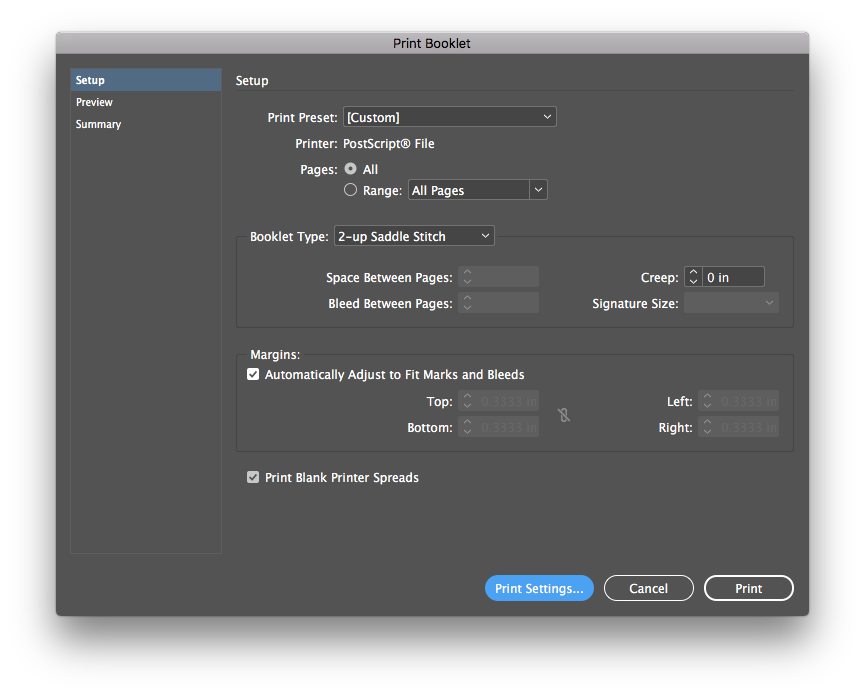
Students should still submit their files for print using our laser print forms, found HERE. You will be prompted to include important information about the paper that you plan to print on. If accepted, you will be sent an appointment link to drop off your paper at the IC.

All paper must be brought into the Imaging Center in its original packaging with the weight and g/m2 clearly marked. If the original packaging is not supplied, the IC will not print using the supplied media. The original packaging or a spec sheet must be brought in each and every time that a print job is submitted.

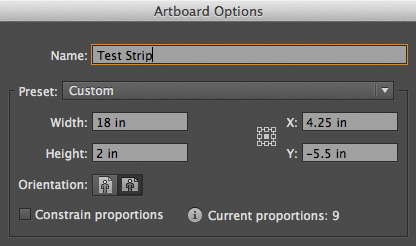
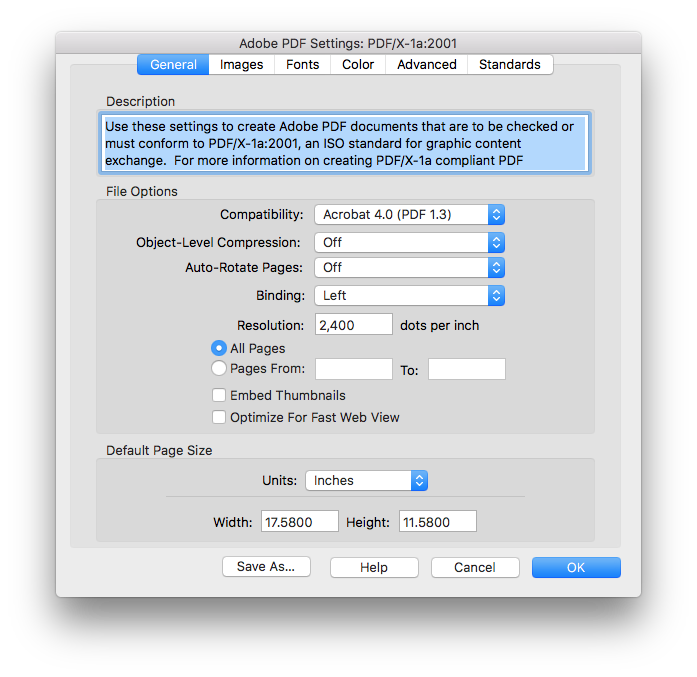
The paper must be cut to a specific standard size (8.5″ × 11″, 11″ × 17″, 12″ × 18″, 13″ × 19″, etc.). If you submit the paper that is sized 12.5” × 19”, the IC can cut it to size for you at a cost of $1.00/cut.

When submitting a print job, please supply between 5-15 sheets of the same paper type for testing purposes. For example, if you submit a textured sheet of paper, settings must be modified slightly so that the toner adheres properly on the page.

Turnaround Times & Proofing

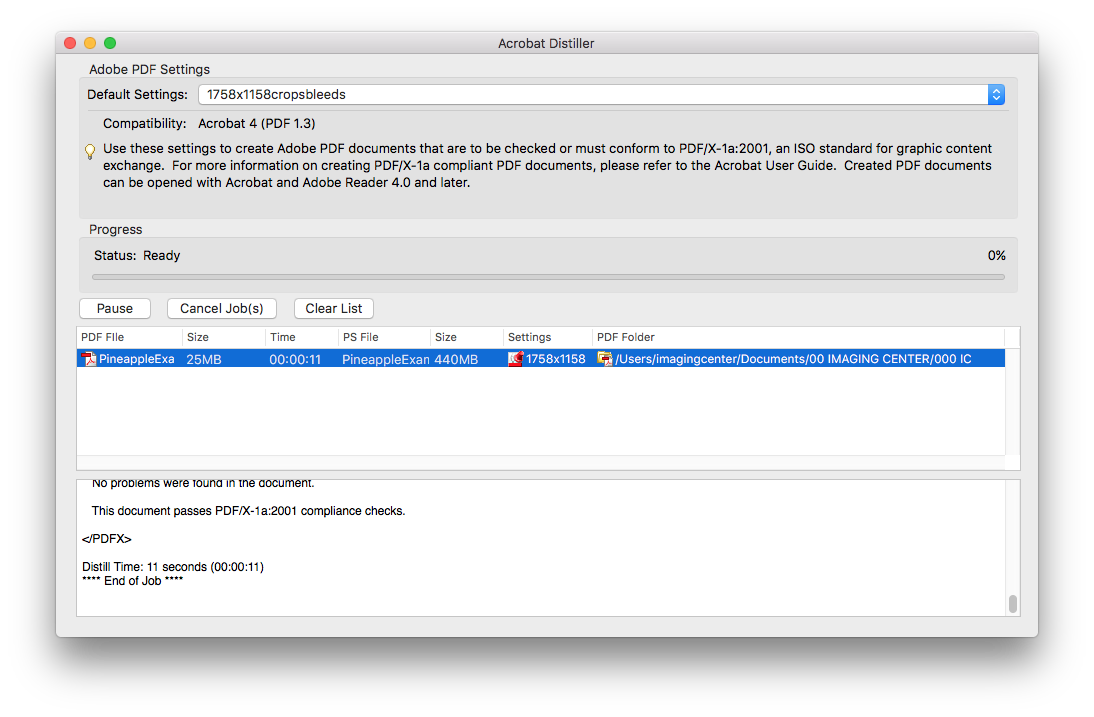
The standard turnaround time for bringing in your own media to use on the Canon 750/850 is 24 hours (one business day). During midterms and finals, turnaround times may increase.

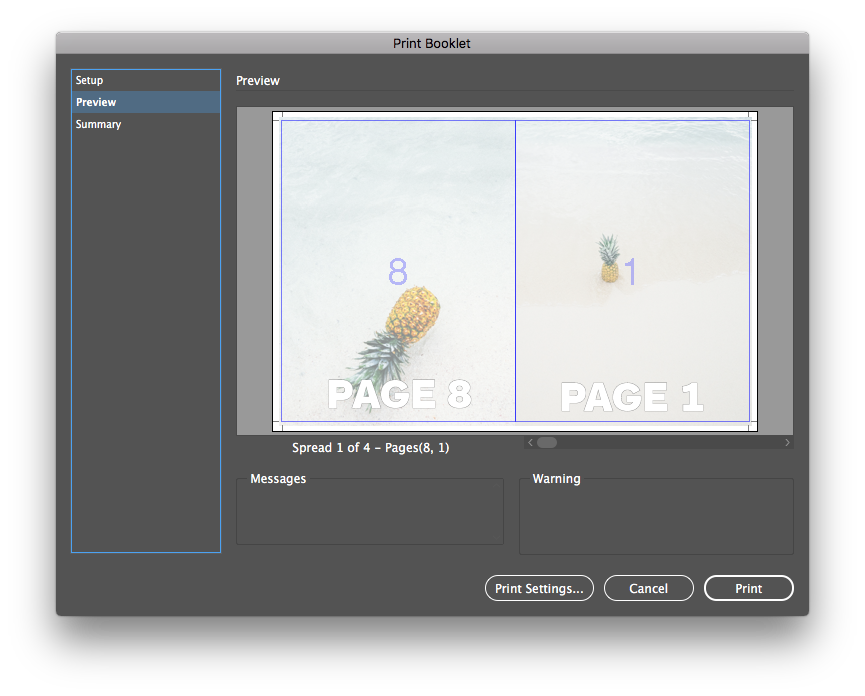
If you are running a large job and want to see a proof copy, turn in a print submission for only one or two pages of your document. This will be completed within 24 hours. Once you are satisfied and “approve” your print, you may then turn in the final order for the full amount of pages & copies that you want. 

A sample page or proof page is highly recommended because it allows you to see exactly what the final print will look like. Students will still be responsible for the price of any additional sample pages once changes are made.   

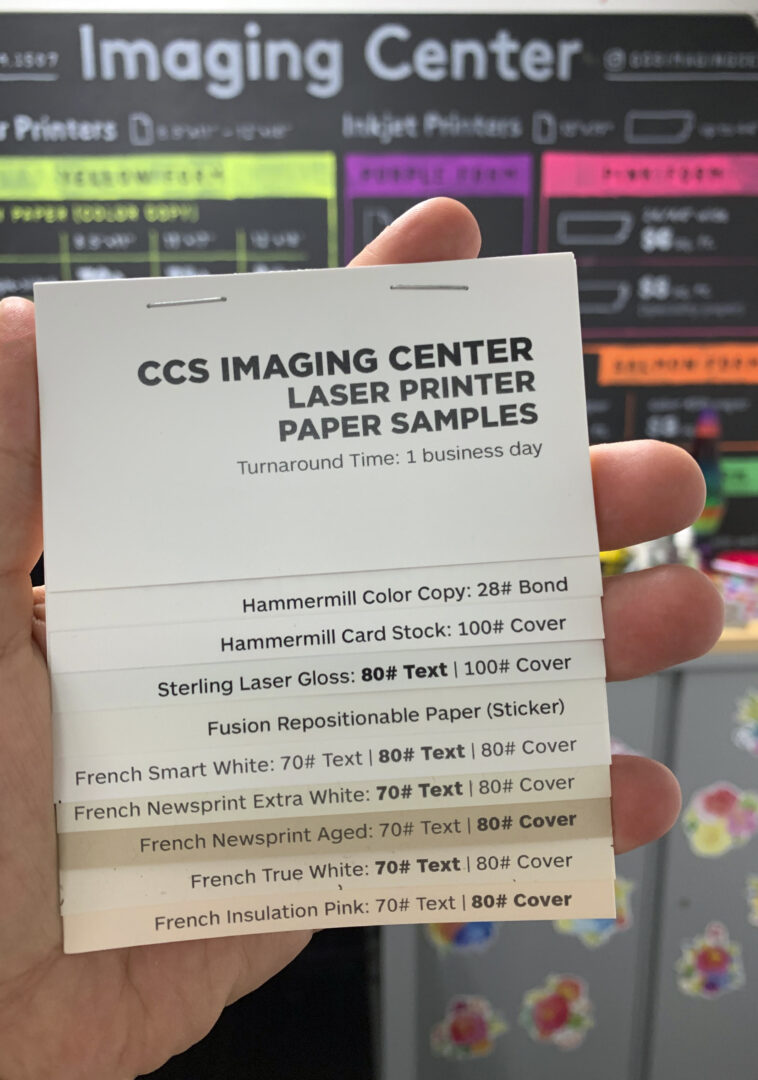
Accepted Paper Types

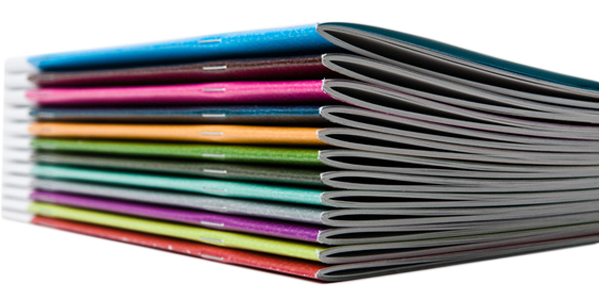
The Canon 810/910 can handle a variety of media weights and types up to 13” × 19” in size and 16# bond (60gsm) to 120# cover (298gsm) in weight.

Some 120# cover papers with a texture may not process through the printer.

The IC recommends the majority of digital printer paper from Neenah or French Paper. When ordering from Neenah, make sure you are purchasing digital paper. They often sell similar papers in large sheets that must be cut. That paper is not meant to run through a digital press.

Unaccepted Paper Types

The Imaging Center will not accept the following media at this time: vellum, newsprint, Canson, metallic, transparency, or watercolor papers, in addition to most adhesive labels or stickers.

The Imaging Center does reserve the right to deny submitted paper types at any time.

Laser Paper | Resource List

This resource list is updated regularly. If you do not see one of these options in the drop-down menu while submitting a job, please write in the paper option on the form. Imaging Center staff will connect with you if that paper is no longer in stock.

Standard Paper

Hammermill Paper
Sterling Laser Gloss
French Paper
Sticker Paper

French Paper (rotating)

Neenah Paper (rotating)