Registration & Trapping

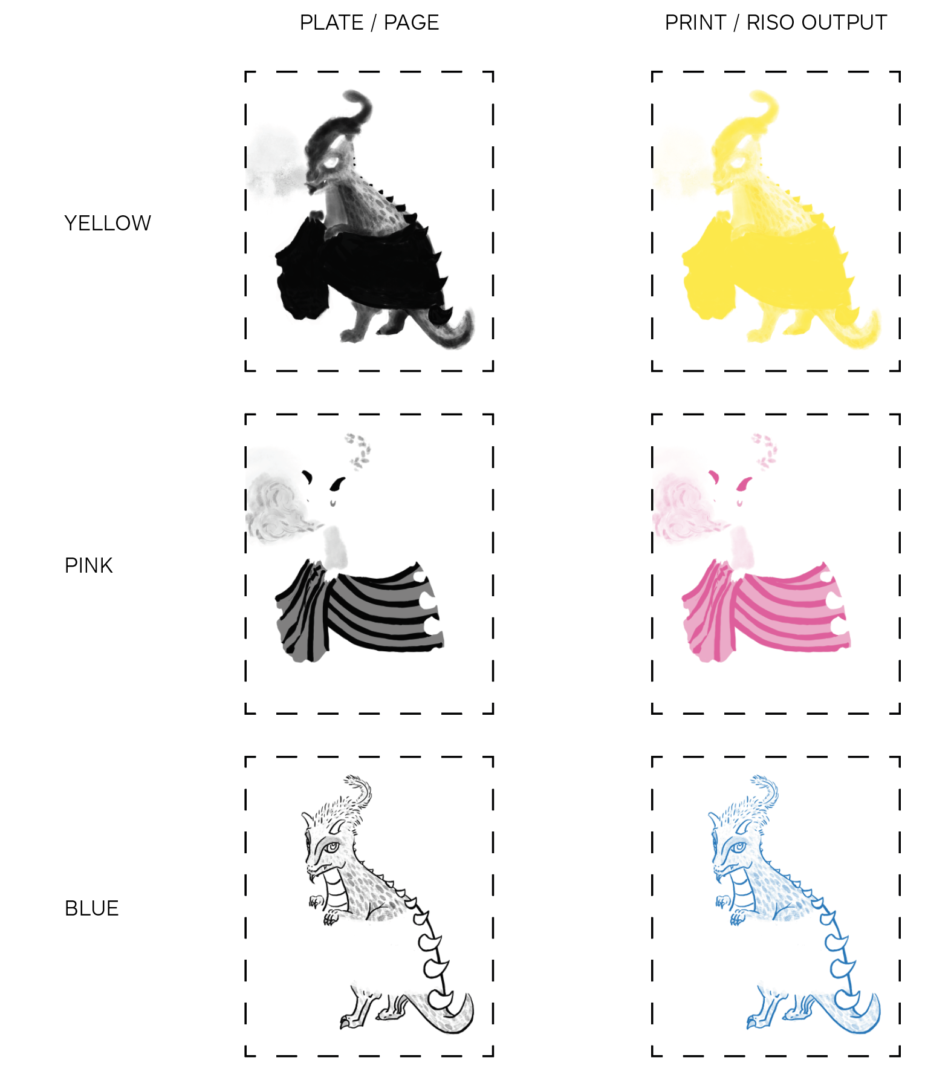
The Risograph has limits of accuracy. Each color layer requires a separate pass through the printer, registration on multi-color Risograph prints will never be perfect. 

It is recommended that you add registration marks to your image to aid in lining up multiple layers. These can also double as trim marks if you plan on cutting down your print to size. 

Line work printed over solid blocks of color will usually look best.

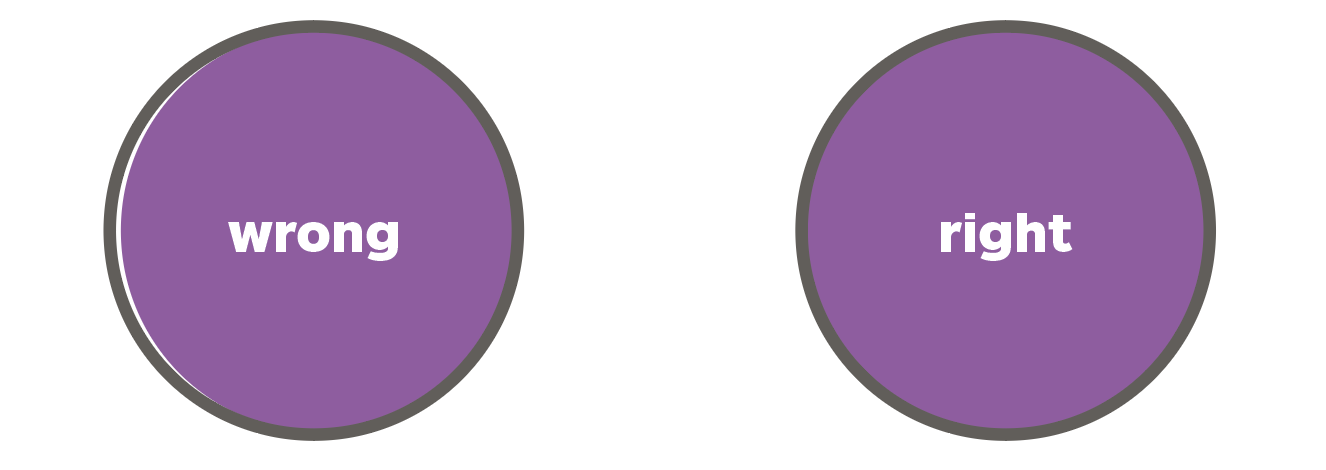
Registration (aligning overlapping colors) can be tricky and often imperfect on the Risograph.

When colors are misaligned (misregistration), you can be left with a glaring white gap that can detract from your overall piece.

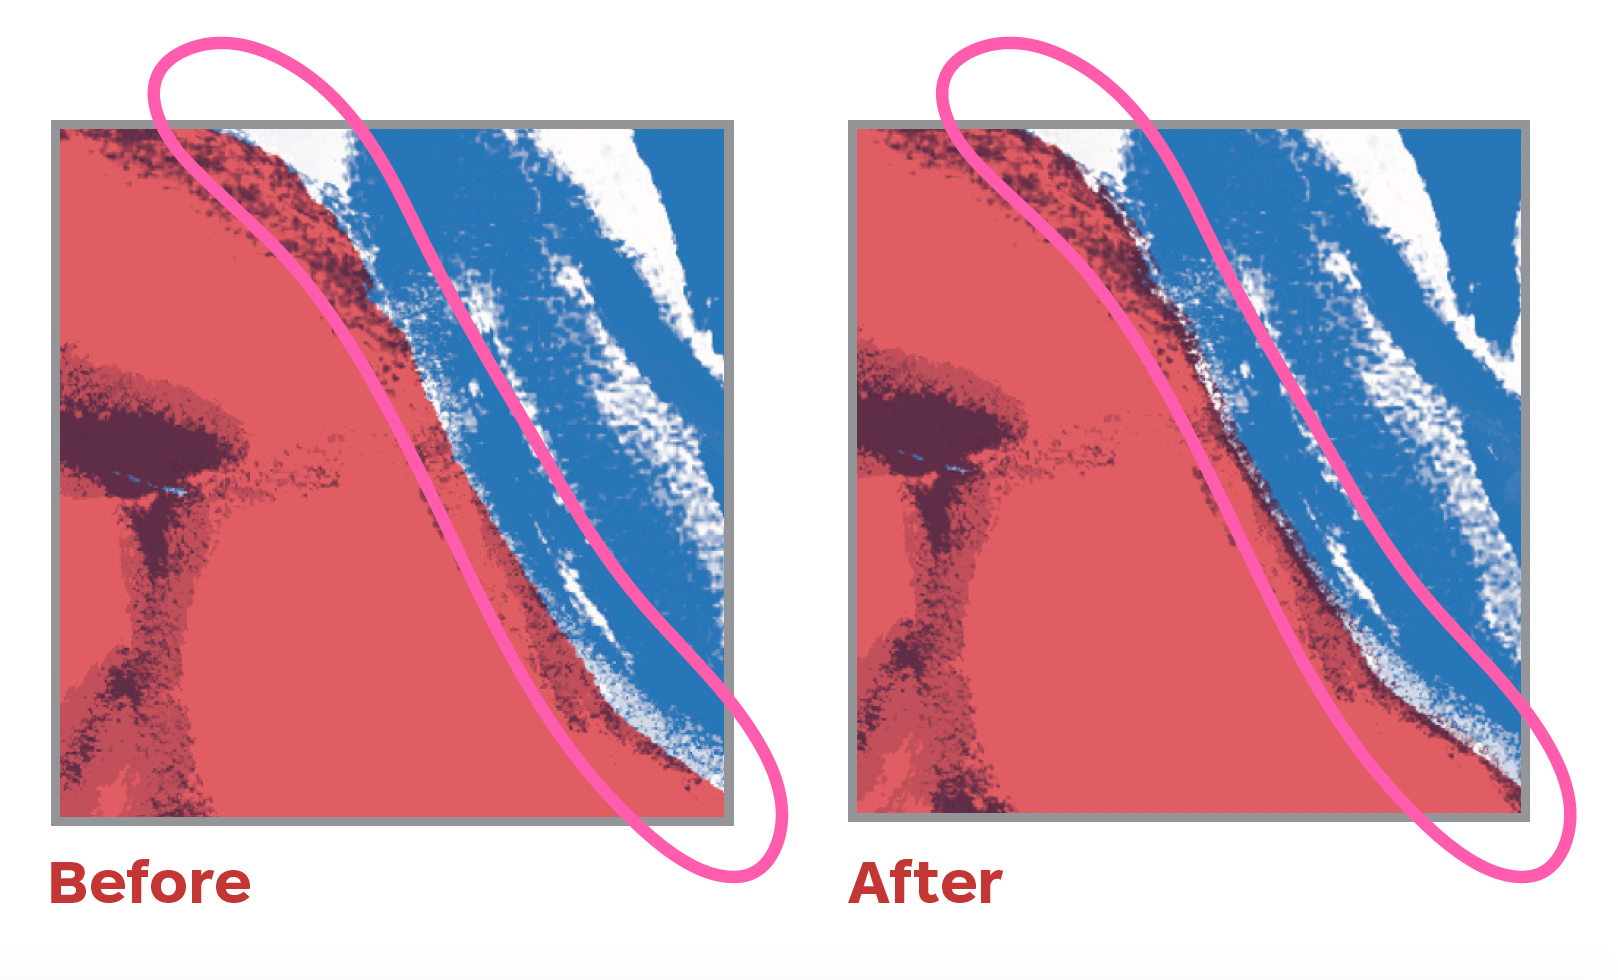
Trapping is a remedy to misregistration. Trapping is the practice of adding a little bit of overlap between adjacent colors to make sure that there are no white gaps between them even when registration is a little uneven. In other words, trapping expands pixels where color channels touch or overlap.

Trapping channels in Photoshop

Select all channels you want to trap.
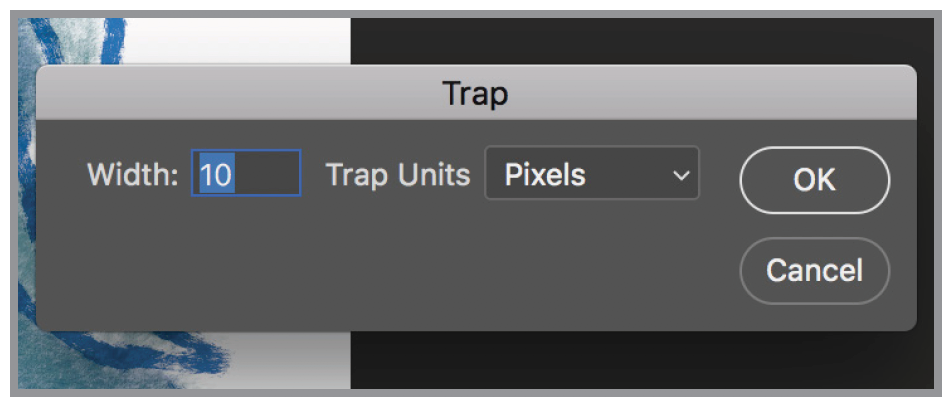
Trap
Menu bar > Image > Trap…

Select the number of pixels or millimeters you want to trap. (We recommend you do the highest allowable.)

There will only be a slight visual difference in your file, but this will help your colors overlap once you print.

Click OK.

Risograph Image Options

The Risograph can print at 600 d.p.i. and has two gradient techniques to choose from:

  • Grain Touch: a randomized diffusion dither pattern (like a photo or film grain) 
  • Screen-Covered: creates classic halftone patterns on a very small scale.  
    • Screen Frequency controls the size of dots produced (higher numbers = smaller dots).
    • Screen Angle controls the angle that the pattern is set to.

We recommend using Grain Touch over Screen-covered. If you have questions about screen-covered and Riso halftones, please contact the IC.

File Preparation for Riso Submission

Your files should be separated into individual black & white images for each color that is to be printed. This is similar to preparing files for screen printing. 100% black in each color layer, will print out as 100% of whichever color you are printing. 90% black will print as 90% and so on. 

Arrange layers in ‘print’ order.

File Prep

Prepare a multi-page PDFx file in the following specification:

  • B & W / Grayscale
  • Color-separated

Additional File Recommendations

  • Outline type: This is particularly important if you have manipulated or custom fonts.
  • Flatten: Be sure to keep a copy of your original file in case you need to make changes.

File Type & Page Order

Files submitted must be saved as a black & white, multi-page PDF file. Files should be color-separated and flattened. Each color should be black & white and on a separate page. Please see the fish example below

Your flattened PDF file should consist of 1-5 pages:

  • Page 1: Color 1 in B & W / Grayscale
  • Page 2: Color 2 in B & W / Grayscale
  • Page 3: Color 3 in B & W / Grayscale
  • Page 4: Color 4 in B & W / Grayscale
  • Etc.
Rendered Image (color composite)
Page 1: Color 1 (YELLOW) in B&W
Page 2: Color 2 (BLUE) in B&W

Naming Convention

YourName_FileName_Riso-colors-in-file-order | Example: RachelDeBoard_Plantlove_Black-HunterGreen-Lime.pdf

Color Composite Version

In addition to the color-separated pdf, upload a color composite (rendered) version of your final print. This is so the printer can check the proof against your rendered image.

Proof Approval

The IC requires proof approval of Riso prints, either in-person or via locker pick up, before giving a pick-up date and appointment. We do not offer digital proofs for the Risograph.

The IC will contact you via email when your proof is ready for pick-up. Once you approve the proof, we will email you a pickup date and time, and a link to sign up for a pick-up appointment. 

Resolution

The Risograph printer has a resolution of 600dpi. Use this resolution for your images.

Maximum Printable Area

Tabloid – Printable Area: 10” x 16” 
Letter – Printable Area 7.5″ x 10″

For full-bleed design, add a security bleed of at least 1/4” around 3 sides of your artwork. Leave at least a 1” margin on the lead edge of the paper. 

The top 2” of the sheet of paper are where you are most likely to see roller marks or a series of faint lines carrying ink over from print to print. 

We offer letter size printing. However, we do not recommend it for heavily inked images. 

Type Weight & Size

Type size should not go below 6pt

The same text should not be printed in two colors, as misregistration will cause some illegibility. Do not set type in Photoshop, use Illustrator or InDesign to avoid your text being rasterized. 

Type size under 12pt should be set in registration black (100/100/100/100) and for type over 12pt use a 100% black.

Channels & Layers

When working with a CMYK file in Photoshop, when your file is ready to print, open the Channels Menu and select Split Channels. This will create new grayscale files, one for each color channel from your template. 

Alternatively, if you have prepared your color separations in layers instead of channels, you can use the File > Export > Layers to Files function to split them into individual files. Then open each file, convert it to grayscale, and print it. 

Double-Sided Printing

It is incredibly difficult to achieve a perfectly aligned double-sided print. 

Slight track marks from paper feeding rollers can also appear, especially when printing more than two layers and areas with heavy inking. 

Please make an appointment with IC staff to discuss your Risograph print submission. 

Need Extra Help?

If you have further questions about file setup, please contact us by email or by scheduling a consultation.

Ink Colors

The Risograph printer is enviro-friendly & is a cost-effective soy and rice ink printer. 

Riso ink dries through a combination process of absorption and evaporation; so the paper must be uncoated. These soy-based inks never really “dry”. Similar to newsprint, rubbing the ink with your finger, even once “dry”, can result in smudging. This is a natural occurrence. 

Imaging Center Riso Colors – Fall 2022

The IC currently has 12 colors of ink in stock. The IC recommends no more than 4 colors per Riso print submission.

Risograph ink is translucent, so its final appearance depends on the color of the paper it is printed on and then the layering of each ink color. 

Colors can be overprinted to create new ones. It is possible to blend any combination of tints together to produce color variants. 

Download our Adobe Swatch file of all available Riso colors HERE!

IC Riso Swatches 2022

Pricing & Paper Information

The Imaging Center offers 8.5” x 11” & 11” x 17” uncoated paper for Risograph printing.

Order Minimums

There is a 5-sheet minimum per order. Multiple pages can be aggregated to meet the 5-sheet minimum. e.g. 12-page saddle-stitch book = 3 sheets; 2 books will use 6 sheets which meets the minimum of 5 sheets.

French Papers

French paper stocked by the IC can be found HERE. Paper options are based on current availability. Please visit the IC in person to pick up individual paper samples.

Bringing Your Own Paper (BYOP)

The Riso can print on uncoated paper between 20# bond and 100# cover. Consult the IC before purchasing BYOP paper for Riso projects. All French paper is uncoated, and therefore, it is always a safe choice.

Please make an appointment via Calendly to drop off the paper or to chat with an IC staff member about what paper would work best for your project.

Risograph Price Chart

Turnaround Times & Proofing

Your print job will be completed in the order it was received. The standard turnaround time for the risograph printer is 3-7 business days. There are no “rush” options for riso print jobs. Please allow an additional 48 hours (2 business days) for each color beyond two colors, as copies need to cure, or dry between runs.

General Turnaround Color Guidelines

1 or 2 colors: 3 days // 3 colors: 4 days // 4 colors: 5-7 days // 5+ colors: 7+ days

You will be notified via your CCS email when your job has been completed. 

Riso Printing | How does the Risograph Work?

An image is either sent digitally from the Riso PC or from a physical original via the scanner bed. The master is created by burning the image onto the master roll inside the printer. This stencil is then wrapped around the ink drum. The Riso feeds paper under the ink drum as it rotates, and ink is pushed out through the stencil to create an impression. 

On our Riso, two colors are printed at a time, and multicolored prints are made by switching out drums, then printing over each layer. The paper passes through the machine multiple times. 

Risograph ink is translucent, so its final appearance depends on the color of the paper it is printed on and the layering of each ink. Colors can be overprinted to create new ones. It’s also possible to blend any combination of tints of color together to produce color variants.

Ways to participate in CCS Riso

The IC offers Service Printing year-round and formal Riso Training in the Fall. Trained students can rent time in the Riso Room year-round. Fall training space is limited and accepts applications from Sophomores, Juniors, and Seniors. The IC hosts Riso Printing events during the school year and student organizations (e.g. Riso Club, Freeform Press) use the Risograph for club events.

A brief explanation of how a Risograph printer works. Along with an introduction of the Risograph Studio in the Imaging Center.

The Quick Guide to the Riso | Fall 2020