Quick Tip #3

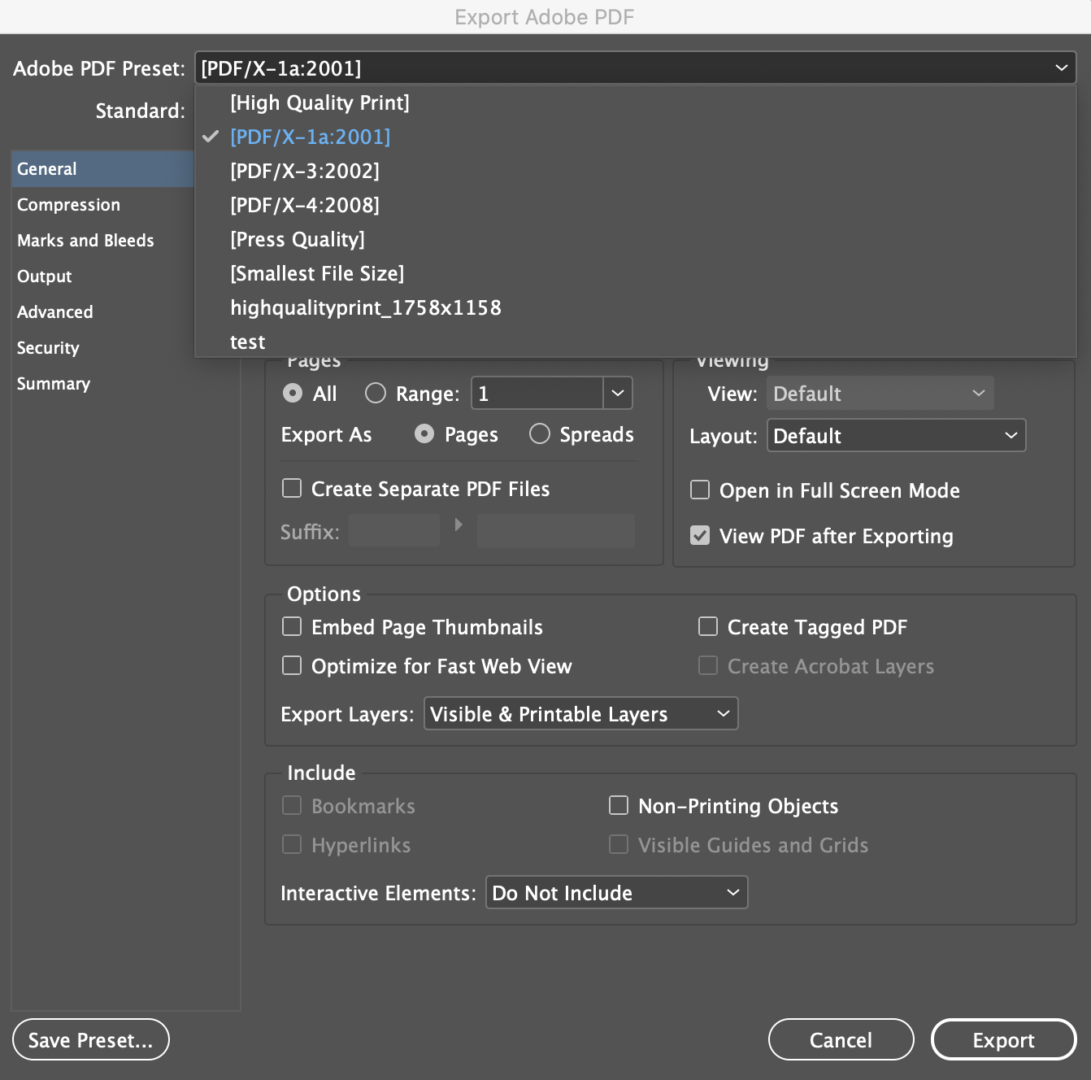
PDF Export Preset & Settings 

PDF documents can be exported using many different settings depending on the desired output destination (print, web, working file, etc.).

PDF Tips 

There are many ways to create a PDF file, but not all of them work well for professional printing and/or file sharing. The way in which you create a PDF can dramatically alter the quality of your printing.

The Imaging Center recommends using PDF/X-1a for most print submissions.

PDF/X-1a 

  • All transparency and layers are flattened
  • Spot colors are maintained
  • RGB content is converted to CMYK

PDF/X-4 

  • This is a newer PDF standard that takes advantage of modern prepress processes.
  • Retains live transparency & layers
  • Retains CMYK, RGB, LAB, and spot colors
  • Intended for workflows that support live transparencies
  • Definitely worth trying to use!

Recommended Changes to Settings

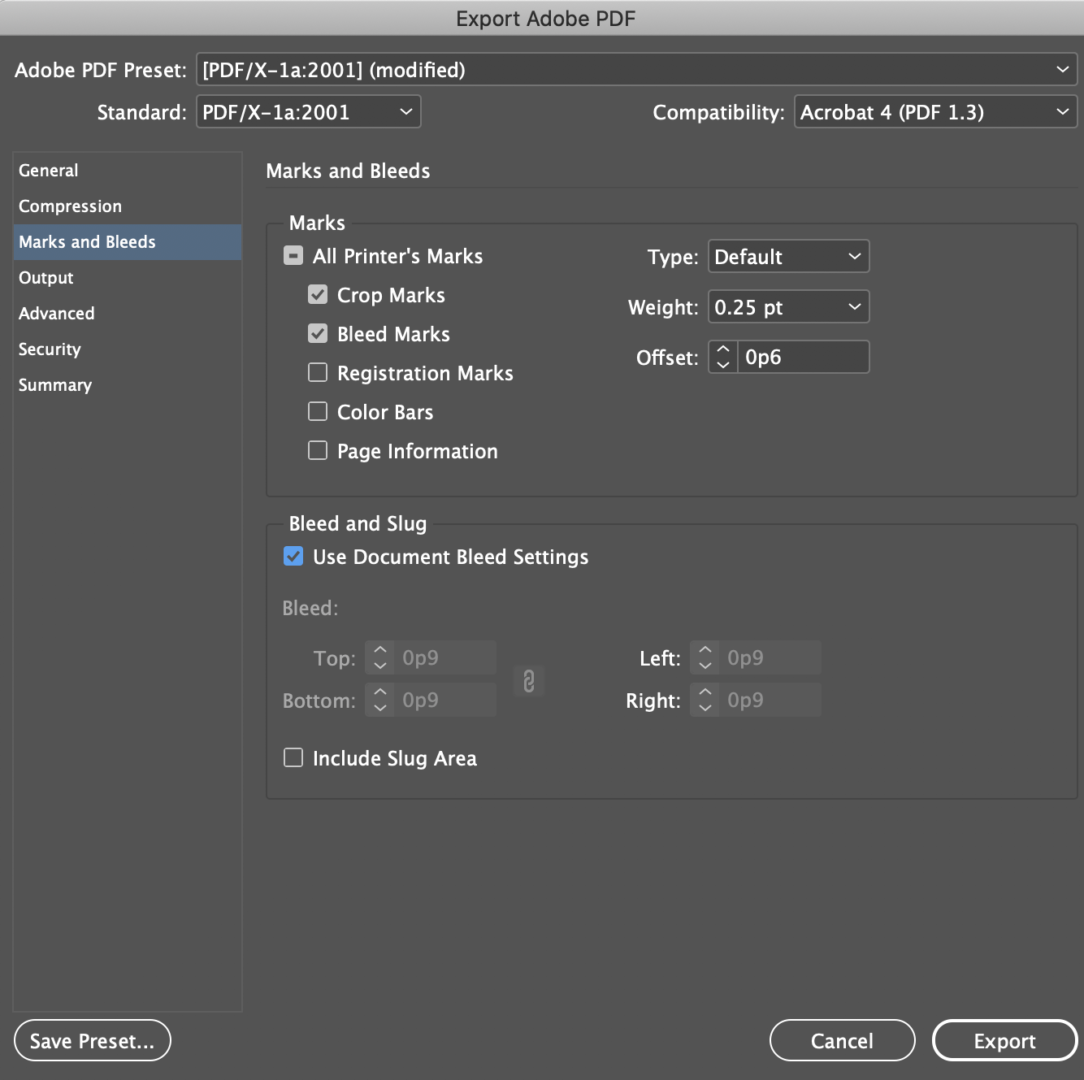
Marks & Bleed: Only include crop & bleed marks if the file set up for that item requires it. Click ‘Use Document Bleed Settings’ to include previously setup bleed, usually should be set to 0.125″(1/8″)
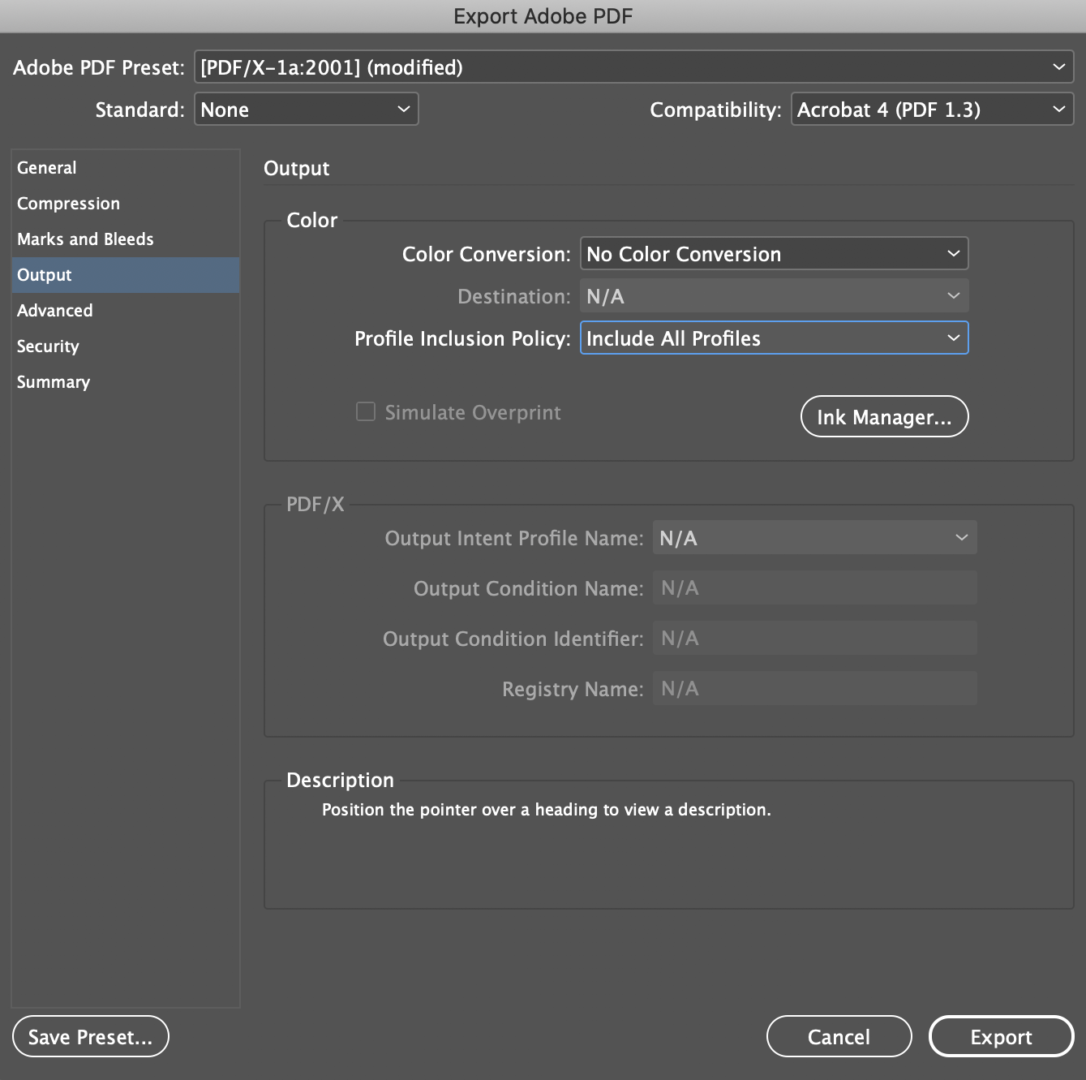
Output Color Conversion: Change to No Conversion & Include all Profiles
Inkjet & Plotter Printing | Paper Resource List

This resource list is updated regularly. If you do not see one of these options in the drop-down menu while submitting a job, please write in the paper option on the form. Imaging Center staff will connect with you if that paper is no longer in stock.

Plotter Printer: Epson SureColor T5270D/T7270D

Standard Paper(s)
24# Bond Paper: 36″ & 42″ rolls
45# Bond Paper: 36″ & 42″ rolls
8 mil UV Microporous Photo Paper – 36″ & 42″ rolls

Specialty Paper(s)
Epson Backlit Transparency Paper: 36″ roll

For more information on our plotter printer, please visit HERE.

Inkjet Printer: Epson SureColor P5000

Standard Paper(s)
Enhanced Matte: 17″ roll
Watercolor – Radiant White: 13″ x 19″ sheets
Premium Luster: 16″ roll

Specialty Paper(s)
Exhibition Canvas Matte: 17″ roll
Hot Press Natural: 17″ roll

For more information on our desktop inkjet printers, please visit HERE.

Inkjet Printer: Epson Stylus Pro 9900

Standard Paper(s)
Enhanced Matte: 24″, 36″, & 44″ rolls
Doubleweight Matte: 24″ roll
Premium Luster: 24″, 36″, & 44″ rolls
Premium Semimmate: 24″, 36″, & 44″ rolls

Specialty Paper(s)
Exhibition Canvas Matte: 24″ & 36″ rolls
Cold Press Bright: 24″ roll
Exhibition Canvas Satin: 24″ roll

For more information on our wide format inkjet printers, please visit HERE.

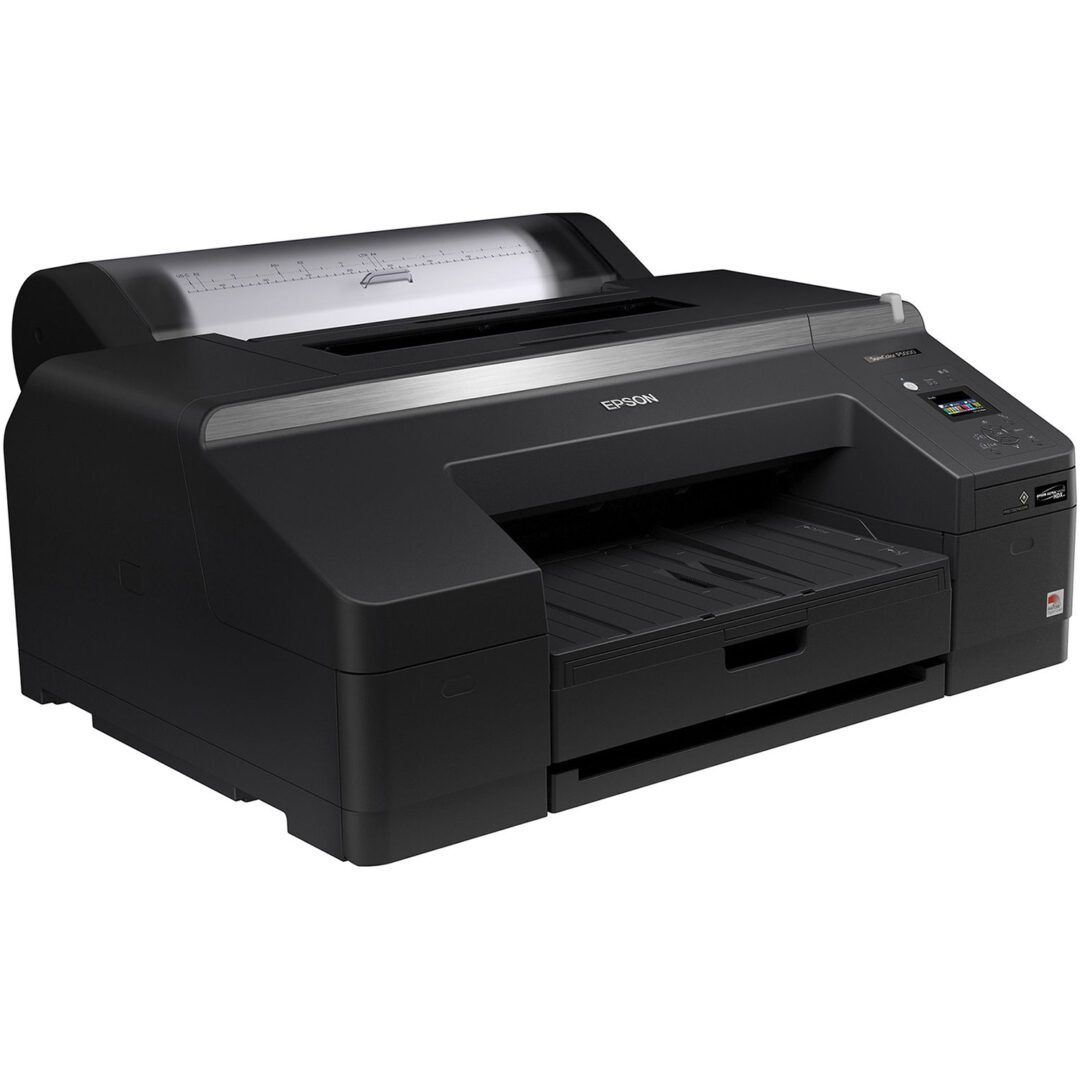
Epson P5000

Desktop inkjet printing offers unmatched resolution, color accuracy, archival properties, and larger media sizes. Inkjet printing is used for high-quality posters, photography, oversize book covers, or anything else where the highest quality or largest print sizes are needed. Inkjet printers are used for low-volume quantity print runs since they can get expensive. 

The Imaging Center has two Epson P5000 printers, which can print up to 16.75” wide (17” paper) on various media. This is a great option for small photographs (5” x 7” or 8” x 10”) or banner-type work (15” x 60”). 

Turnaround Times

Your print job will be completed in the order it was received. 

The standard turnaround time for the desktop inkjet printers is approximately 1-2 full business days. This does not include weekends or holidays.

At this time, there are no “Rush” options available. Please be aware that during midterms and finals, turnaround times can increase up to 2-3 business days. 

Soft Proofing

Soft proofing is a representation or simulation on a computer monitor of what an image is going to look like on an output device, such as a printer. 

Soft proofing only simulates the appearance of an ink-on-paper proof, also known as a hard proof. The reliability of the soft proof depends upon the quality of the monitor, the profiles of the output devices, and the ambient lighting conditions of the working environment. 

Please rent an i1Display profiling device in order to color calibrate your monitor.

Color Management Information

Soft Proofing

Soft proofing is a representation or simulation on a computer monitor of what an image is going to look like on an output device, such as a printer. 
Read More

Color Systems & Color Spaces

Understanding RGB vs. CMYK vs. CMY The primary colors of light RGB (Red, Green, and Blue), represent a visual range that, in theory, can produce any c
Read More

Math 101

All of our inkjet printers are billed by the square foot. You are only charged for your image size and not the excess white paper. There are a few instances where the IC has sheets of inkjet media but the majority of all inkjet prints are printed on roll media.

This formula shows how to calculate the final price of your print job. All measurements must be in inches. 

Length” × Width” = Square Inches”

Square Inches” / 144 = Square Feet’

Square Feet’ × Paper Cost = Cost of Print

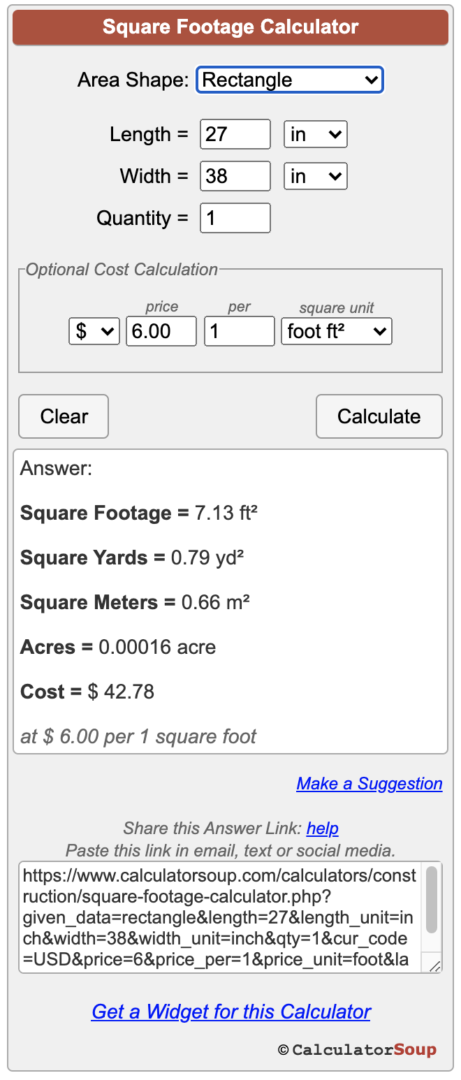
For example, if you wanted to print an 27” x 38” image on the Epson 9900 on Enhanced Matte.

Step 1: 27” × 38” = 1026”

Step 2: 1026” / 144 = 7.125 sq. ft.

Step 3: 7.125 (round up to 7.13) sq. ft. × $6.00 = $42.78

The total cost for this print job would be $42.78 before tax and $45.35 after tax.

To figure out the price of your poster with tax, multiple the before-taxed amount by $1.06. 

Calculator

Square Foot Calculator

Test Strip Package

The Imaging Center offers a FREE test strip package for our inkjet printers. This includes the Plotter/Graphic Inkjet printer and our Desktop and Wide-Format Inkjet printers. Test strips are highly recommended because they allow you to see exactly what the final print will look like. A test strip or hard proof is the most accurate kind of proof since it is an actual print made using the same materials that will be used to make the final print. Test strips should be checked for color accuracy, contrast, and resolution. 

If you would like to do a test strip, please fill out an Inkjet Test Strip form.

Test strips can take up to 1 business day. Once you are satisfied and “approve” your print, you may then submit the final order for the full-sized image. Remember to save your test strip file in the same exact way as your final image (.jpg test strip for a .jpg final print OR a .pdf test strip file for a .pdf final print).

Once a test strip has been approved, the file can be submitted for processing. Complaints will only be considered if a test strip was printed and approved by the customer. 

Test strips are FREE!! (within reason of course!). Students can print the same test strip for free on three different types of media.

Test strips should be no larger than 2” tall by the width of the document and contain areas of the file that offer the best representation of color and contrast. Please label the file test-strip.

Creating a Test Strip in Photoshop

From the toolbar, select the Crop Tool (c). You can specify the Crop options using the Control bar at the top.  

Choosing W x H x Resolution from the Aspect Ratio menu displays a Resolution field in the options bar and can auto-fill the Width and Height values.

Remember test strips can be 2” by the width of the document, in this case, 27”.

Creating a Test Strip in Illustrator

The quickest way to crop an image in Illustrator is to change the size of your artboard. 

Document Setup > Edit Artboards (Shift+O)

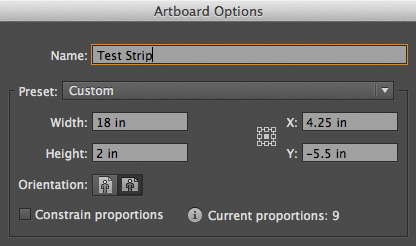
Enter the width and height of the test strip, in this case, 18” x 2”. You can also create a custom name for the test strip.  

File > Save As > Format > Adobe PDF (Print)        

General Information about Inkjet & Plotter Printing

All of the IC inkjet printers process through the same RIP software, Onyx Thrive.  

Each of our print media is color profiled with an i1Pro 2 Spectrophotometer utilizing the i1Profiler software. 

All inkjet printers are on a regular maintenance schedule with nozzle checks and print head alignments. The printers are color profiled at the start of each semester and are adjusted as necessary throughout. 

Crop “corners” can be requested for all inkjet print jobs, however, if you require true crop marks, you must export the file with crop marks.

By default, the Imaging Center will print your image in the center of the paper roll. We can not determine the white border on your image. If you need a 1” white margin on each side of your image, save that within your file in addition to crop marks. You will be charged accordingly.

If submitting a PDF with multiple pages, make sure to note the different image sizes on the print request form.

The Imaging Center may “gang files up” in order to provide quicker turnaround times and to save media. This will not affect your price quote as the IC bills by the square foot of the image. If files are “grouped together”, there will be at least .5” between each image.  

Remember to outline all of your type before saving/exporting your file as a PDF.

Turnaround Times

Your print job will be completed in the order it was received. 

The standard turnaround time for the plotter & inkjet printers is approximately 1-3 full business days. This does not include weekends or holidays.

At this time, there are no “Rush” options available. Please be aware that during midterms and finals, turnaround times can increase up to 2-3 business days. 

If you would like to do a test strip, please select the “Please print a test strip” option. Test strips can take up to 1 business day. Once you are satisfied and “approve” your print, you may then submit the final order for the full-sized image. Information on test strips can be found HERE

You will be notified via your CCS email when your job has been completed.