Welcome to using Zoom at the College for Creative Studies. Zoom is a web-based system that combines video conferencing, online meetings, and mobile collaboration into one platform. When you sign up for Zoom you will automatically be given a Basic Account. With the Basic Account you can hold meetings with three or more participants for up to 40 minutes at a time. If your meeting has two participants (host and one additional participant) your call time is unlimited. If your meeting has three or more participants and will take longer than 40 minutes, please contact the Helpdesk with your request for a temporary upgrade to a Licensed Account. This guide will walk you through how to set up your account, schedule a meeting, and manage your audio and video.
Accessing Your Account
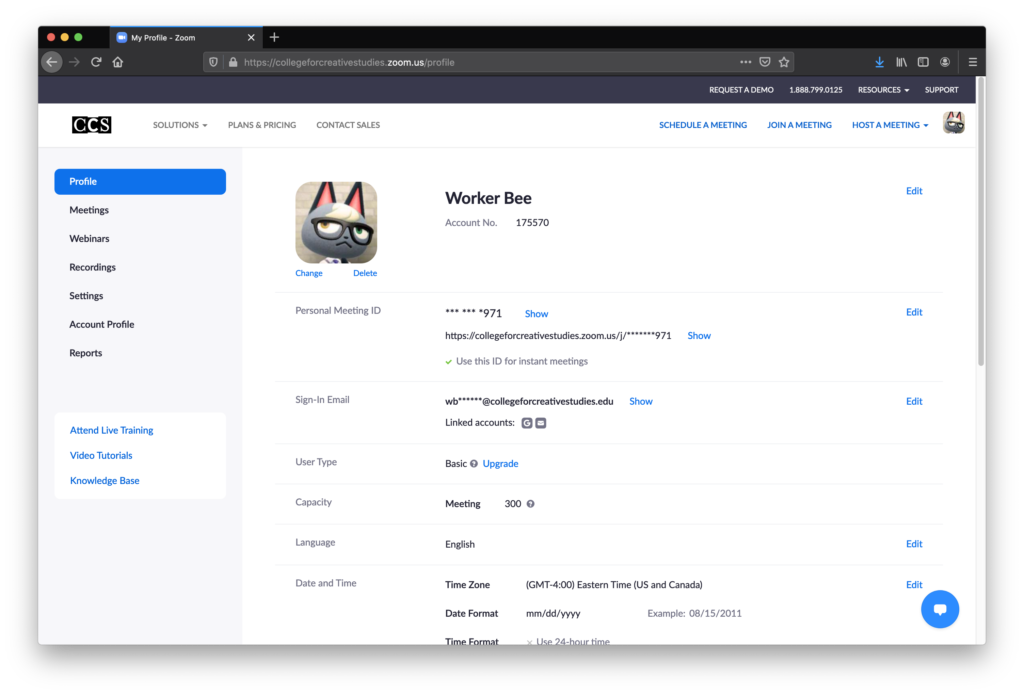
Set Your Profile
Log in to your account. On the left side of the webpage you will see that you are viewing “My Profile.” Here you will find your account information. Take a moment to upload a profile picture and make any edits you see fit.
Schedule a Meeting/Class
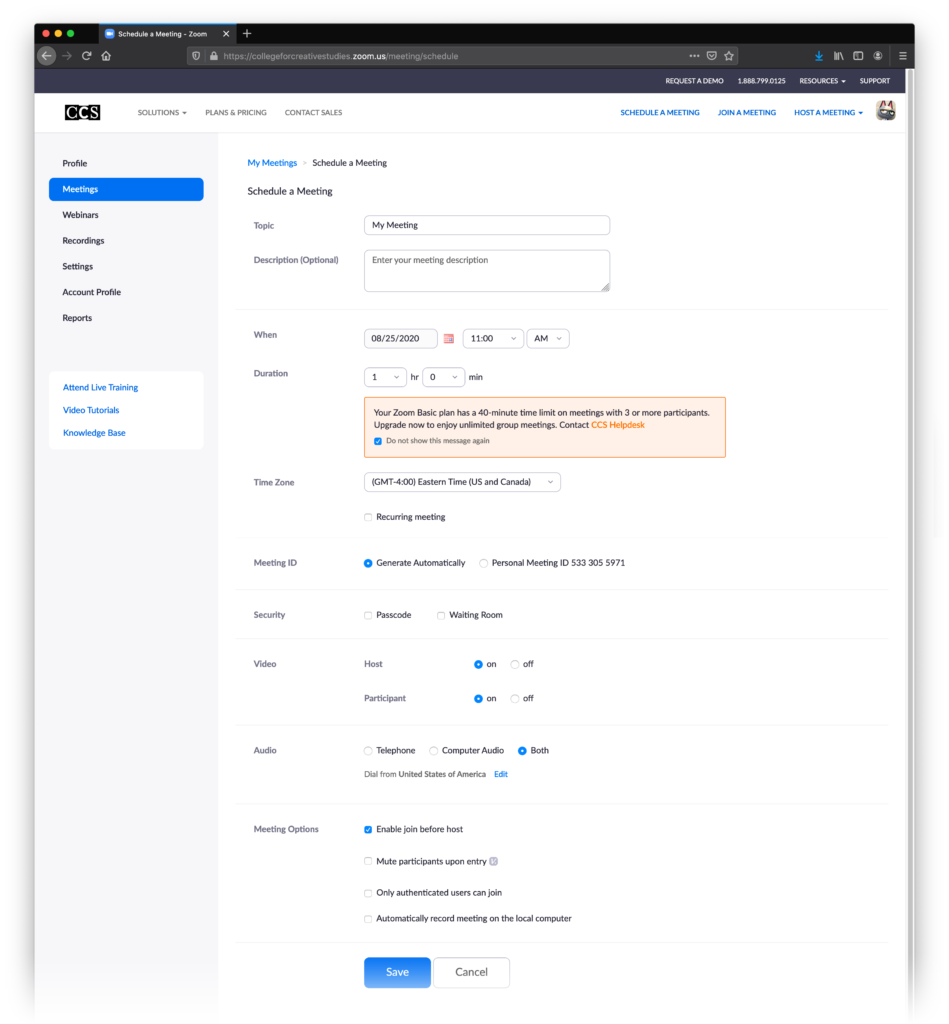
- Log in to your account. In the upper right, click Schedule a Meeting.
- Set the meeting details, including a Topic for your meeting, the Date and Time, Duration, Host and Participant Video On (recommended), Audio option Both, Enable join before host (recommended), and Enable waiting room (recommended). If your meeting needs to be more secure, select Require meeting password.
- Press the Save button at the bottom of the page.
- On the Manage My Meeting page you will see the URL that your
meeting has generated for others to join, as well as a generated invitation email that you can copy and paste to your attendees.

Host a Meeting/Class
- Log in to your account and go to My Meetings on the left menu.
- Click Start next to the meeting you wish to begin.
- Once you click to start a meeting, a pop-up may appear asking for an “External Protocol Request to Launch the Application.” Click Launch the Application.
Managing Audio
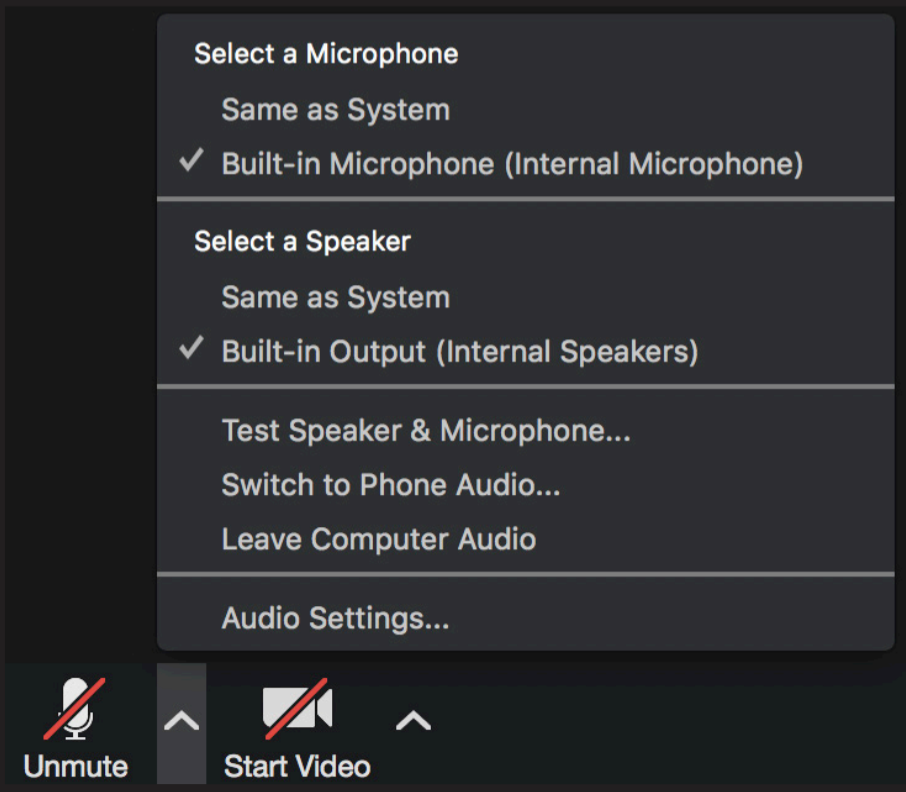
Once you have joined the meeting, a pop-up will appear asking you how you want to join the audio conference – by computer or by phone. Using the computer audio is recommended. You can choose to test the sound via computer before you join to ensure the audio is clear. If it is not, using a conference phone is suggested. Click the “Join by phone” button to access the dial in numbers. Once you have selected your audio, in the bottom left corner of the control bar you will see a microphone icon. You can mute and unmute your microphone by clicking the icon. You may also click the arrow to the right of the icon to see more audio preferences.
Managing Video
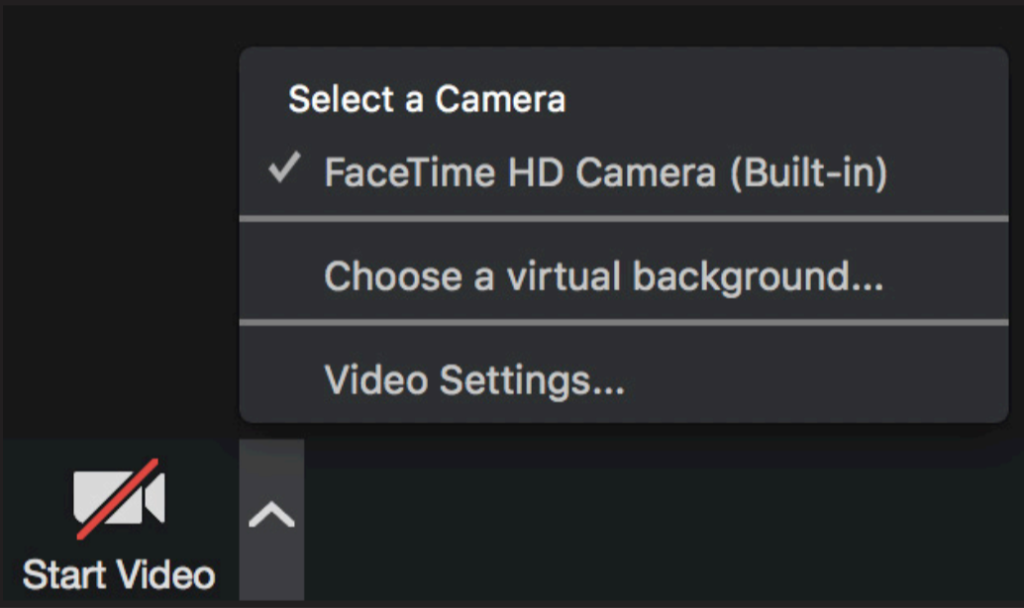
Your webcam should connect automatically if you selected video to “On” for the start of the meeting when you created the meeting invitation.
You will see a camera icon next to the microphone icon in the bottom control bar. You can stop and start the video by clicking on the icon. You may also click the arrow to the right of the icon to see more video preferences.
Managing Participants
Remote participants will enter a “waiting room” to wait to be admitted to your meeting. The waiting room has CCS branding and a message that their meeting will begin shortly. The Waiting Room feature allows you to admit participants to your meeting when you are ready. If you have back-to-back meetings scheduled, the Waiting Room also keeps participants from joining in the middle of a meeting in progress. You, the host, will receive an audio notification (ding) and the name of the participant when someone has entered the Waiting Room.
To admit someone from the Waiting Room into the meeting, select the “Manage Participants” button from the bottom of the window.

This will open a new pane on the right side of the Zoom window labeled “Participants” from which you can admit attendees in the waiting room to the meeting proper.
Sharing the Screen
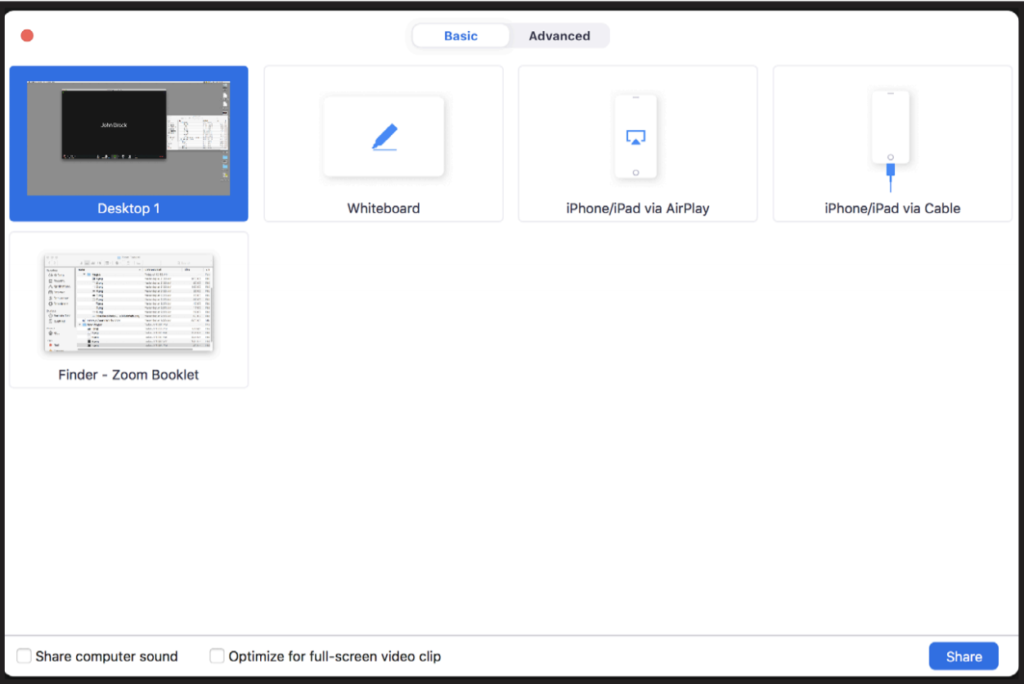
You can choose to share your screen to show presentations, documents, web browsers, and videos. To do this select “Share Screen” in the control bar. A window will pop-up asking what you wish to show; make the selection.
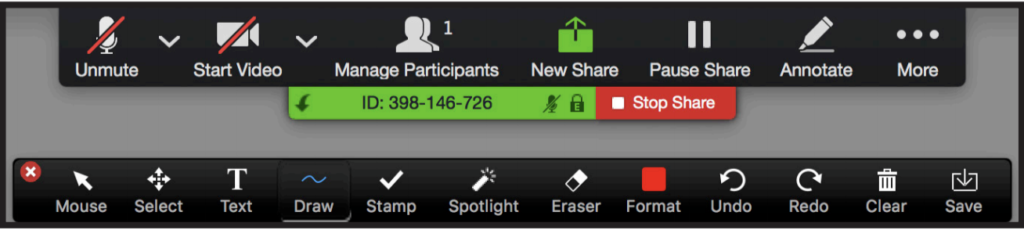
The control bar will remain at the top of your desktop while you are sharing your screen. You can choose to share something new by clicking the “New Share” icon, or stop sharing your screen by selecting “Stop Share.”
When you choose to share your screen there is also an option to use a Whiteboard for collaboration. To save your Whiteboard in a screen shot, select “Save” in the annotation control bar.
This will save in a folder titled “Zoom” in your documents folder on your hard drive as a png file..
Using Annotation
While you are sharing your screen, you can choose to make annotations on your presentation, video, etc. To do this, go to the top of your screen in the control bar and select “Annotate.” You can draw, add text, spotlight your cursor, etc.
To save your annotation notes in a screen shot, select save in the annotation control bar. This will save in a folder titled “Zoom” in your documents. The files are titled by “Year-Month-Date-Time” to make it easy for you to find.
To clear your annotations select “Clear” in the annotation control bar.
You will have the option to upgrade the attendees privilege to host once they have entered the meeting. This will give different annotation abilities. For more information please contact Academic Technologies at 313-664-1501.
Recording the Meeting/Class
You also have the option to record your meeting. Once your meeting has started, you will see a Record icon in your control bar. Press this to begin recording.
The meeting will record an mp4 file every time the record option is
started and stopped. The file will save to a folder titled “Zoom” in the
documents folder on your computer.

Ending the Meeting/Class
When you are ready to end your meeting, please press the “End Meeting for All” button. For Basic users, please keep in mind that your meeting will be limited to 40 minutes. A 10 minute countdown warning will pop up after 30 minutes. If you require your meeting to last longer than 40 minutes, please contact Information Technology Services.