The College for Creative Studies utilizes a third-party tool called Simple Syllabus that integrates with our Canvas LMS (Learning Management System). Simple Syllabus contains all the elements you need to create your course syllabus that your students can view within your Canvas course. Faculty update their Simple Syllabus document, and then it is approved by the Chair/Program Manager of the associated department.
- Accessing and Editing Your Simple Syllabus in Canvas
- Submit Button is Grayed Out
- Additional Resources
Accessing and Editing Your Simple Syllabus in Canvas
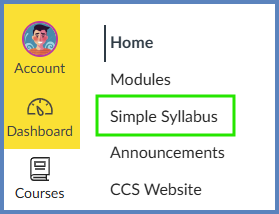
- To access your Simple Syllabus document within your Canvas course, in Course Navigation, click the Simple Syllabus link.
- The location of this link may vary from course to course depending on how you’ve organized your course navigation.
- When you first view your syllabus, content is automatically copied from the previous semester—provided you have access to both courses in Canvas. If the content does not copy over, please contact the ET+I team at CCS for assistance.
Simple Syllabus Not Visible in Course Navigation?
If the Simple Syllabus link is not visible in your Canvas course, use the following Guides to enable it within your course:
Configuring Course Navigation
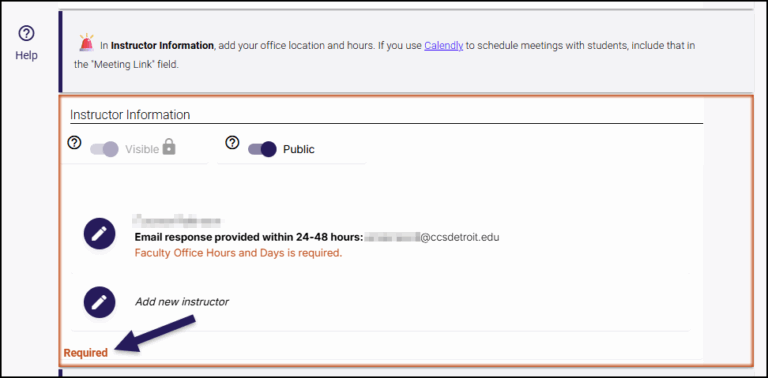
- Read the instructions for each component of your Simple Syllabus. Instructions appear in gray boxes with a purple vertical bar (shown below). Information boxes with a 🚨 red siren icon need your attention.
- Depending on the component, click on the ✏️ pencil icon, or click within the Rich Text Editor to begin editing your Simple Syllabus document.
- Some components will already be filled in for you and will not be editable while other components will be editable.
- Some components may be required while other components are optional. Required components will have a Required label shown in the bottom left-hand corner.
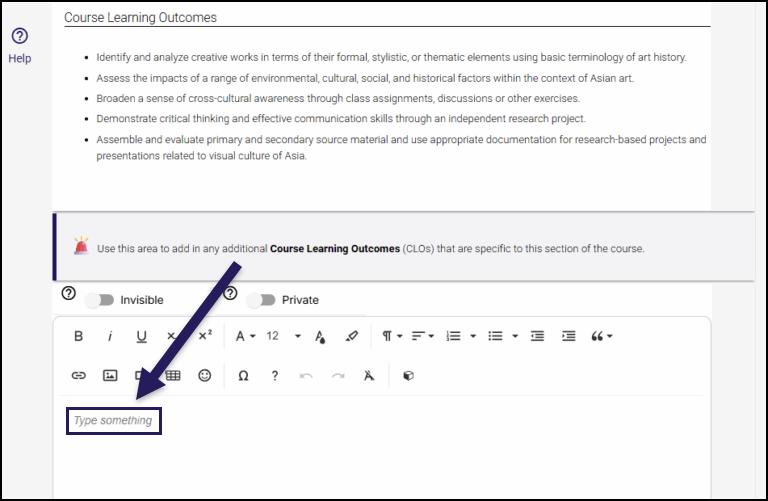
Components like Course Learning Outcomes (CLOs) are automatically populated by the College. However, you can add section-specific details in the separate text box provided below. Look for the help text marked with a 🚨 red siren icon.
- Optional: At the bottom of your Simple Syllabus, next to the Submit and Preview buttons, you will find a space for an Internal Comment. Use this space to provide further details on what you edited within your Simple Syllabus document.
- Once you have made edits to your Simple Syllabus document, click the Submit button at the bottom of the screen to submit changes for approval from your Chair/Program Manager.
Submit Button is Grayed Out
If the Submit button is grayed out and you cannot submit your Simple Syllabus document, this means required information is missing from your Simple Syllabus document.
- Click on the ❗ exclamation point icon. A Warning message will appear on the bottom right corner of your screen.
- Click on the link(s) within the the Warning message. Simple Syllabus will bring you to that component within your document.
- Example: Required Texts/Materials/Supplies

- Edit those areas of your Simple Syllabus document that are required.
- Example: Click on the ✏️ pencil icon to add the estimated cost of books and supplies.
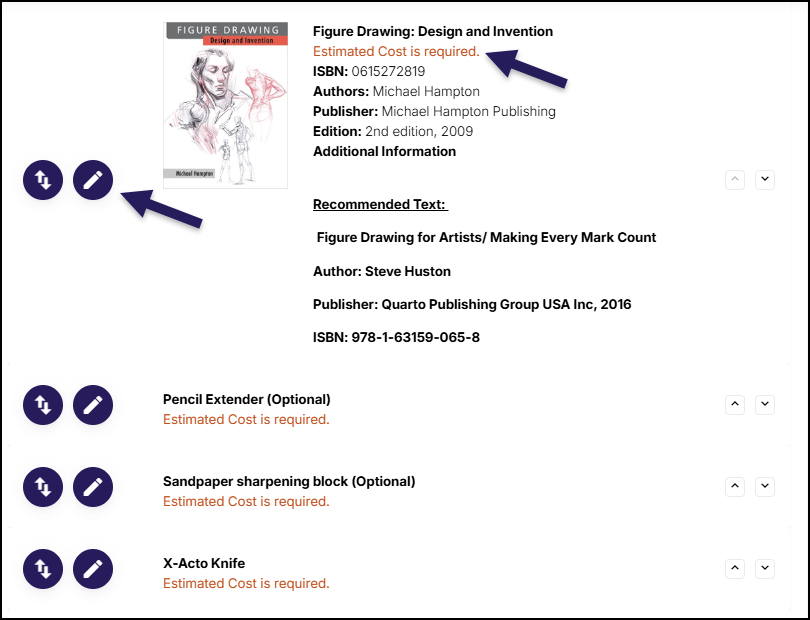
- Click the Submit button at the bottom of the screen.