Processing a Travel & Expense Reimbursement
Please refer to the Travel and Entertainment Policy for all rules and guidelines
For meal reimbursements, an itemized receipt is required. If an itemized receipt is not submitted, the meal will not be reimbursed. Credit card authorization slips are not acceptable as documentation for meals.
- Complete the Travel & Expense Reimbursement Form. If you are filling out the form on behalf of a student or an employee, please select the “This form is being filled out on behalf of someone else”. If paying an individual, include their legal name.
- Attach any required backup documentation (itemized receipts) to the form in Softdocs.
- The form will route through the approval workflow and ultimately reach Accounts Payable for processing in the next scheduled check run.
Submitting a Form via Softdocs
The Business Office uses Softdocs for all internal and external forms.
Once signed in, you will be taken to your Central Dashboard, which includes tabs for Submissions, Forms, and various Documents.
Click on Forms and use the arrows to navigate through the forms available within the Business Services Department.
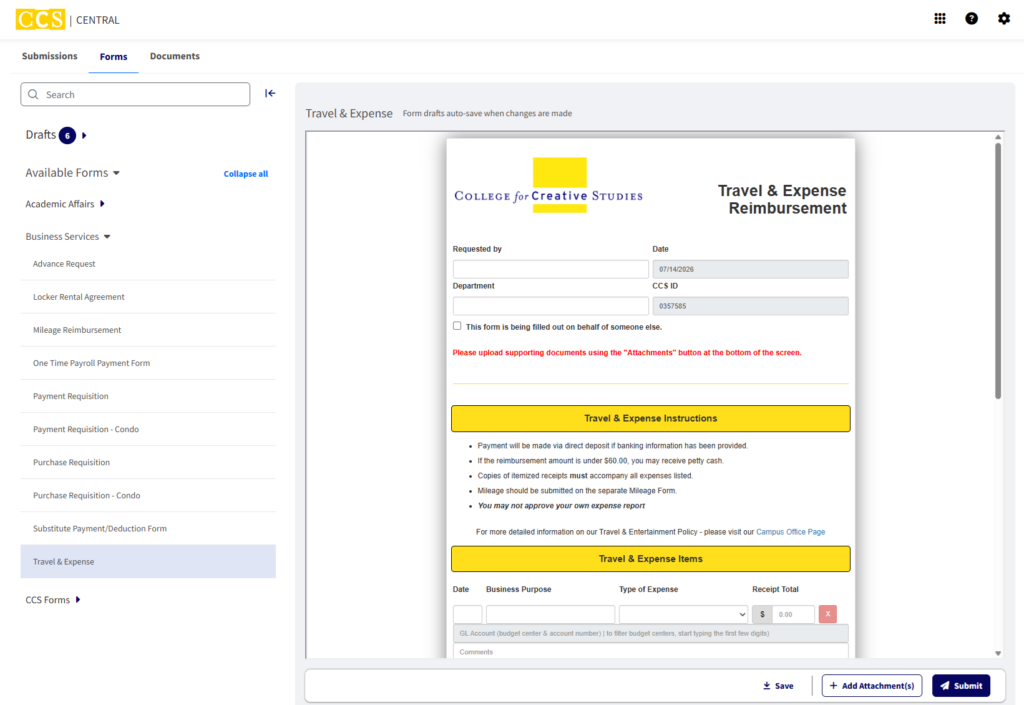
Once a form is selected, you can view and complete it directly within the dashboard. Form drafts automatically save whenever changes are made. Many fields, including Department, Vendor, Address, and GL Account information, will auto-populate based on the information entered.
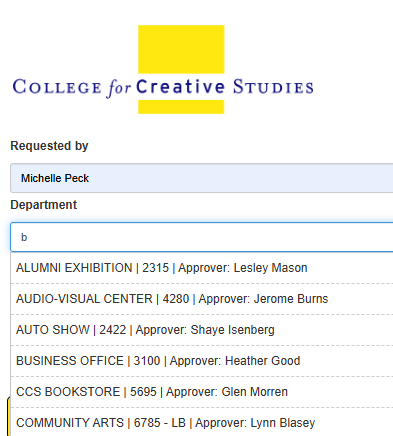
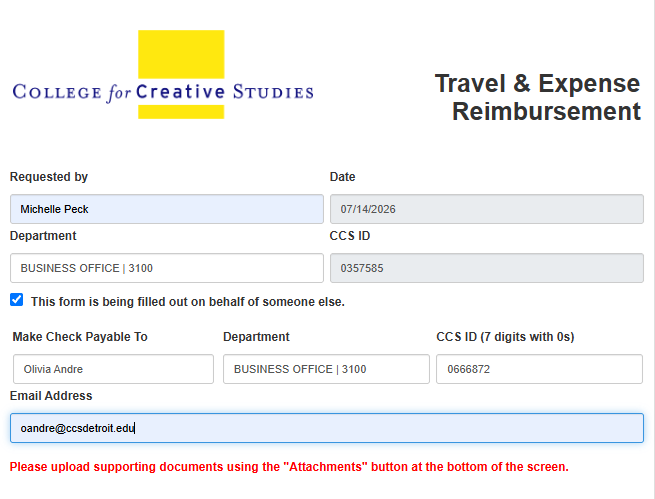
The Travel & Expense Reimbursement form uses logic from Colleague/Self-Service to route requests to the employee’s supervisor for approval. If the person requesting the reimbursement is not an employee (for example, a student participating in a club), the form will instead route to the authorized signers for the selected department.
This routing logic is based on the CCS ID number. Please be sure to enter the leading zero so the ID is entered as a 7-digit number.
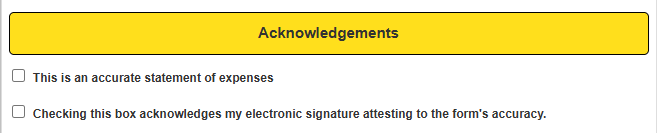
If you are completing the form for yourself, check the acknowledgement boxes before submitting. If you are completing the form on behalf of someone else, leave these boxes unchecked. The form will automatically route, behind the scenes, to the internal email address entered in the On Behalf Of section so that person can review and complete the acknowledgements before the request continues through the approval workflow.
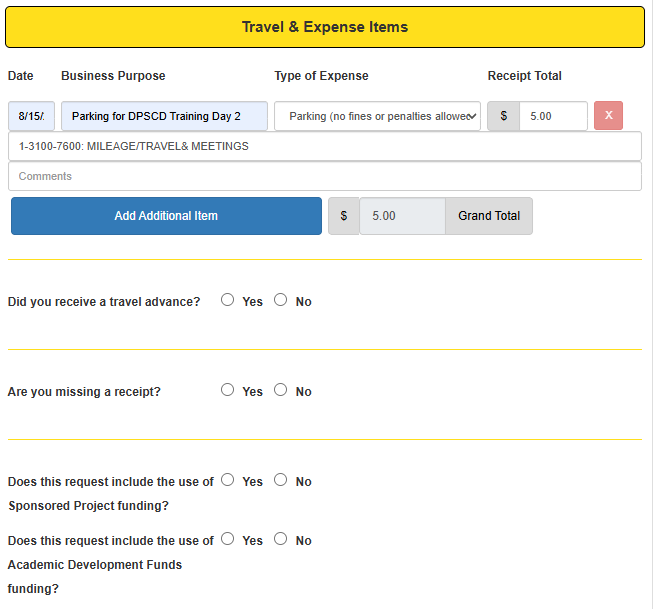
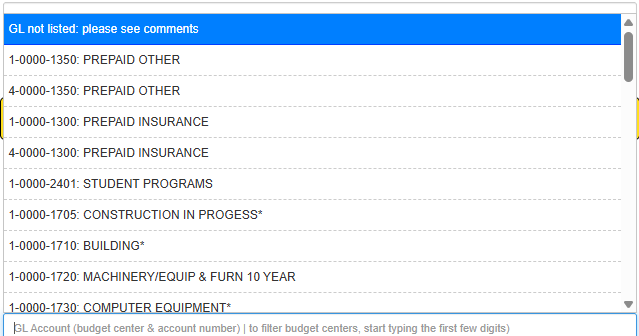
The GL Account field will also auto-populate based on your security settings within Colleague/Self-Service. Please allow a few moments for the list to load if your GL Account does not appear immediately.
Only the first 50 GL Accounts will be displayed. If you are responsible for multiple budget centers, begin typing the first few digits of the GL Account (for example, 1-3100) to narrow the search.
If your GL Account is still not listed, please select “GL not listed: please see comments” from the drop-down menu.
The forms are designed to calculate pricing and route requests to the appropriate authorized signers. They will also automatically route to any departments that may need to review or approve sponsored project funding, technology requests, capital project funding, or other specialized requests.
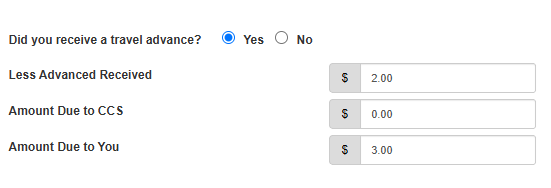
If you received a travel advance, select Yes and enter the amount you received in the Less Advance section. The form will automatically calculate whether any funds are owed back to CCS or whether you are due an additional reimbursement.
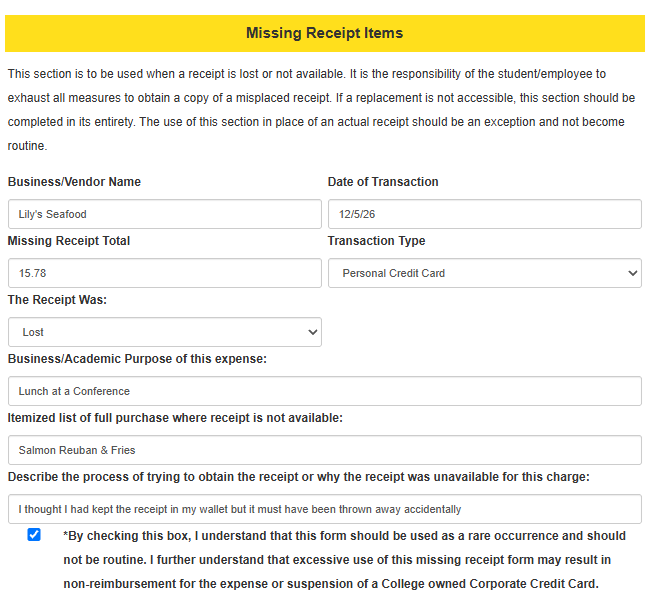
If you are missing a receipt, select Yes and complete the Missing Receipt section in its entirety. This section should only be used as an exception when a receipt is unavailable and should not become a routine substitute for original receipts. You will also be required to acknowledge that the information provided is accurate and that the receipt is unavailable.
The Softdocs workflow uses built-in logic to automatically route your form to the appropriate approvers behind the scenes.

If attachments are required, use the Add Attachment(s) button at the bottom of the form. When you are ready to submit your request, click Submit.

The approval workflow takes place behind the scenes and will automatically route the form to the appropriate individuals and departments for review and approval.
Once your Payment Requisition has been submitted, you will receive notifications throughout the approval process. You will receive email notifications when your request has been approved, denied, or returned for additional information or revisions.
What if I am an Authorized Signer?
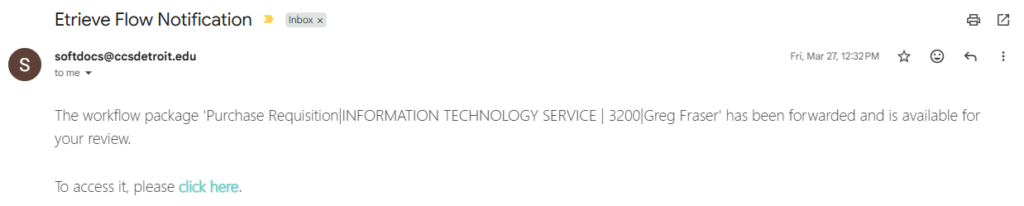
If you are an Authorized Signer receiving a form for approval, you will receive an email notification when a package (form) is ready for your review and signature.
Once you have logged in, you will see all of your package submissions. Click the package you would like to review to view any uploaded attachments or supporting documents.

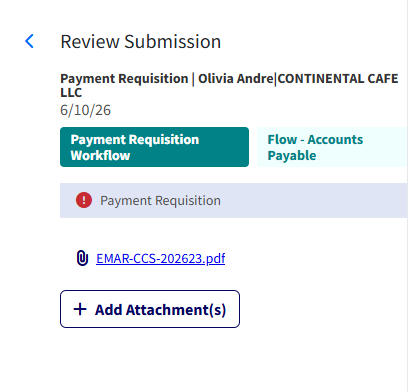
When you are ready to take action, the Approve, Decline, Return, and Refer options are located at the bottom of the form.
Selecting Approve will move the request to the next step in the workflow.
Selecting Decline will reject the request and end the approval process. The originator will receive an email notification informing them that the request has been declined.
If additional information or revisions are needed before a decision can be made, you may select Return to send the form back to the originator for updates. Once the requested changes have been made, the originator can resubmit the form for approval. The Refer option allows you to route the form to another individual for review, input, or action before the approval process continues.

Support and Training
We want to make this transition as smooth as possible for everyone. Here is how you can get help:
Technical Issues: Please direct all technical questions to ITS by submitting a helpdesk ticket. For example, submit a ticket if you are unable to attach a supporting document.
1:1 Training: You can schedule a personalized session by reaching out to any member of the Business Services team by emailing us at busserv@ccsdetroit.edu