In Using the MultiTool’s Template Builder, we cover how to create template pages for your Canvas course(s) that you can use to quickly build your content. Here, we will look at the MultiTool’s Module Builder. The Module Builder is a tool that lets you build out the structure of your course on one screen. You can also assign any of the templates you build via the Template Builder to items you want to include in your course using the Module Builder. (You will still need to fill in your course pages with content relevant to the topic.)
Accessing the Module Builder
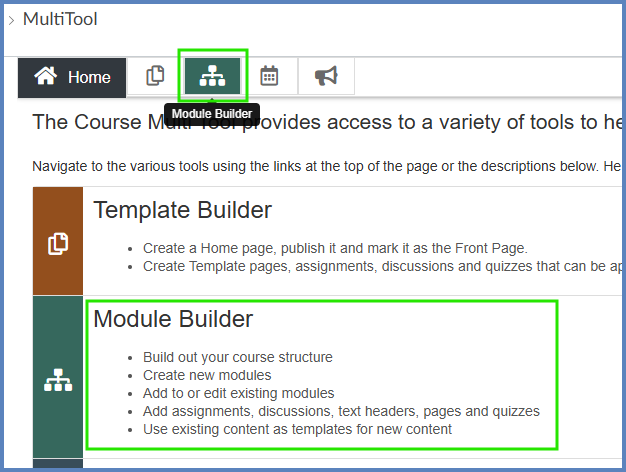
- In Course Navigation, click the MultiTool link.
- If you do not see the MultiTool link in your Course Navigation, refer to Streamlining Student Navigation: Course Navigation.
- On the MultiTool screen, click on either the Module Builder icon or the Module Builder description.
Existing Modules
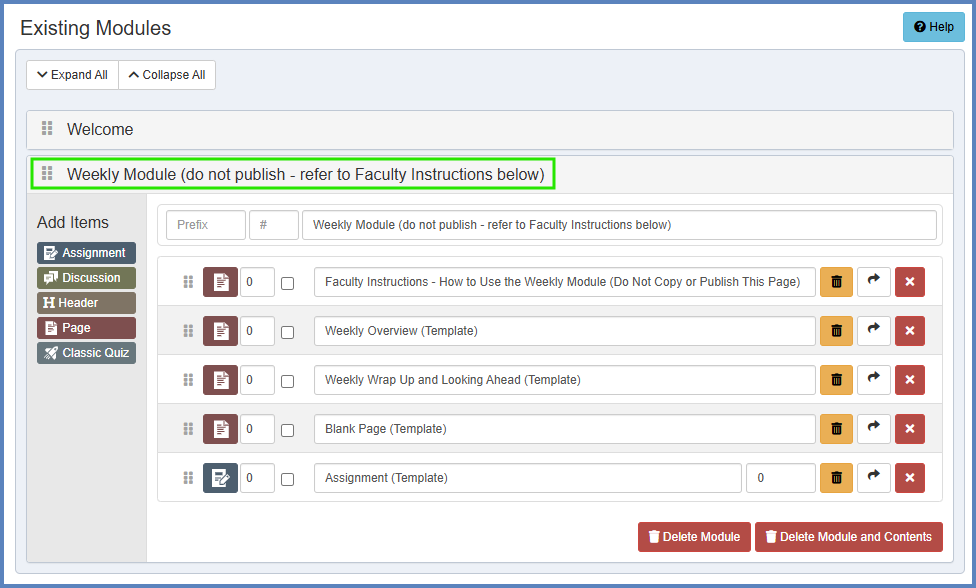
The Existing Modules section will display any modules you have in your course. In this example, there are two modules: Welcome and Weekly Module (do not publish – refer to Faculty Instructions below). Click on the name of a module to view the different content items that are within it. In this example, there are three Pages and one Assignment.
New Modules
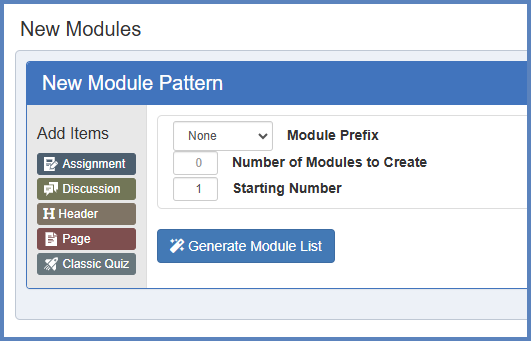
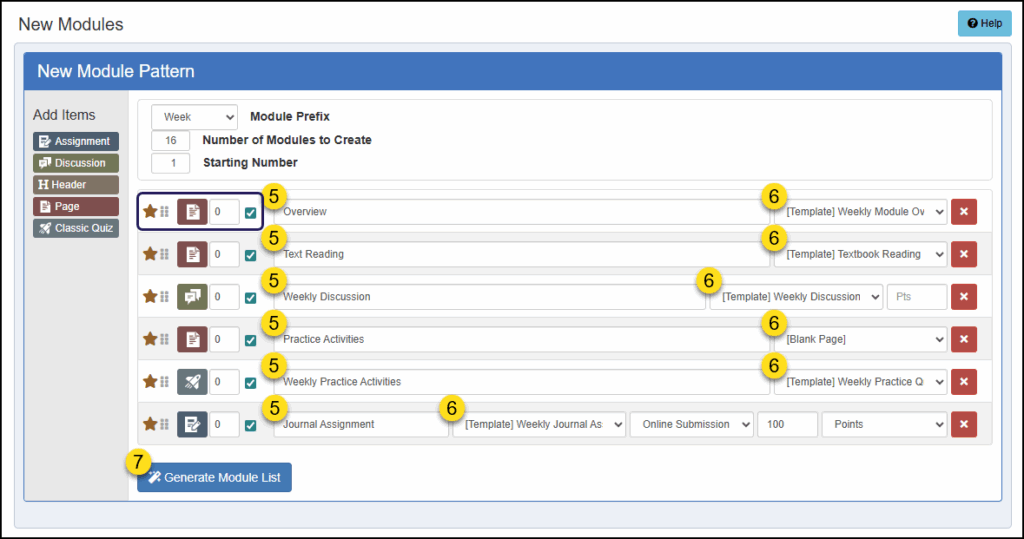
The New Modules section of the Module Builder allows you to build out the pattern of what your weekly modules will look like in Canvas.
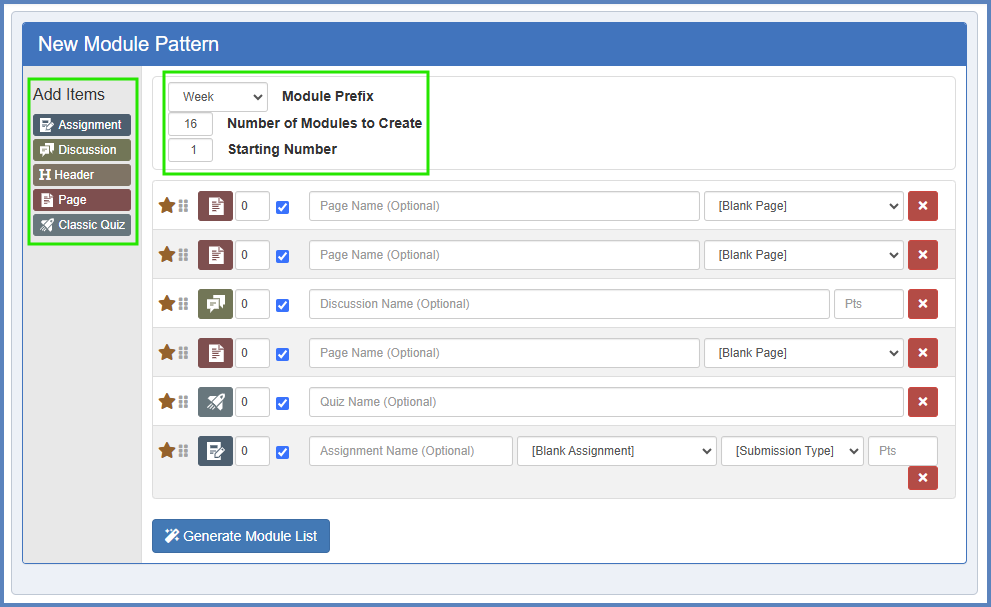
- From the Module Prefix drop-down list, select the prefix name you’d like to use for each of your modules. In this example, we selected Week.
- Enter in the Number of Modules to Create. In this example, we entered 16.
- Enter in the Starting Number. In most cases, this will be 1.
- Under the Add Items heading, click on the Assignment, Discussion, Header, Page, and/or Classic Quiz buttons to add them to your module pattern. This pattern is how you want each of your modules to look within your course. You can add as many items as you want…including multiples of the same item type.
You can later add additional items to specific weekly modules, and you can remove items from specific modules as well.
Example
Imagine that you wanted each of your modules to have the following structure/layout:
– Overview page
– Text Reading page
– Weekly Discussion page
– Practice Activities page
– Weekly Practice Quiz page
– Journal Assignment page
Once you decide on your module structure, and after you generate your module list (end of Step #6 below), you can add and/or remove items (step #7 below) from any of your modules so that your modules contain exactly what you want for your students.
- Enter in the names of your pages. For example, if each of your weekly modules will have an overview for the week, you might title that page Overview.
- If you need to re-arrange any of the items you’ve added to your module pattern, use the six vertical dots icon to the right of the ⭐ star icon to click and grab the item. Move the item up or down as needed.
- Change the number to the left of the ✅ checkmark to indent any items within your module.
- Use the ✅ checkbox to decide whether or not you want the module information as part of the item title. For example, “Week 1: Overview” vs. “Overview”.
- Use the drop-down list to the right of each textbox name to select the template page you designed for your course.
- This is where designing your templates using this Guide is helpful: Using the MultiTool’s Template Builder.
- Click the Generate Module List button to begin generating the modules for your course. NOTE: This will not actually create the modules on your Modules index page just yet. That step is still coming.
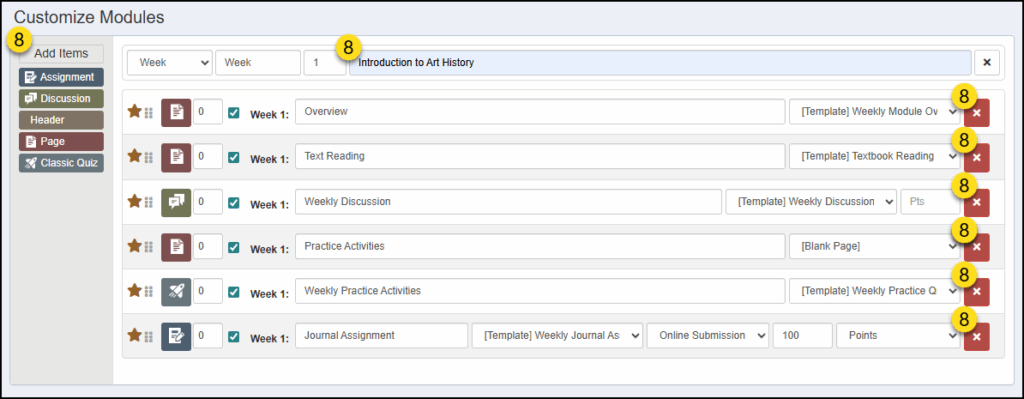
- The Module Builder tool will generate a listing of each module that will be in your course. Review the details for each item within your modules. For example:
- Add a title for each of your weekly modules. In our example, we named the first module, “Introduction to Art History”.
- Add additional items to a module using the Add Items buttons on the left side of each module.
- Delete items from your module that you do not want to include within the module using the ❌ icons on the right side of each module item.
- You still have full control to do other things to each module including: using a different prefix (“Chapter”, “Lesson”, “Unit”, etc.), re-ordering of items, indenting, unchecking the ✅ checkbox to remove the prefix, changing the names of your content pages, and choosing different templates.
- For Discussion and Assignment types, some additional choices will become available if you want to make these items graded.
- Click the ➕ Save Progress button if you would like to save your progress and come back to it at a later time. Take note of the ⚠️ Caution message, however.
- Click the ➕ Add Modules to Course button to let the Module Builder add all the modules and content items to your course.

Additional Resources
Module Builder: [New] DesignPLUS User Guide
Cidi Labs (the folks behind DesignPLUS) provides a tutorial on using the Template Builder. This video will start at the 8:25 mark. Watch through 15:25.