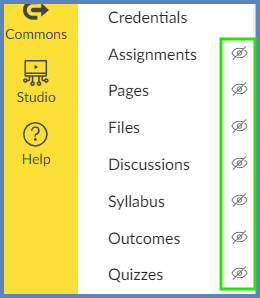
You can configure your course navigation along the left-hand side of your Canvas course for you and your students.
Course Navigation
First, we will adjust the course navigation to focus students’ attention to the areas of greatest importance. To do this:
- Log into your Canvas course.
- In Course Navigation, click the Settings link.
- Select the Navigation tab at the top of the screen.
- You will see two lists. The top list contains course navigation menu items that are visible to your students. The bottom list contains course navigation items that are hidden from your students.
- Hidden course navigation items will have a crossed-out eye icon next to them within your course.

- Click and drag a course navigation item from either the top or bottom list, and move it to the other list…depending on your desired preferences.
- Alternatively, click on the Edit Course Navigation (three vertical dots) icon next to any item in either list, and select one of the following options: ➕ Enable, ❌ Disable, or ↕️ Move.
- Click the Save button at the bottom of the screen.
Using fewer navigation options is recommended. For example, you can keep Assignments, Pages, Discussions, Quizzes, and Files hidden, since students will access these items through Modules.
Additional Resources
How do I manage Course Navigation links?
Making Items Visible in Canvas Course Navigation