
It is necessary to have your Canvas Gradebook configured properly prior to setting up your Simple Syllabus. In this Guide, we’ll take a look at weighted assignment groups, the assignments within those assignment groups, and the integration with Simple Syllabus.
NOTE: All assignments listed in your Canvas Gradebook are listed on your Assignments index page.
Assignment Groups
In Canvas, you can create Assignment Groups to group all similarly-typed assignments together. Additionally, you can weight those Assignment Groups (see below) for use in your Canvas Gradebook.
In your Simple Syllabus document for your course, look at the Basis for Final Grade section. The names and percentages listed here should match the Assignment Groups names and weighted percentages in Canvas.
For example, you might have three Assignment Groups for your course: Assignments, Exams, and Discussion Topics. By default, every Canvas course has a minimum of one Assignment Group (called Assignments), but you can re-name all Assignment Groups to meet your course needs.
Creating Additional Assignment Groups in Your Canvas Course
Enable Assignment Group Weighting
These steps assume that the option to Weight final grade based on assignment groups has been enabled in your course. To verify this, skip to the next section on this page, Verify Weighting. Then, return to this section if you need to add additional Assignment Groups to your course.
- In Course Navigation, click the Assignments link.
- Click on the ➕ Group button on the upper right corner of your screen.
- In the Add Assignment Group window that appears, add a Group Name.
- If you are weighting your Assignment Groups, add a number to the % of total grade text box.
- Click the Save button.
Your new Assignment Group will be added to the bottom of your Assignments index page.
🆕Removing Unused Assignment Groups in Your Course
Please refer to Unused Assignment Groups in Canvas Courses.
Verify Weighting
Once your Assignment Groups have been created, you will want to verify that your Assignment Groups are properly weighted.
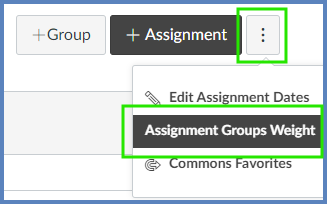
- In Course Navigation, click the Assignments link.
- Select the Options (three vertical dots) icon on the upper right corner of your screen.
- Select Assignment Groups Weight.
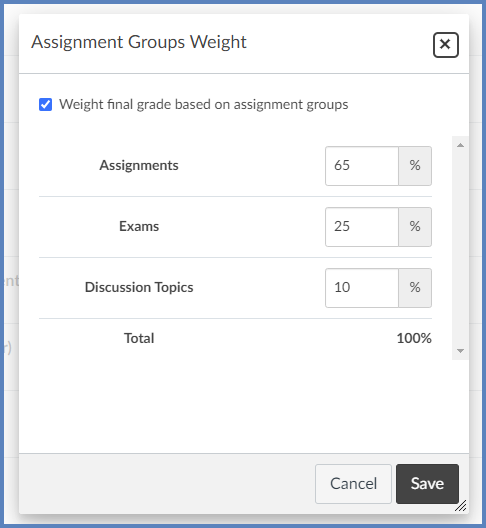
- Select the Weight final grade based on assignment groups checkbox (if not selected already).
- Verify that the percentages for each of your Assignment Groups adds up to 100%.
- Click the Save button.
Each weighted percentage will display on the right-hand side of the Assignment Group name on the Assignments index page.

Verify Assignments
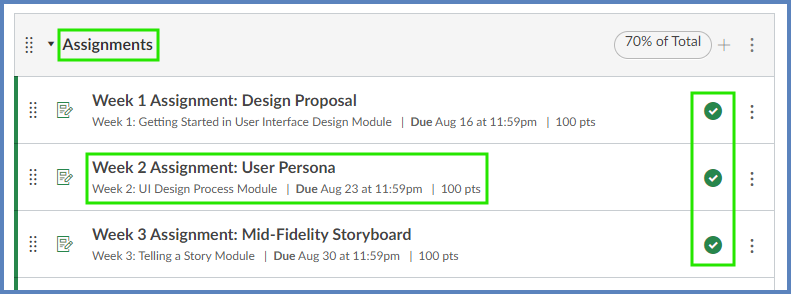
To verify your assignments are set up properly in your Canvas Gradebook:
- In Course Navigation, click the Assignments link.
- Check that each assignment is:
- within the appropriate weighted group.
- properly titled, has a due date, and is set to 100 points.
- published.
Simple Syllabus
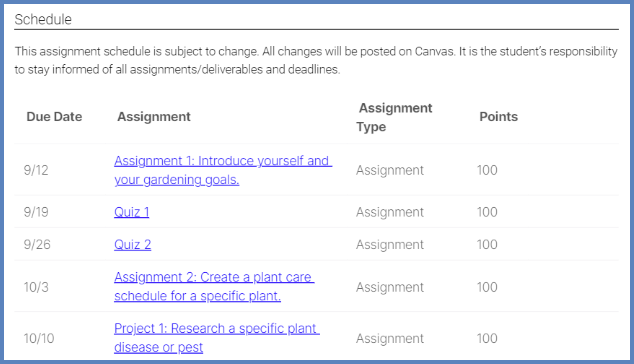
Any changes made to assignments may take up to 24 hours to synchronize with Simple Syllabus. However, we’ve found that Simple Syllabus synchronizes almost immediately with Canvas. The Schedule section of Simple Syllabus will automatically list all assignments and include links to those assignments.
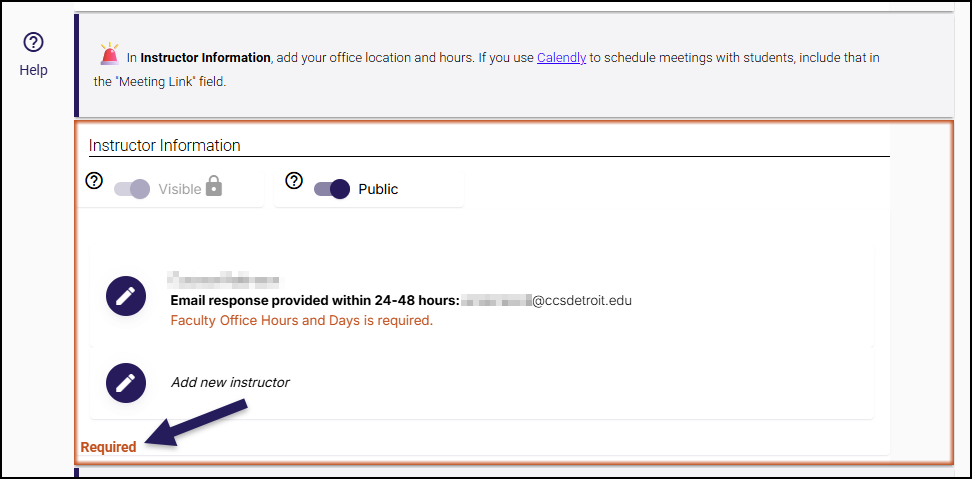
Some Simple Syllabus components are already set by CCS or your department and cannot be edited. Other components (Example: “Instructor Information” shown below) can be edited by faculty.
Once all components are complete, click the Submit button at the bottom of the screen to have it sent for approval by your department. Once approved, students will be able to see your Simple Syllabus in the course navigation of the respective Canvas course.
Note:
- Students will only be able to view approved syllabi. If any changes are made and submitted, students will see the previous syllabi until the changes are approved.