- Import the [Content Blocks] Resource from Canvas Commons
- Edit the [Content Blocks] Page in Your Canvas Course
- Duplicate a Content Block on the [Content Blocks] Page
- Add Content Block to Your Content Page
- Additional Resources
Level: Intermediate
This Guide is designed for those who have an intermediate level of knowledge with the DesignPLUS sidebar. If you would like to walk through the processes outlined below with the ET+I team at CCS, please contact us at EdTech@ccsdetroit.edu.
Imagine that you were building a course where some of the exact same information was repeated on multiple content pages. For example, maybe part of your directions on how to post responses to an online discussion topic are the same from week to week. One of the nice features of DesignPLUS is the ability to create reusable content blocks in your course that you can bring into your content pages without having to type in the same information over and over again each time. Content blocks are like chunks of content that you can build within your Canvas course(s). Multiple content blocks can be added to a content page in your course, and they keep your content organized by using proper heading structures to meet accessibility standards.
If a scenario like this might apply to one or more of your Canvas courses, continue following along with these directions.
Import the [Content Blocks] Resource from Canvas Commons
To begin, you will need to import a resource from Canvas Commons into your course so that you can begin creating content blocks. Follow these steps for each course where you want to add content blocks into.
- Log in to your Canvas course where you’d like to create reusable content blocks.
- On the right-hand side of the screen, click on the Import from Commons button.
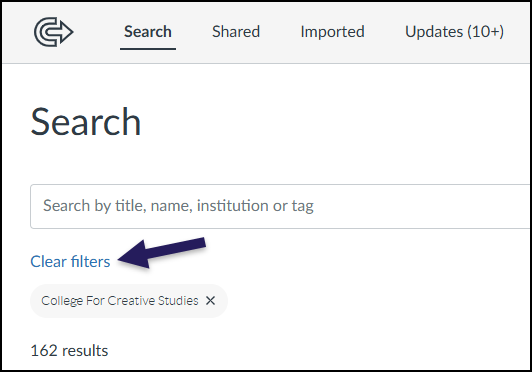
- On the left side of the Commons interface, click the Clear filters link to remove the College for Creative Studies filter that was applied.
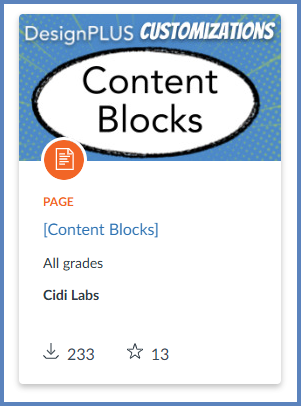
- In the Search field, type in the words content blocks. The [Content Blocks] shared resource from Cidi Labs should be one of the first search results. Click on the name of that item, [Content Blocks].
- On the right-hand side of the screen, click on the Import/Download button.
- In the fly-out menu that appears on the right-hand side of the screen, place a ✅ checkmark next to the course(s) where you’d like to import the [Content Blocks] shared resource page into.
- Click the Import into Course button to begin importing the shared resource into the selected course(s).
- The [Content Blocks] page only needs to be imported into a given course one time.
- To check the status of the import, click on the Settings page, and then select the Import Course Content link on the right-hand side of the screen. The item will be listed as a Canvas Common Cartridge with the date/time you initiated the import from Canvas Commons.
Edit the [Content Blocks] Page in Your Canvas Course
Once the [Content Blocks] page has been imported into your Canvas course, you can begin making edits to it.
- Navigate to the Pages index page of your Canvas course.
- Find and click on the [Content Blocks] page.
- NOTE: This page can remain unpublished in your course.
- Click on the ✏️ Edit button at the top right-hand corner of the screen.
When editing this page for the first time, you will see the following:
- Page Title called [Content Blocks]
- NOTE: It is important that you do not change the name of this page within your Canvas course.
- Content Blocks Customization area — Do not make any edits to this area above the gray dots. (Notice the div label at the top right corner.)
- My Custom Content Block 1 — This content block (and any others that you add below it) are completely customizable. (Notice the Content Block label at the top right corner.)
![A screenshot showing the edit view of a Canvas page titled "[Content Blocks]" after it has been imported. The image is marked with three yellow letters: 'A' points to the Page Title field, 'B' points to the main content area which includes a "Content Blocks Customization" header, and 'C' points to a sample "My Custom Content Block 1" with placeholder text.](http://campus.collegeforcreativestudies.edu/ed-tech/wp-content/uploads/sites/53/2024/11/DesignPlus_ContentBlocksPage-1024x525.png)
- Click on the 🚀 rocket ship icon at the top right-hand corner of your screen to open the DesignPLUS sidebar.
- Alternatively, use the keyboard shortcut Alt/Option + Shift + D.
- Place your cursor somewhere within the pink Content Block border.
- On the top blue toolbar of the DesignPLUS sidebar, click on the 🎯 Edit Current Element tab.
- Click on the Content Block button below the 🎯 Edit Current Element tab.
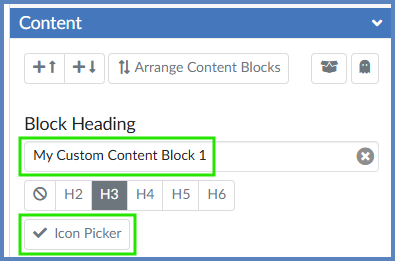
- Rather than editing the heading text in the Rich Content Editor (RCE), use the textbox under the heading Block Heading within the DesignPLUS sidebar to edit the heading. For example, you might call your content block “Discussion Requirements”.
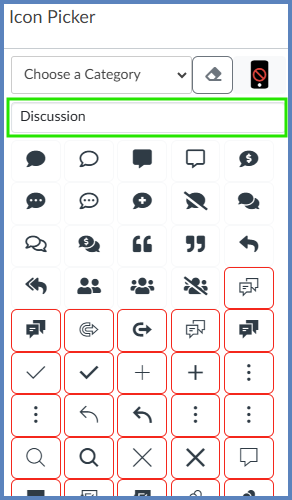
- Select the Icon Picker button to select an icon for your content block. We recommend selecting an icon that, in some way, relates to the material within your content block.
- In the below example, the word Discussion was typed in the Search box, and icons representing discussions appeared.
- A thin red border around an icon indicates it will not be visible in the Canvas mobile app. Hovering over the 📵 black and red mobile icon (to the right of the Choose a Category drop-down list) will display further help text regarding these types of icons.
- In the RCE, within the area marked Content goes here, edit this section to include the content that should be part of that content block. Be sure that any content you add to this content block remains within the pink border.
Finally, as last steps in this editing process, we need to look at an advanced setting.
- Repeat Steps 5-7 above.
- Scroll to the bottom of the DesignPLUS sidebar, and click on the Advanced panel.
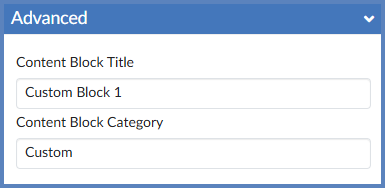
- Edit the Content Block Title and Content Block Category boxes to suit your needs.
- Content Block Title: It is recommended that you name this the same as your content block title in the RCE.
- Example: Discussion Requirements
- Content Block Category: This is the category name you’d like your content block to appear under when you select it to add to your page via the DesignPLUS sidebar.
- Example: Discussion Topics
- Content Block Title: It is recommended that you name this the same as your content block title in the RCE.
- Be sure to Save you page.
Duplicate a Content Block on the [Content Blocks] Page
Duplicating a content block on the [Content Blocks] page can be a quick and easy way to create additional content blocks for you to use in your course.
- Follow steps 1-7 in the previous section of this Guide, Edit the [Content Blocks] Page in Your Canvas Course.
- Within the Content Block section, click the Duplicate Content Block button.
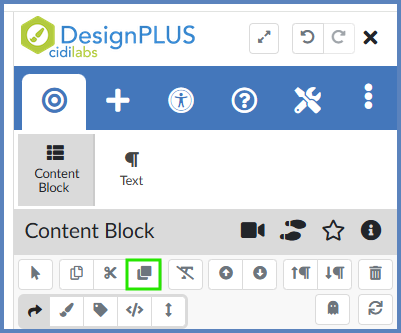
A copy of your content block will appear below it. The process to edit this content block is identical to editing the first content block. The main difference is to ensure your cursor is within the new content block and not in the first content block.
Add Content Block to Your Content Page
Once you have created your content block on the [Content Blocks] page, you can add it to other content pages in your course.
- Open an exiting content page (or create something new) in your course. This could be a Page, Discussion, Assignment, or Classic Quiz.
- Click on the ✏️ Edit button at the top right-hand corner of the screen.
- Click on the 🚀 rocket ship icon at the top right-hand corner of your screen to open the DesignPLUS sidebar.
- Alternatively, use the keyboard shortcut Alt/Option + Shift + D.
- Place your cursor where you want to insert the content block.
- On the top blue toolbar of the DesignPLUS sidebar, click on the ➕ Add New Elements tab.
- Under the Getting Started heading, click on the Content Block icon. A new content block will be added to your page (which you can later delete).
- Ensure that the 🎯 Edit Current Element tab is now selected on the top blue toolbar of the DesignPLUS sidebar. Also, ensure that the Content Blocks is selected under the 🎯 Edit Current Element tab.
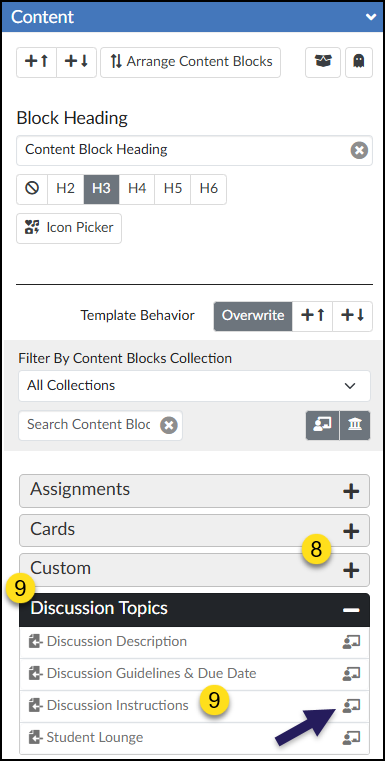
- Within the Content panel, several expandable categories will show. Click the ➕/➖ buttons to expand or collapse them.
- Find and click on the content block that you created. The content block you created on your [Content Blocks] page will be inserted onto your page.
- The icon on the right-hand side of your content name indicates that the content block is for the current course.
