
Nicknames Overview
Canvas allows you to create nicknames for your courses. These nicknames are names that only you can see within your Canvas account. Nicknames do not overwrite the official course name brought in from CCS’ Student Information System (SIS), Colleague. In addition, your students will not see the nicknames you use for your course(s). Students can also give nicknames to the courses they are enrolled in. Instructors and other students will not be able to see the nickname a student has given a course in his/her account.
- A course nickname does not affect the course code, which always displays on the course card for course reference.
- A course nickname does not affect the course name at the account or course level; it only changes the name of the course for the individual user who created the nickname.
- Course nicknames appear in the Dashboard, Course Navigation Menu, course breadcrumbs, and notification emails. Nicknames do not display in the global Grades page and Dashboard sidebar elements such as the To Do list.
- Course nicknames are limited to 59 characters.
Click on each accordion in succession to learn more about nicknames.
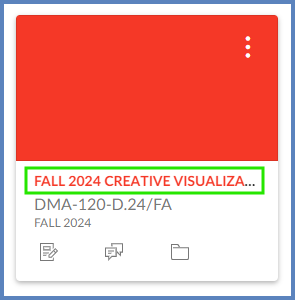
Course Card
This is a Course Card. Course Cards are found on your Canvas Dashboard. In this example, the instructor would like to shorten the course name FALL 2025 GAME IDEATION (DMA-107-B) to Game Ideation (DMA-107-B).
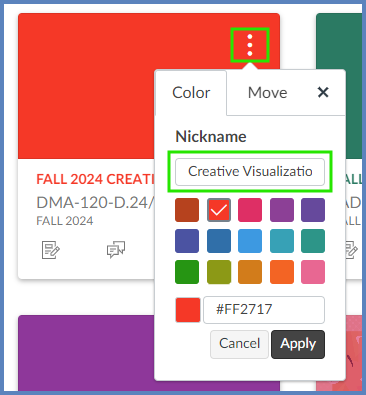
Custom Nickname
- Click on the Options (three vertical dots) icon at the top right corner of a Course Card.
- In the Nickname textbox, enter in a custom nickname for the course. In this example, the instructor gives the course a nickname of Game Ideation (DMA-107-B).
- Click on the Apply button to save the changes.
In this example, if the instructor wants to remove the nickname later on, she can return to this Course Card to remove the nickname. The original course name will appear.
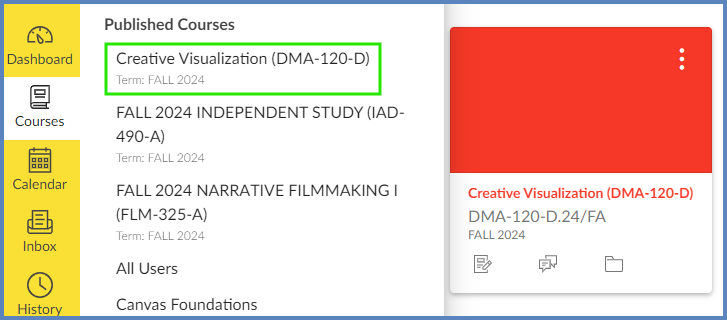
Courses Fly-Out
After the nickname as been created, the instructor will see the name change in several areas of Canvas. Click through the next few accordions to see examples.
The nickname is displayed within the Courses global navigation fly-out menu. It is also displayed on the Course Card.
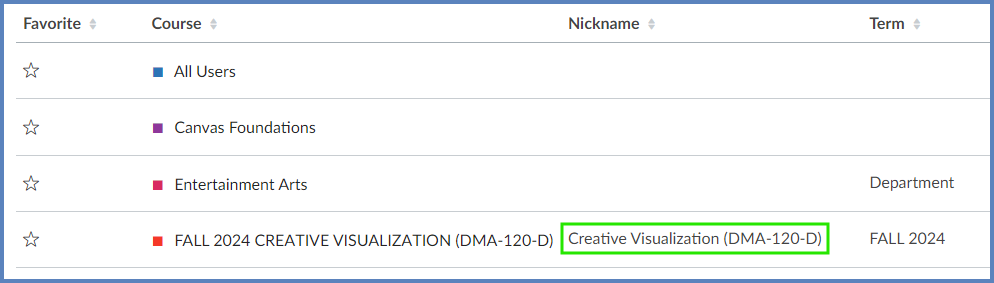
All Courses
The instructor checks her Courses >> All Courses screen. The original course name is listed under the Course column, and her new nickname is listed under the Nickname column.
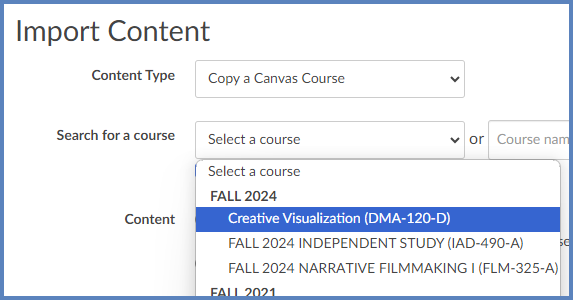
Import Content
If the instructor wanted to import (copy) course content from one course to another, the nickname of the course would be listed in the Select a course drop-down menu.
Breadcrumb Trail
The custom nickname will display at the top left-hand corner of the Canvas course in the breadcrumb trail.

Additional Resources
How do I view my courses in the Card View Dashboard?
- Refer to the section on “Create Nickname”.