The Simple Prep Clean Up tool scans your entire Canvas course and helps to identify unused files and folders, duplicated content, and outdated content. Using the Clean Up tool helps to declutter your course so that your course doesn’t fill up with unneeded, unused content.
Accessing the Simple Prep Clean Up Tool
- Log in to your Winter 2026 course within Canvas.
- Note: The Simple Prep interface is only available for Winter 2026 Canvas courses and beyond.
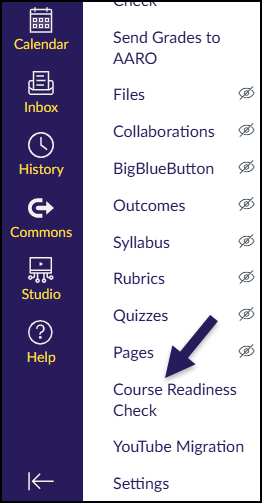
- Find and click on the Course Readiness Check course navigation link in your course.
- The location of the Course Readiness Check link may not be the same as what is shown in this screenshot.
- If you cannot find the Course Readiness Check link in your course navigation, refer to Configuring Course Navigation.
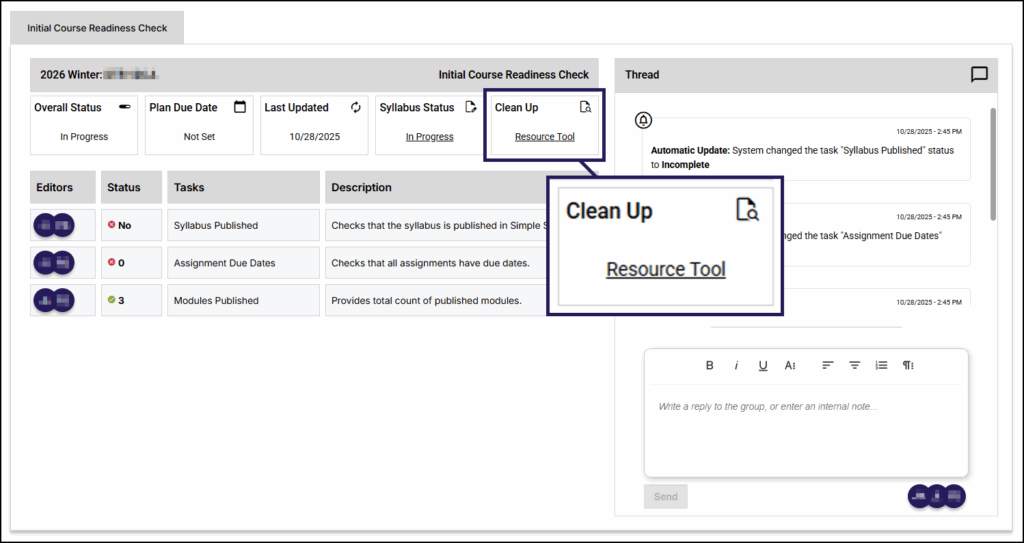
The Simple Prep interface will display within Canvas. The Simple Prep plan name (Example: Initial Course Readiness Check) will display in the upper left corner. Below the plan name, the term name and course number will be shown.
To access the Clean Up tool, click on the Resource Tool link.
A slide-out menu interface will appear on the right side of your screen showing tabs for LMS Content, Files, and Folders. Below these three tabs, the term name and course number are displayed. Below these, a Looking for something… search box and a Filters button are available.
LMS Content
The LMS Content tab displays all course content pages in your course. The table shows the Content name, the Type of content it is, when it was Last Updated, the Published state, if it has Contents, and if it is In Module.
Use the checkboxes to the left of the Content column to select one or more content items in the table. Depending on your selection(s), the Publish and Delete buttons located at the bottom left corner of the interface will activate.
- Note 1: The Simple Prep Clean Up tool allows you to delete Published content, so take care when selecting checkboxes next to those items, as your students may be able to access those items within your course.
- Note 2: If you accidentally delete a content page from this screen, there is a chance (though not 100% guaranteed) you can retrieve it from your Canvas course. Refer to The “Undelete” Trick for additional information. If you are able to recover your content page via Canvas, the next time you launch the Simple Prep Clean Up tool, that content page will again display as a row in this table.

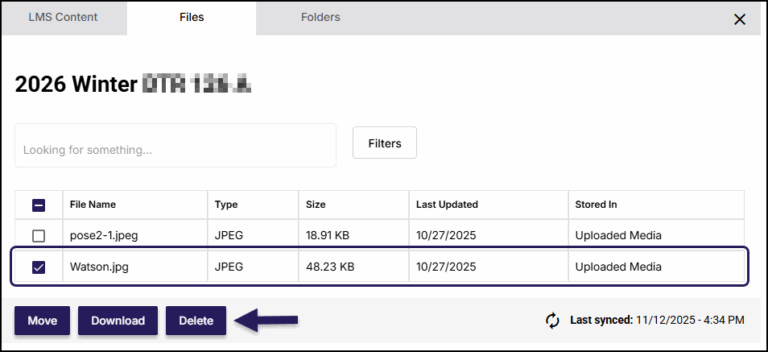
Files
The Files tab shows all files within your Canvas course. The table shows the File Name, the Type of file, the Size of the file, when it was Last Updated, and where the file is Stored In (folder name).
Use the checkboxes to the left of the File Name column to select one or more files in the table. Depending on your selection(s), the Move, Download, and Delete buttons located at the bottom left corner of the interface will activate.
- Note: If you accidentally delete a file from this screen, there is a chance (though not 100% guaranteed) you can retrieve it from your Canvas course. Refer to The “Undelete” Trick for additional information. If you are able to recover your file via Canvas, the next time you launch the Simple Prep Clean Up tool, that file will again display as a row in this table.
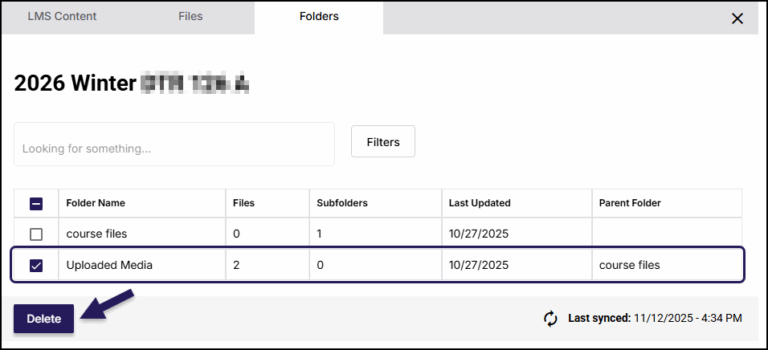
Folders
The Folders tab shows all folders within your Canvas course. The table shows the Folder Name, the number of Files within the folder, the number of Subfolders, when it was Last Updated, and the Parent Folder.
Use the checkboxes to the left of the Folder Name column to select one or more folders in the table. Depending on your selection(s), the Delete button located at the bottom left corner of the interface will activate.
- Note 1: The course files folder cannot be deleted as it is the “root” folder within your Canvas course.
- Note 2: If you accidentally delete an empty folder from this screen, it cannot be recovered via The “Undelete” Trick. If you need the folder again in your course, follow the steps in: How do I create a folder in Files?. The next time you use the Simple Prep Clean Up tool, that folder will again display as a row in this table.
- Note 3: If you accidentally delete a folder from this screen that contains files, there is a chance (though not 100% guaranteed) you can retrieve those files from your Canvas course. Refer to The “Undelete” Trick for additional information. If you are able to recover your files via Canvas, the original folder structure and files will be restored in the Canvas Files screen. In addition, the next time you launch the Simple Prep Clean Up tool, that folder will again display as a row in this table.