If you would like to add a link to your left-hand course navigation, you can use the Redirect Tool to accomplish this. For example, if you wanted to add a link to the CCS Homepage or a link to a website that your students will need to frequently access, you could add that to your left-hand course navigation in Canvas.
- Adding Your Custom Navigation Link
- Editing Your Custom Navigation Link
- Removing Your Custom Navigation Link
- Additional Resources
Caution!
If you use the Redirect Tool to link to existing content in your course, the link may reference a unique CourseID number specific to your course. In the future, when you import (copy) course content, the link you initially created via the Redirect Tool will not automatically update in the new course. It will point students to a previous course that they do not have access to. You will need to manually fix that link to point to the content in your new course. Refer to the section on Editing Your Custom Navigation Link below.
Adding Your Custom Navigation Link
- Log in to your Canvas course.
- In Course Navigation, click the Settings link.
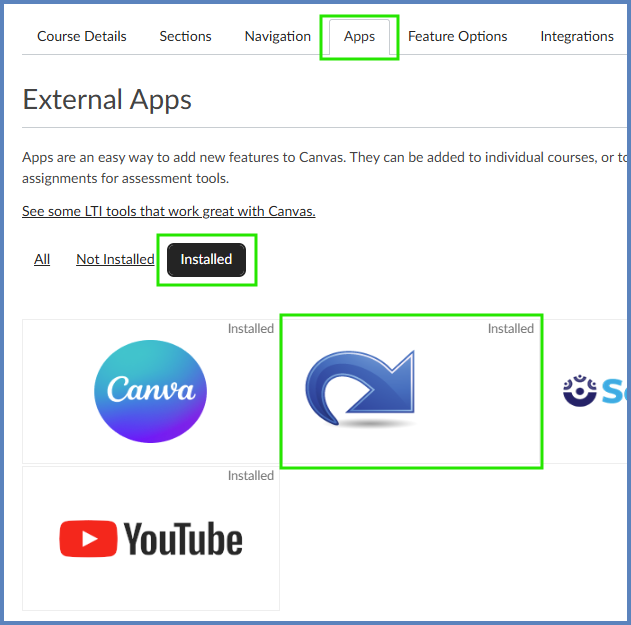
- Click on the Apps tab.
- Click on Installed.
- Select the Redirect Tool.
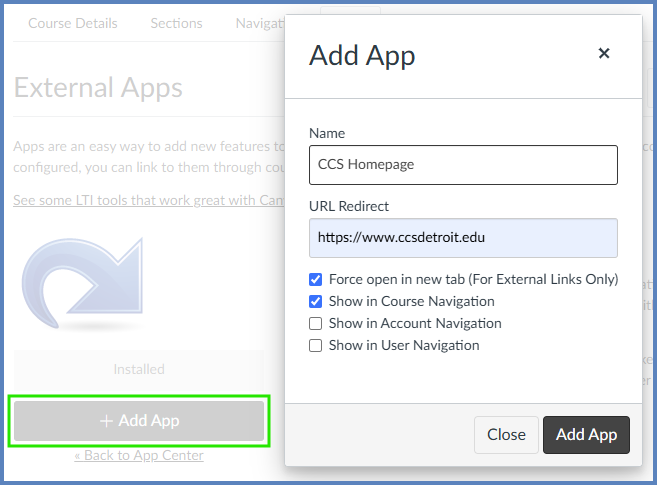
- Click on the ➕ Add App button.
- The Add App window will appear. Fill in the Name, URL Redirect (this is the website you want your students to visit), and select any of the relevant checkboxes. For example, if you want your link to display on your course navigation, select Show in Course Navigation.
- Click the Add App button to confirm your details.
Your new link will display in Canvas based on the checkboxes you selected. For example, if you selected Show in Course Navigation, the link would appear at the bottom of your Canvas course navigation menu. However, you can move it to a different location for you and your students if you wish. Follow the instructions in: Configuring Course Navigation.
- If you do not see your new link, you may need to refresh your screen. Press the F5 key (soft refresh) on your keyboard to refresh your screen. Or, use the keyboard combination Ctrl + Shift + R (hard refresh).
Editing Your Custom Navigation Link
- Log in to your Canvas course.
- In Course Navigation, click the Settings link.
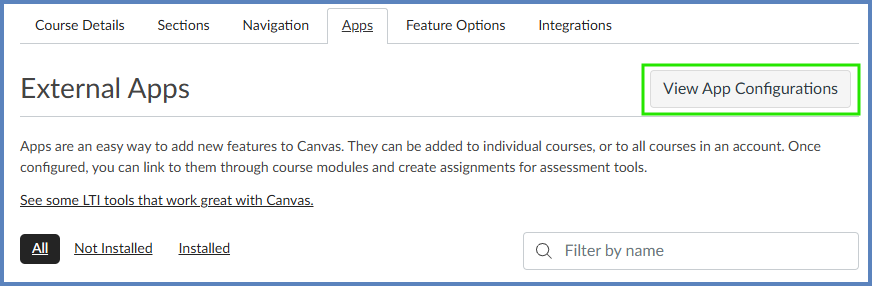
- Click on the Apps tab.
- Click on the View App Configurations button.
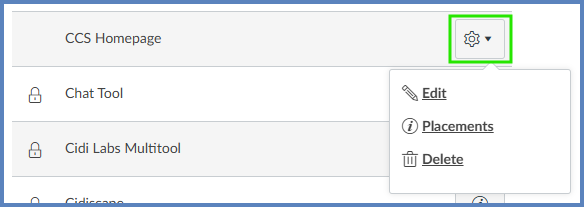
- Click on the Settings (⚙️ cog wheel) icon to the right of the name (row) that you had named your custom link.
- Select ✏️ Edit.
- In the Edit App dialog box that appears on the screen:
- Edit the Name field if you want to change the name of the course navigation button displayed on the left-hand side of your course.
- Edit the Custom Fields textbox to provide a different URL that students should access.
- Example: url=https://www.ccsdetroit.edu
- Click on the Submit button.
![A screenshot of the "Edit App" dialog box in the Canvas LMS shows various fields for configuration. The "Name" field is filled with "CCS Homepage," and the "Consumer Key" and "Shared Secret" fields contain "N/A" and "[Unchanged]," respectively. The "Launch URL" is set to "https://www.edu-apps.org/redirect," the "Domain" field is empty, and the "Privacy Level" is "Anonymous". A "Custom Fields" text box, highlighted by a yellow circular callout with the number '7' and a purple arrow, contains the lines "new_tab=1" and "url=https://www.ccsdetroit.edu". Below this, a description reads, "Add links to external web resources that show up as navigation items in course, user or account navigation. Whatever URL you specify is loaded within the content pane when users click the link". At the bottom are a "Cancel" button and a dark blue "Submit" button, which is highlighted by a yellow circular callout with the number '8'.](http://campus.collegeforcreativestudies.edu/ed-tech/wp-content/uploads/sites/53/2025/05/EditApp.png)
Removing Your Custom Navigation Link
- Log in to your Canvas course.
- In Course Navigation, click the Settings link.
- Click on the Apps tab.
- Click on the View App Configurations button.
- Click on the Settings (⚙️ cog wheel) icon to the right of the name (row) that you had named your custom link.
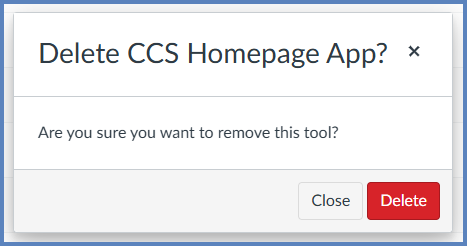
- Select 🗑️ Delete.
- Click the Delete button to confirm you want to remove your link from your course navigation.