Feature Preview
Insights for Canvas Discussions is currently a Feature Preview. This means there may be ongoing updates outside of the regular release schedule.
Option 1:
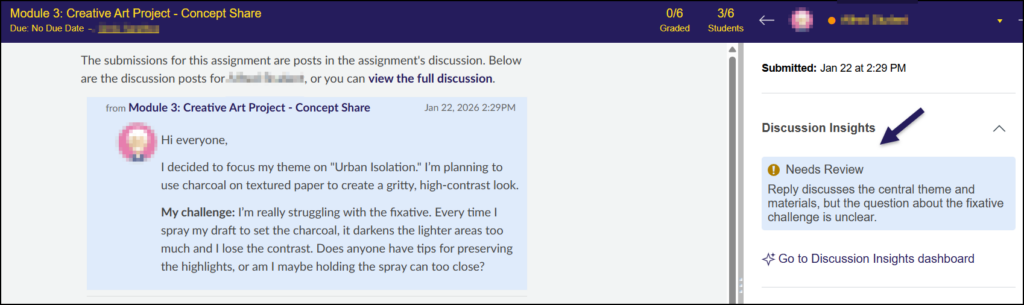
Discussion Insights is a strictly instructor-facing tool designed to support the grading process without directly determining grades or adhering to specific rubrics. Students cannot view these insights or evaluations, and while the AI-generated scores and notes are uneditable, they are intended solely to guide instructors who ultimately assign grades within SpeedGrader. Access to these results is generally confined to the Discussion Insights interface, although they become visible within SpeedGrader if the Platform Usability Updates feature is enabled.
Option 2:
Discussion Insights serves as an instructor-facing support tool that operates independently of assignment rubrics, meaning the AI evaluates posts without considering your specific grading criteria. Students cannot access these internal evaluations, and the AI-generated scores—which cannot be edited—are intended solely to guide the instructor’s manual grading process in SpeedGrader rather than determining the final grade. While these insights are primarily housed within their own interface, enabling specific usability updates allows the results to be viewed directly alongside the grading workflow in SpeedGrader.
Canvas Discussions allow instructors to generate insights for a given discussion topic using IgniteAI to help determine the relevance and quality of student replies.
Enabling Insights for Discussions
In order to utilize Insights for Discussions:
- Navigate to your Canvas course.
- Click on the Settings course navigation link on the bottom left-hand side of your screen.
- Click on the Feature Options tab at the top of the screen.
- Find the IgniteAI Insights for Discussions Feature Option row.
- Optional: Click on the > icon to expand and read the description.
- Click on the red ❌ icon, and select Enabled. A green ✅ checkmark icon will display indicating that the Feature Option has been enabled.
- There is no Save button on this screen. Any Feature Options you enable or disable here are updated immediately.

Viewing Insights for Discussions
These instructions assume that you have at least one discussion topic created in your Canvas course and have replies from your students. If you do not have any discussion topics created in your course, refer to How do I create a discussion as an instructor? or How do I create a graded discussion?.
In your Canvas course, click on the Discussions course navigation link on the left-hand side of your screen.
Click on a discussion topic in your course.
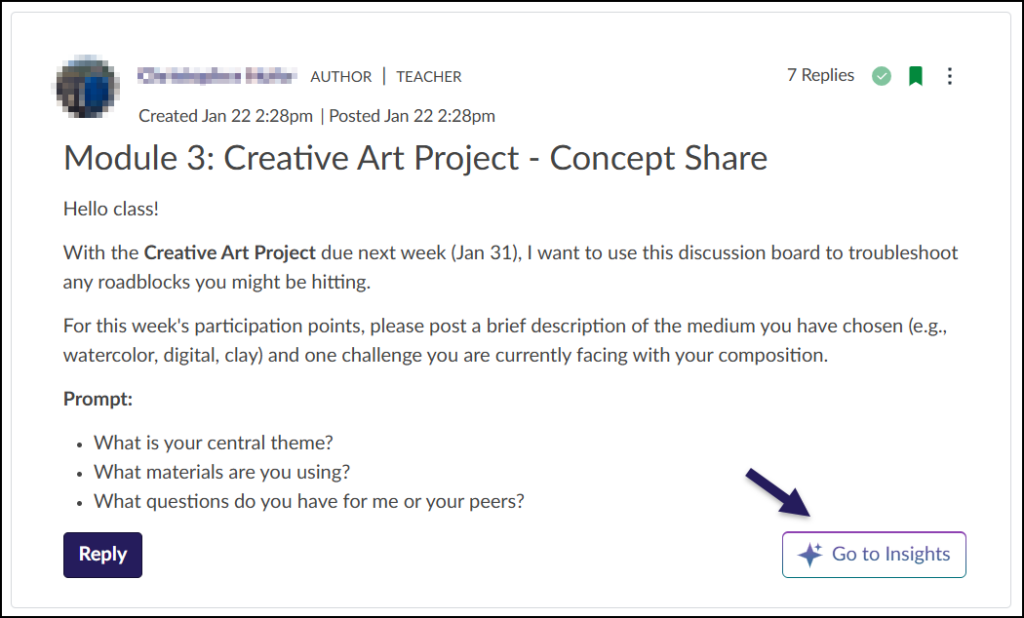
Click on the ✨ Go to Insights button located at the bottom right-hand corner of your discussion prompt.
The ✨ Open Summary button (not shown) may also appear here if you have enabled IgniteAI Summaries for Discussions.
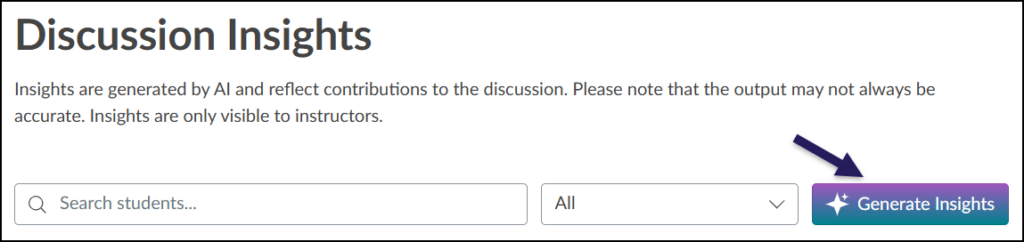
The Discussion Insights dialog box will appear.
Click on the ✨ Generate Insights button to generate Evaluation Notes of your students’ replies.
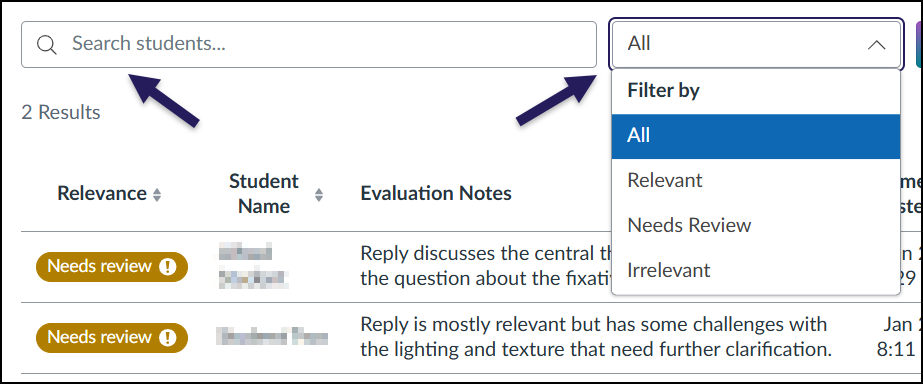
After insights have been generated by IgniteAI, use the Search students… text box to search for specific students, and/or use the Filter by drop-down menu to select a specific Relevance of All, Relevant, Needs Review, or Irrelevant.
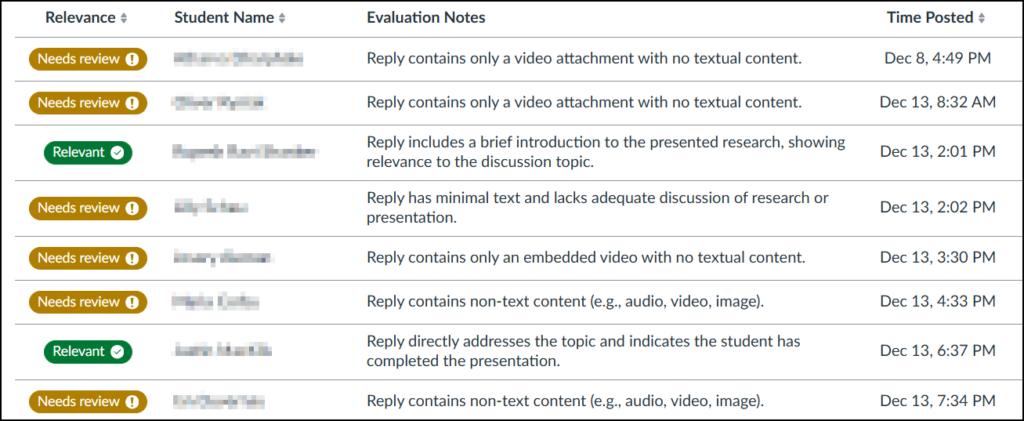
Five columns of data display on the screen after Insights have been generated:
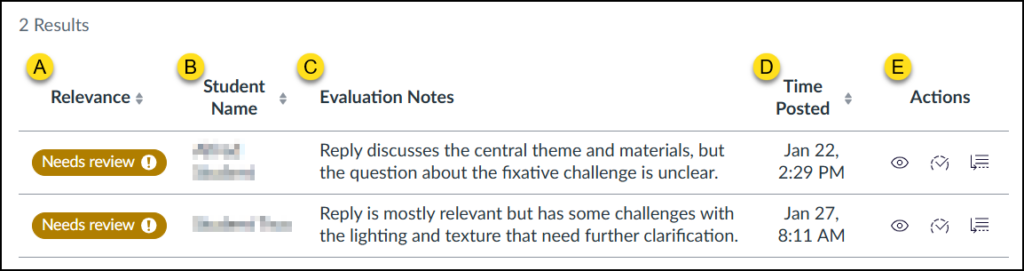
- Relevance: The labels (each in their own color) in this column are Relevant (green), Needs review (gold), or Irrelevant (red). The labels are not clickable. Click the up/down arrow icon next to Relevance to sort the column.
- Student Name: Displays the student’s name in a given row. Click the up/down arrow icon next to Student Name to sort the column.
- Evaluation Notes: Displays an AI-generated evaluation of student responses.
- Time Posted: Displays the date and time of when the student posted the reply. Click the up/down arrow icon next to Time Posted to sort the column.
- Actions: Three different icons display in this column.
- Please see the menu below for an explanation of each icon.
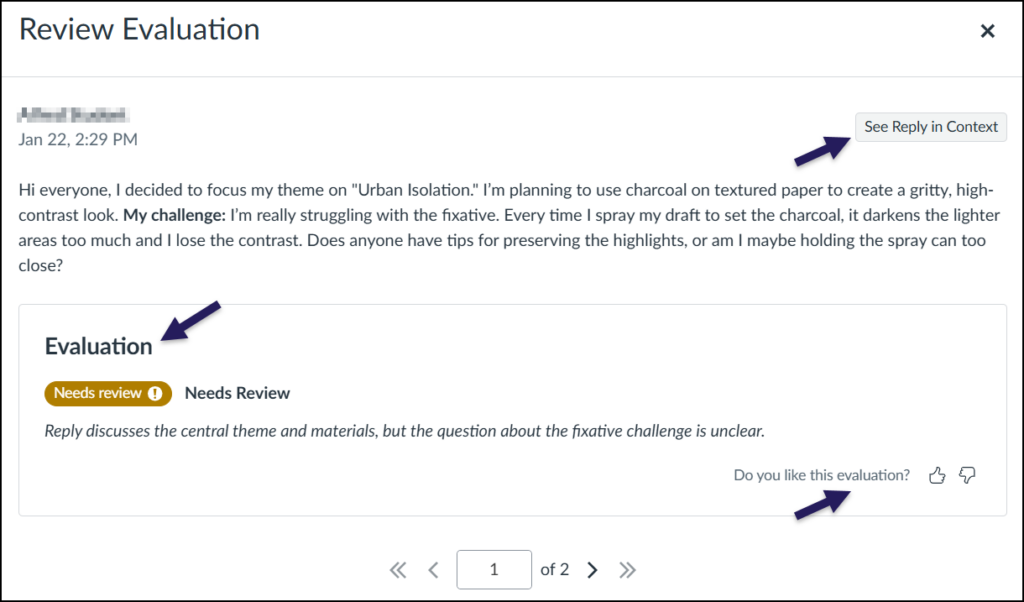
Click on the 👁️ eye icon to See reply. A Review Evaluation window will open. The student’s response displays at the top with the AI-generated Evaluation beneath it.
- Click the See Reply in Context button to be taken to the discussion topic.
- Use the Like (Thumbs Up) and Dislike (Thumbs Down) icons next to Do you like this evaluation? to submit feedback to Instructure about this tool.
- Use the <<, <, >, and >> icons to page through student responses.
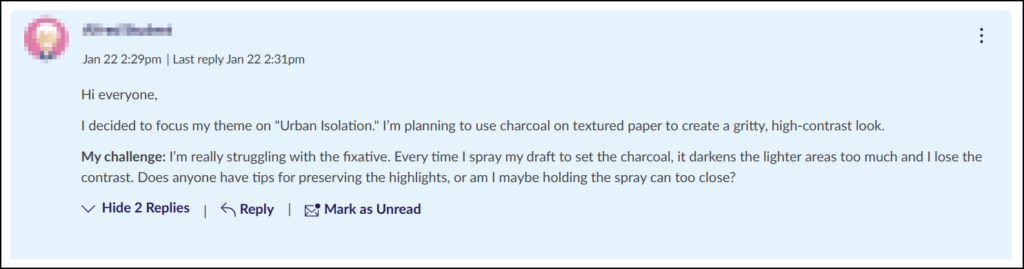
The following screenshot shows a different discussion topic in another course and how IgniteAI evaluated these student responses.