Moving Courses on the Canvas Dashboard

Moving Courses on the Canvas Dashboard

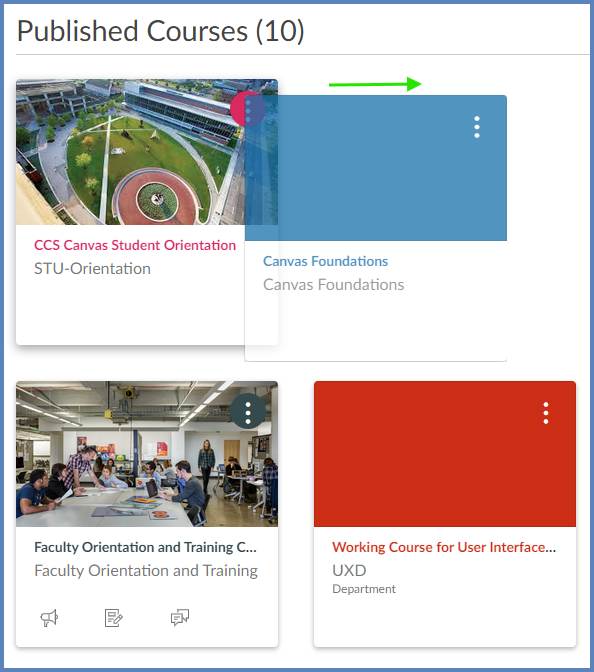
There are two main ways to move course cards around on the Canvas Dashboard.

Click and Drag

On the Canvas Dashboard, click and drag a course card to a new location. Canvas will save the location of where you placed the course card page so that you can easily find it the next time you sign in to Canvas.
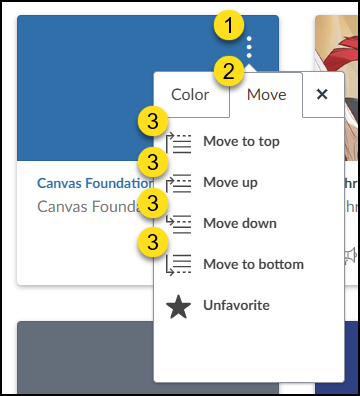
Drag and drop course cards on the Canvas Dashboard to arrange them how you want so you can easily find your courses.

Use the Move Option

  1. On the Canvas Dashboard, click the Options (three vertical dots) icon at the top right corner of a course card you would like to move.
  2. Click the Move tab.
  3. Select from Move to top, Move up, Move down, or Move to bottom.
On the Canvas Dashboard, click the Options (three vertical dots) icon at the top right corner of a course card you would like to move.  Click the Move tab.  Select from Move to top, Move up, Move down, or Move to bottom.

Additional Resources

View my favorite courses in the Card View Dashboard

How do I view my favorite courses in the Card View Dashboard as an instructor?

00:07: How do I do my favorite courses in the card view dashboard as a student, 00:12: By default, active course cards are automatically added by canvas and 00:16: display up to 20 courses. Dashboard courses 00:20: are ordered alphabetically, by course name and your role in the course, nicknames, 00:24: and course codes do not apply to course, ordering courses with instructor 00:28: roles are listed first, followed by Thai rolls and student rolls. 00:33: Course, card, show an overview, of course information, including the course. 00:36: Name course, code and term. 00:40: Each card can include up to for tabs, which represent the four main Candace 00:44: features for student course activity assignments. 00:47: Announcements discussions and files. 00:50: These tabs mimic visibility and order in course navigation. 00:54: So, for instance, if an instructor hides, the announcements link the 00:58: announcements tab will not display on the course card. 01:02: An unread icon on the discussions or announcements tab indicates. 01:05: That there is a new discussion or announcement in the course. 01:08: The number in the icon indicates the number of new items. 01:13: If one of your courses include the long are confusing name, you can create a nickname 01:17: for your course, most courses are created using student Information 01:21: Systems. Sis that generate course names, based on terms, 01:25: departments and section numbers, and courses with similar names, 01:29: may be hard to distinguish. 01:32: Course nicknames appear in the dashboard course, navigation, menu. 01:35: Course, breadcrumbs and notification emails. 01:40: Of course, nickname does not affect the course name at the account. 01:43: Or course level it only changes the name of the course where the individual user, 01:47: who created the nickname 01:50: If you need to know the original name of the course, you can have her over the nickname. 01:53: And the original name will appear. Additionally, the course code 01:58: is not affected and always displays on the course card, for course reference 02:03: To add a nickname, click the options icon, then type the name 02:07: and then nickname field, click the apply button. 02:11: To remove a nickname open the card options and remove the nickname. 02:14: The nickname field will display. 02:17: The original name of the course, 02:20: Course cards can help you organize your courses by customizing the color. 02:23: Which is synced with the color shown for the course in the calendar to change 02:27: the color, click the cards options icon, then select a new color, 02:31: the check mark indicates, the selected color and a hex 02:35: color code displays in the text field. 02:38: If you want to use a color not shown in the window, you can enter 02:42: the colors hex code directly in the text filled. 02:44: The hex field will display a warning icon. 02:47: If the hex code is not valid, additionally, any variation 02:51: of white is not accepted as a course color. 02:55: Click on move. 02:58: Click on color. 03:01: Click on move. 03:04: Click on color. 03:07: Click on color. 03:10: Click on move. 03:13: Click on color. 03:16: Click on move. 03:19: Click on color. 03:22: Select dashboard View. 03:25: Celexa course image. 03:28: This guy detailed, the specific actions required to view and customize favorite 03:32: courses in the card view dashboard. On, in structure for employee training,