In Cidiscape, a Batch acts as a container for the courses you want to monitor. Cidiscape will only collect data for courses that have been added to a Batch. Once a course is in a Batch, Cidiscape automatically scans it every 72 hours to update data on tool usage, accessibility issues (if you have UDOIT), and file usage (if you have *TidyUP). You can trigger an “on-demand” scan for an entire Batch if you need immediate data updates (e.g., right before a semester start).
For example, a Department Chair or Program Manager could create a batch containing all courses in the “Film” program for the Winter 2026 semester. Or, a batch could contain courses from both the Fall 2025 and Winter 2026 semesters to compare data.
- *At CCS, TidyUP is not integrated with Canvas. However, Department Chairs, Program Managers, and Instructors can use the Simple Prep Clean Up Tool available within the Simple Prep interface which provides similar functionality.
In Cidiscape, the concept of Batches and Quick Views [see Adding Quick Views in Cidiscape (for Department Chairs and Program Managers)] can be confusing. Think of it like this:
- Batch: The “Who” (The actual list of courses being scanned).
- Quick View: The “What” (A saved filter that determines which columns of data you see for those courses, such as “Accessibility Scores” or “DesignPLUS Usage”).
The “Lens” Analogy
Think of the Batch as the Landscape (the courses you are looking at) and the Quick View as the Binoculars (the specific lens you use to look at them). You can switch your binoculars (Quick View) to look for different things without ever leaving the landscape (Batch).
- Accessing Cidiscape within Canvas
- Accessing Batches within Cidiscape
- Creating a New Batch in Cidiscape
Accessing Cidiscape within Canvas
- Log in to your Canvas account via the CCS Access Manager.
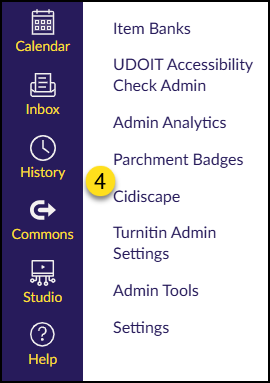
- From the Canvas Dashboard, click on the Admin icon on the left-hand global navigation menu.
- From the slide-out menu that appears on the left side of your screen, select a sub-account (Example: FILM, LIBERAL ARTS, TRANSPORTATION DESIGN, etc.)
- Find and click on the Cidiscape link on the left side of your screen.
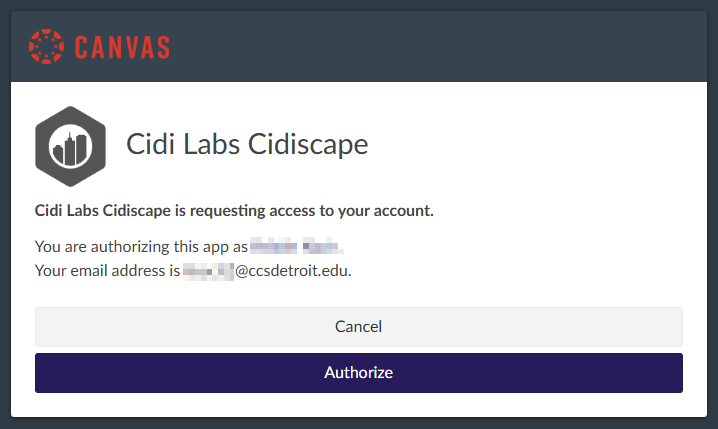
If this is your first time accessing Cidiscape, you will see a screen asking you to authorize your account. Click the Authorize button to continue.
Accessing Batches within Cidiscape
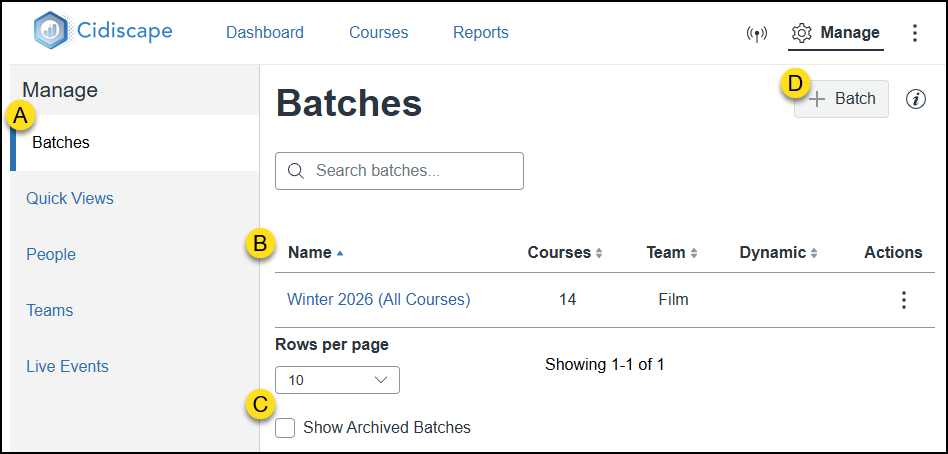
From the Cidiscape Welcome, Dashboard, Courses, or Reports screen, click on the ⚙️ Manage link at the top right corner of the screen. Refer to the yellow labeled letters as you read through these descriptions:
- You should be brought to the Batches screen automatically. If not, click on Batches under the Manage heading.
- This section will display a table containing any Batches created by you or the Educational Technology + Innovation (ET+I) team at CCS. A Search batches… text box is available above the table. You can also select the number of Rows per page below the table.
- The Show Archived Batches checkbox allows you to see any Batches that have been previously archived by you or the ET+I team at CCS.
- Click the ➕ Batch button to create a new Batch. Click the ℹ️ information icon to read a short paragraph about Batches and access a link to the official Cidiscape user guide for Batches.
Creating a New Batch in Cidiscape
There are two different ways to create baches of courses within Cidiscape:
Manual: Courses can only be added or removed manually.
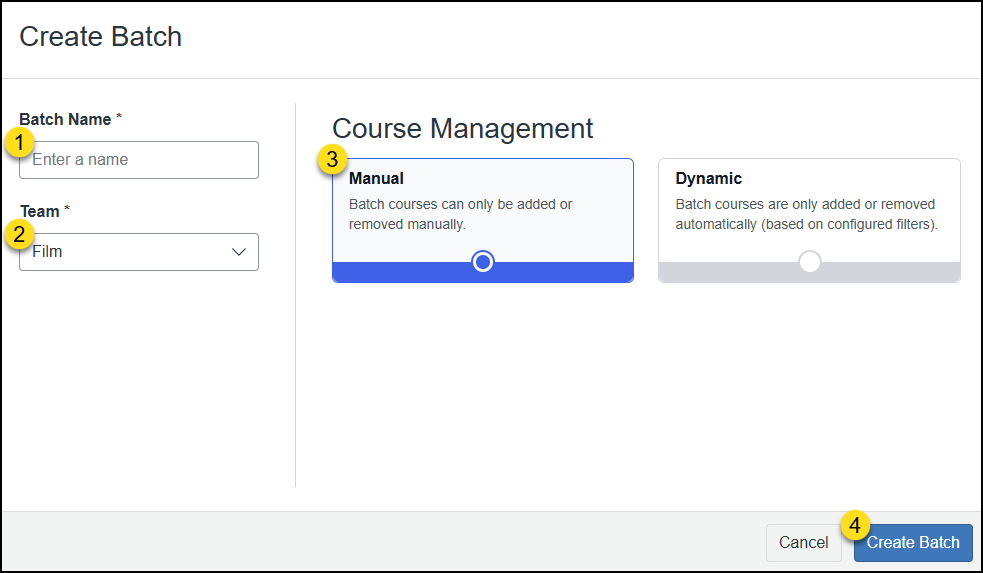
After clicking on the ➕ Batch button (above), the Create Batch screen will display.
- In the Batch Name field, type in a name for your Batch. (Example: Winter 2026 Film Courses)
- From the Team drop-down list, select one of your Teams. (Example: Film)
- From the Course Management section, select Manual.
- Click the Create Batch button.
On the next screen, there are three options to add courses to your Batch:
Find Courses
The Find Courses tab allows you quickly search for and select courses to add to your Batch.
- In the Term drop-down list, select a term. (Example: Winter 2026) Place a checkmark next to Show expired terms if you would like to search for previous terms.
- In the Account drop-down list, select the program name. (Example: FILM)
- Click the Find Courses button.
- Your search results will appear in a table format in this area.

- Place a ✅ checkmark next to one or more courses you want to include in your Batch.
- Click the Add Courses button at the bottom right corner of the screen.
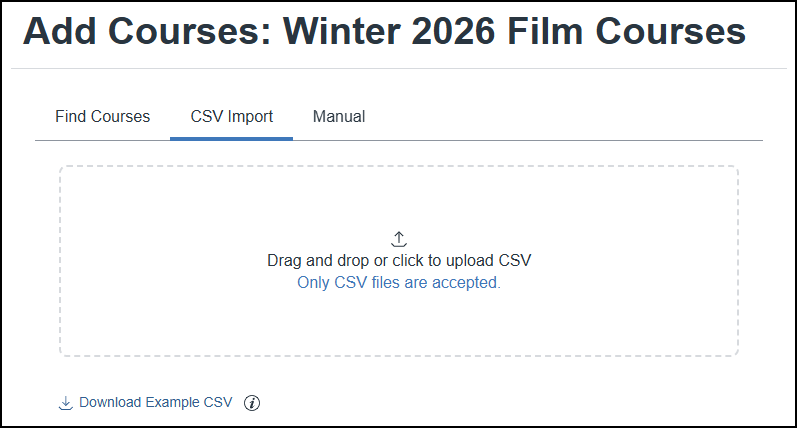
CSV Import
The CSV Import tab allows you to upload a properly formatted CSV file from your computer to Cidiscape. A Download Example CSV link is available at the bottom of this area.
Manual
The Manual tab allows you to add courses by either:
- LMS Course ID (Example: https://collegeforcreativestudies.instructure.com/courses/#####)
- SIS Course ID (Example: 024275e2-….-….-….-c6f3b5283e8f)

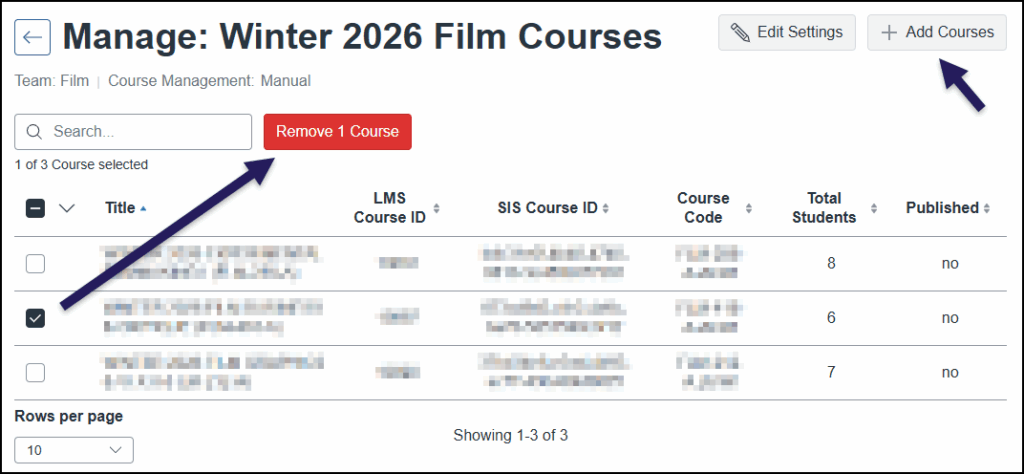
The courses you selected/uploaded will be displayed on the Manage screen.
To remove one or more courses, place a ✅ checkmark next to the course name(s), and click on the red Remove # Course(s) button that appears on the screen.
To add additional courses to your Batch, click on the ➕ Add Courses button at the top right corner of the screen. Repeat the instructions in one of the three accordions (above).
Dynamic: Courses are automatically added or removed based on Batch configurations.
Dynamic Batches automatically sync from Canvas once a day, or whenever a user manually triggers a sync.
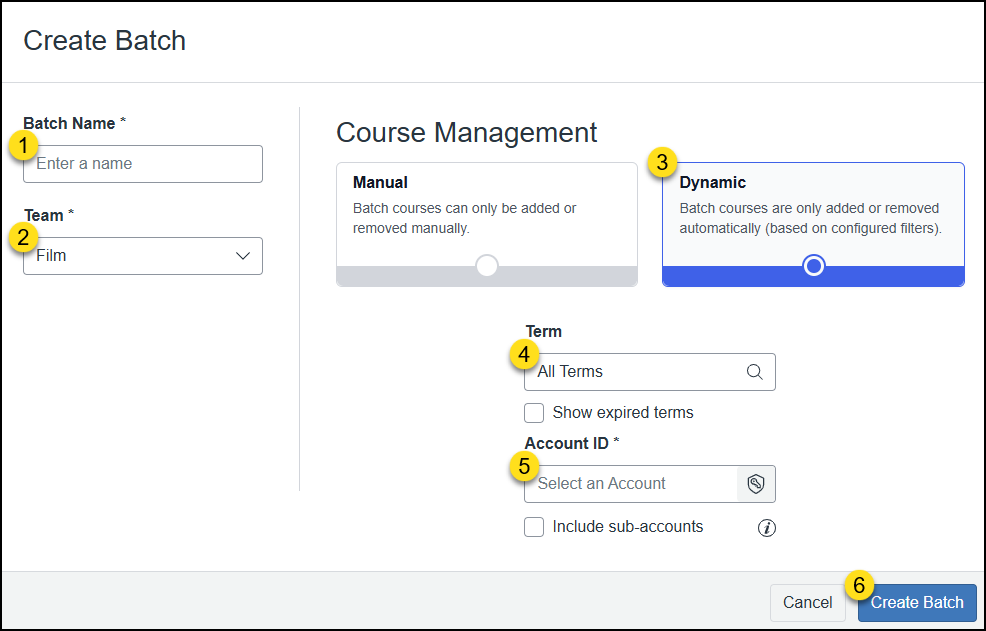
After clicking on the ➕ Batch button (above), the Create Batch screen will display.
- In the Batch Name field, type in a name for your Batch. (Example: Winter 2026 Film Courses)
- From the Team drop-down list, select one of your Teams. (Example: Film)
- From the Course Management section, select Dynamic.
- From the Term drop-down list, select a term. (Example: WINTER 2026)
- Optional: Place a ✅ checkmark next to Show expired terms to show more past term.
- From the Account ID drop-down list, click on the 🔑🛡️ key & shield icon, and select an account name within the pop-up window that appears. (Example: FILM) Click the Confirm button to confirm your selection.
- Optional: Place a ✅ checkmark next to Include sub-accounts to show more past term.
- Click the Create Batch button.
The Manage screen will populate a table of courses based on the selections you have chosen.
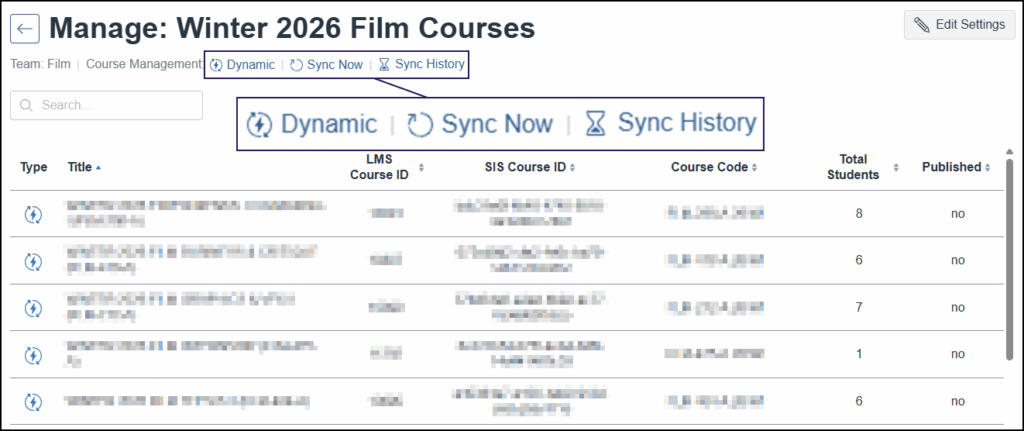
Three clickable links (shown above) are available to you:
Dynamic
Displays a small pop-up window showing the Canvas Account ID number and the Canvas Term ID number associate with the choices you selected.

Sync Now
Allows you to sync your Canvas courses to Cidiscape for the selected Batch.
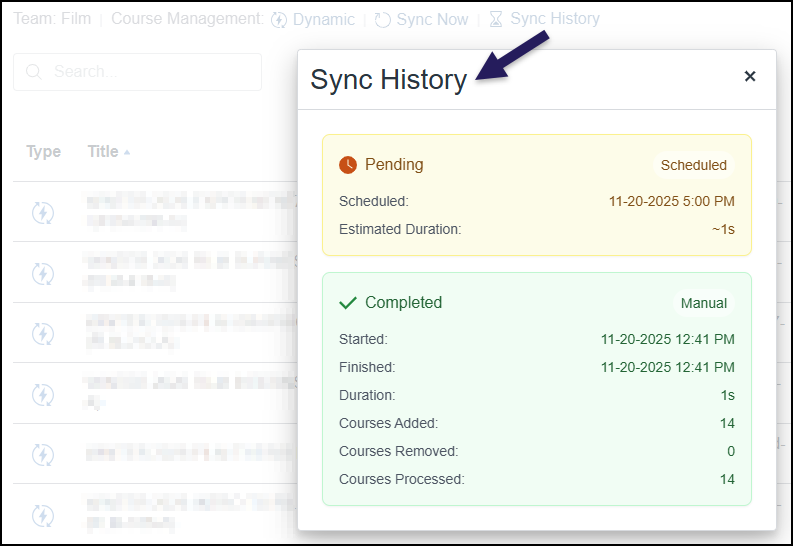
Sync History
Displays a small pop-up window of sync history information.