Feature Preview
Enhanced Rubrics is currently a Feature Preview. This means there may be ongoing updates outside of the regular release schedule.
In July 2024, Enhanced Rubrics (then under a slightly different name) were introduced to provide a more modern interface within the Canvas environment. Today, Enhanced Rubrics can be enabled in your Canvas course(s) to give you a cleaner layout, better visibility, and improved usability. Archive or draft rubrics that you’re not yet ready to use. Import and create rubrics via a spreadsheet following a provided file format. Easily identify which assignments your rubrics are attached to within your course(s). Need to re-order criteria rows? That’s possible, too! And, within the SpeedGrader, Enhanced Rubrics provide additional views to assist in grading.
- Enabling Enhanced Rubrics
- Enhanced Rubrics Interface
- Viewing Rubrics
- View Location(s) of Rubric
- Importing Rubrics
- Downloading Rubrics
- Additional Resources
Enabling Enhanced Rubrics
In order to utilize Enhanced Rubrics:
- Navigate to your Canvas course.
- Click on the Settings course navigation link on the bottom left-hand side of the screen.
- Click on the Feature Options tab at the top of the screen.
- Find the Enhanced Rubrics Feature Option row.
- Optional: Click on the > icon to expand and read the description.
- Click on the red ❌ icon, and select Enabled. A green ✅ checkmark icon will display indicating that the Feature Option has been enabled.
- There is no Save button on this screen. Any Feature Options you enable or disable here are updated immediately.

Enhanced Rubrics Interface
To access all course rubrics in your Canvas course, click on the Rubrics course navigation link on the left-hand side of your screen.
- The Rubrics course navigation link may/may not have a crossed-out eye icon next to it. Either way, this is one of those rare instances where students will never see this link when logged in to your Canvas course(s).
- If you would like to configure where the Rubrics course navigation link is placed in your course, follow the steps in Configuring Course Navigation.
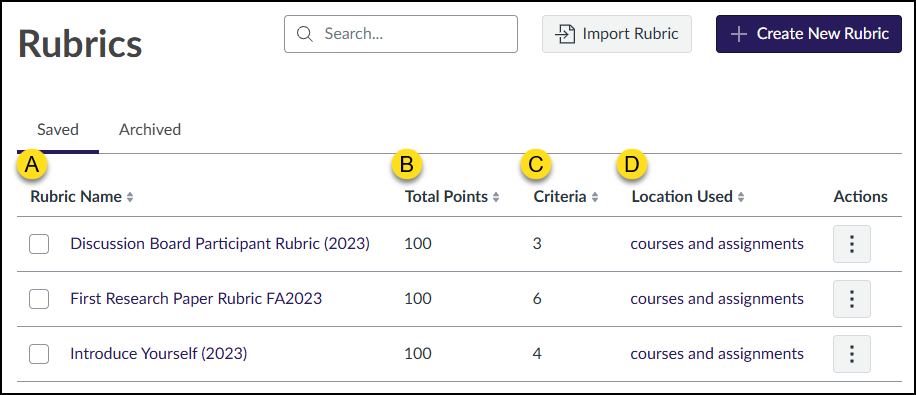
An interface similar to the screenshot below will display on your screen which includes the rubrics in your course. Two tabs, Saved and Archived, contain identical columns (with the slight exception of one menu option in the Actions column).
- Rubric Name: Click the rubric name to open it in a slide-out tray on the right.
- Total Points: Total points possible for the rubric.
- Criteria: Number of criterion rows within the rubric.
- Location Used: Click the link in this column to see where this rubric is used in the course.
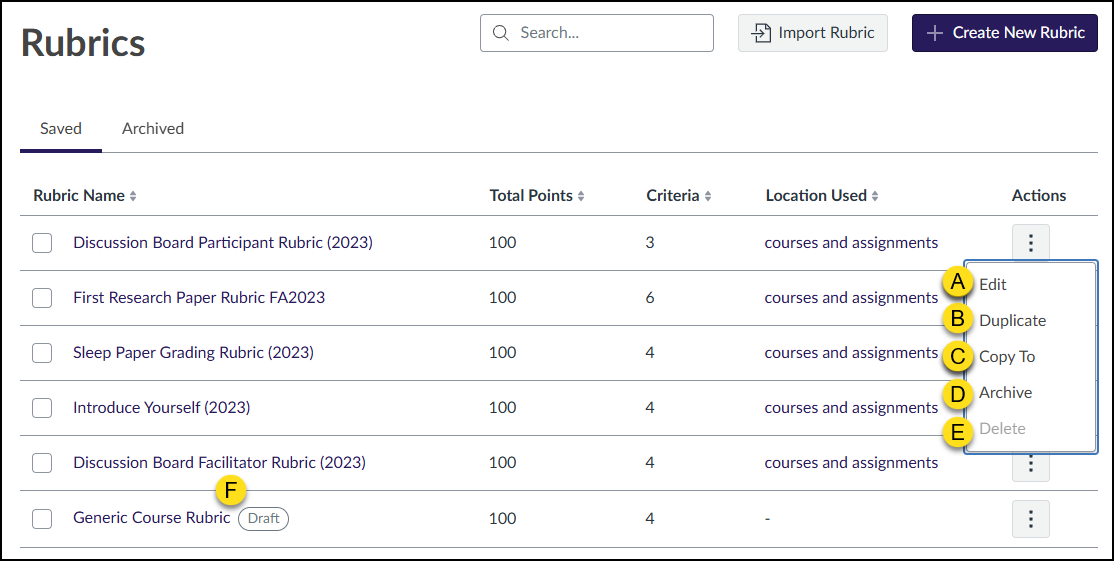
The final column, Actions (three vertical dots icon), includes the following options:
- Edit: Edit the details of the rubric.
- Duplicate: Create a copy of the rubric. The word Copy is appended to the end of the duplicated rubric.
- Copy To: Copy a rubric to another course you are enrolled in as an instructor.
- Archive (Saved tab) / Un-Archive (Archived tab):
- The Archive option moves the rubric to the Archived tab.
- The Un-Archive option moves the rubric to the Saved tab.
- Delete: Delete the rubric entirely from the course. This option is only available if the rubric has not been assigned to any graded assignment in the course.
- Draft: A Draft label displays next to a rubric name if it has been saved as a draft. The Archive (D) option will not be available for rubrics with this label.
Viewing Rubrics
Clicking on the name of a rubric under the Rubric Name column will display a slide-out tray on the right side of the screen. A drop-down list displays at the top of this tray and provides three different views. Select a tab below to see an example of what a criterion row looks like in different “views” of the rubric.
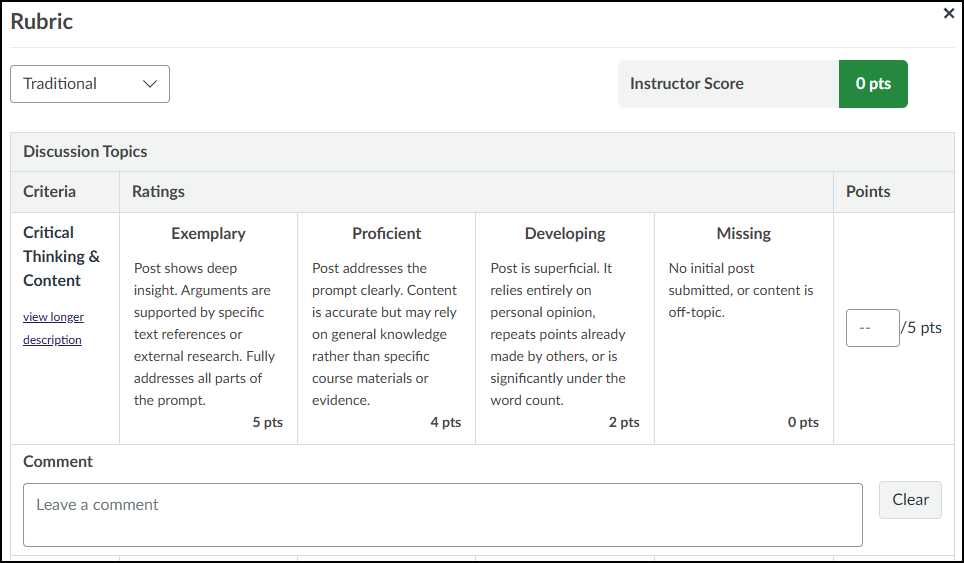
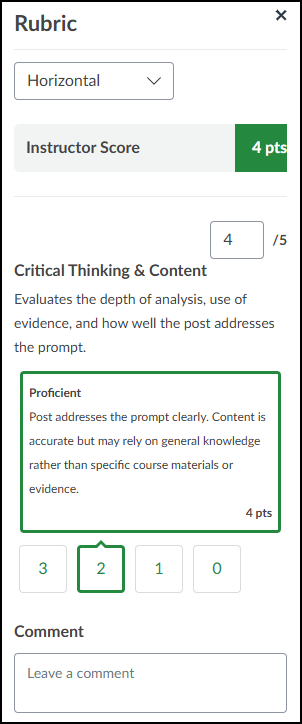
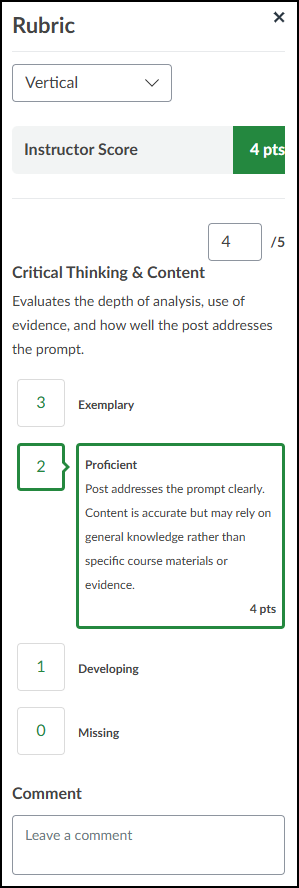
The Vertical view displays the Criterion Name, Criterion Description, and rating order of the possible Points (see below example).
Example: In the Vertical view, the numbered buttons (3, 2, 1, 0) represent the rating order, not the actual point value. As shown, selecting button ‘2’ applies the ‘Proficient’ rating of 4 points to the Instructor Score. The selected rating’s details and actual point value are displayed in the highlighted green box.
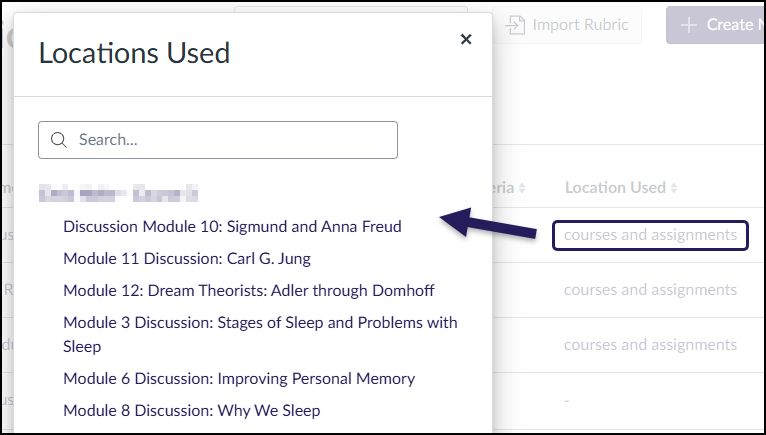
View Location(s) of Rubric
Select the link in the Location Used column to see where the rubric is active. As shown in the example, a dialog box displays the course name (blurred in the example) and a list of connected assignments (such as the six discussion topics shown here). All items in the list, including the course name, are clickable links.
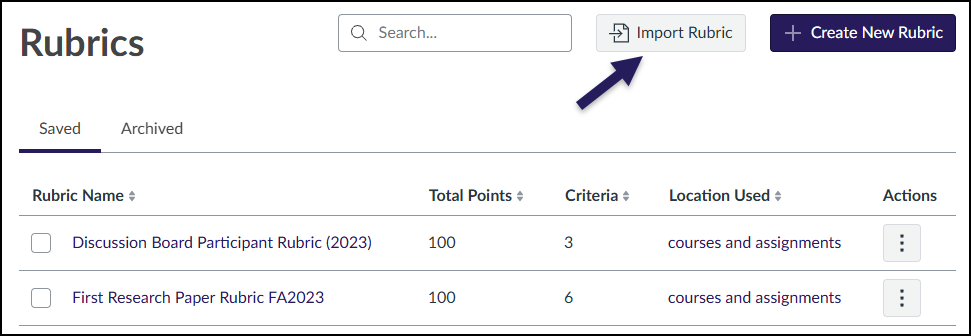
Importing Rubrics
Instructors can import one or more rubrics into a Canvas course via a single CSV file following a specific file format.
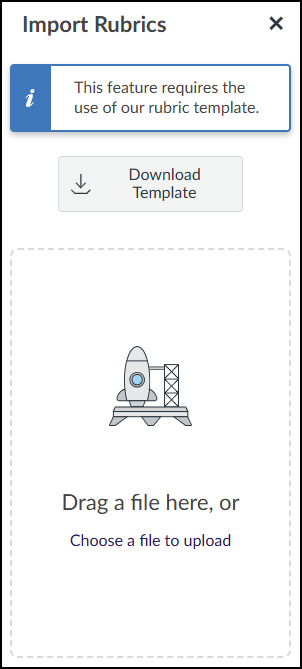
From the Rubrics screen, click on the Import Rubric button.
An Import Rubrics slide-out tray will appear on the right side of your screen.
Click the Download Template button to download a sample CSV file, import_rubric_template.csv, to your computer.
Use the Drag a file here, or Choose a file to upload area to upload a CSV file from your computer to Canvas.
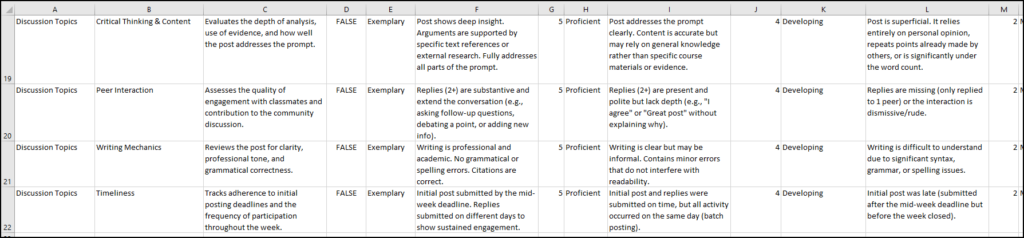
Template Column Definitions
Each column in the spreadsheet has a specific purpose (as shown by the label names in cells A1 through G1).
NOTE: In the two screenshots below,
- Cell B1 (Criteria Name) in the spreadsheet refers to the yellow label B (Daily Sleep Habits Entry).
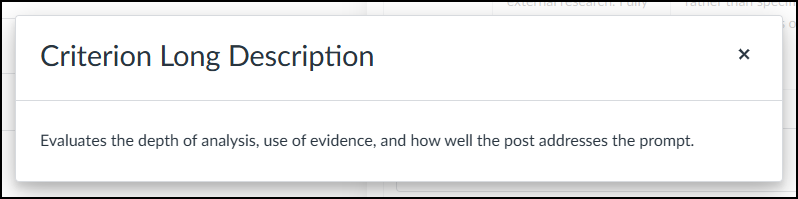
- Cell C1 (Criteria Description) in the spreadsheet refers to the yellow label C (Criterion Long Description).


- Rubric Name: Enter the name(s) of each rubric you would like to upload to your Canvas course.
- Example: To create a rubric called “Discussion Topics” that will contain five (5) criteria, add the words Discussion Topics to cells A2 through A6. To create a rubric called “Final Essay Paper” that will contain ten (10 criteria), add the words Final Essay Paper to cells A7 through A16.
- Criteria Name: Enter the name of a criterion. This name can be a few words in length if you choose to use column C to add a longer description. In the above example, the criterion name is “Daily Sleep Habits Entry”.
- Criteria Description (Optional): Enter a longer description of the criterion name that was entered in column B. In the above example, the longer description is “Submit the provided Sleep Chart as an Excel Spreadsheet”.
- Criteria Enable Range: Enter a value of either TRUE or FALSE.
- TRUE Example: A rubric with possible point values in a range. Exceeds (4.1 to 5 points), Mastery (2.1 to 4 points), Near (0.1 to 2 points), and Below (0 to 0 points).
- FALSE Example: A rubric with possible points of 5, 4, 2, and 0 with no ranges between them.
- Rating Name: Enter a rating name. (Example: Exceeds, Master, Near, Below, etc.)
- Rating Description: Enter a description for the rating.
- Rating Points: Enter the possible points possible for the rating.
An example CSV file is shown below. To add additional rating names/descriptions/points, copy and paste the data from columns E, F, and G to make additional columns in the CSV file. For example, to add two more sets of ratings, create new columns of H, I, J, K, L, and M. Update the data in the new columns as needed.
Downloading Rubrics
To download one or more rubrics as a CSV file to your computer:
- In the Saved and Archived tabs, place a ☑️ checkmark next to the name of one or more rubrics under the Rubric Name column.
- Click the Download Selected Rubrics button at the bottom right corner of the screen.
Canvas will download all selected rubrics from both the Saved and Archived tabs in a single CSV file to your computer. The name of the file will be rubrics_export.csv.

Create New Rubric
Instructors can manually create rubrics via the Enhanced Rubrics interface in Canvas. From the Rubrics course navigation menu within a Canvas course, click on the ➕ Create New Rubric button at the top right corner of the screen. The following screen will display:
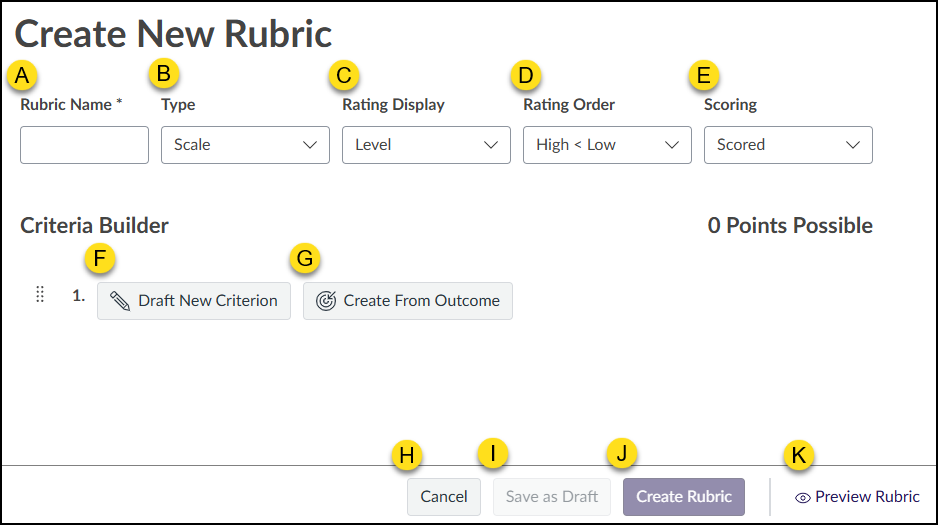
- Rubric Name (Required): Enter a name for the rubric.
- Type: Select from Scale or Written Feedback.
- Rating Display: Select from Level or Points.
- Rating Order: Select from High < Low or Low < High.
- Scoring: Select from Scored or Unscored.
- ✏️ Draft New Criterion: Create a new criterion row for the rubric.
- 🎯 Create From Outcome: Bring in one or more Outcomes stored in the Canvas course to the rubric.
- Cancel: Return to the main Rubrics screen.
- Save as Draft: Save the rubric as a draft when details of rubric are created and at least one criterion has been built. The rubric will have a Draft label next to it.
- Create Rubric: Create the rubric when the details and at least one criterion have been built. The rubric will not have a Draft label next to it.
- 👁️ Preview Rubric: Preview the rubric in a slide-out tray that appears on the right side of the screen.
After clicking on the ✏️ Draft New Criterion button, the Create New Criterion window displays on the screen:
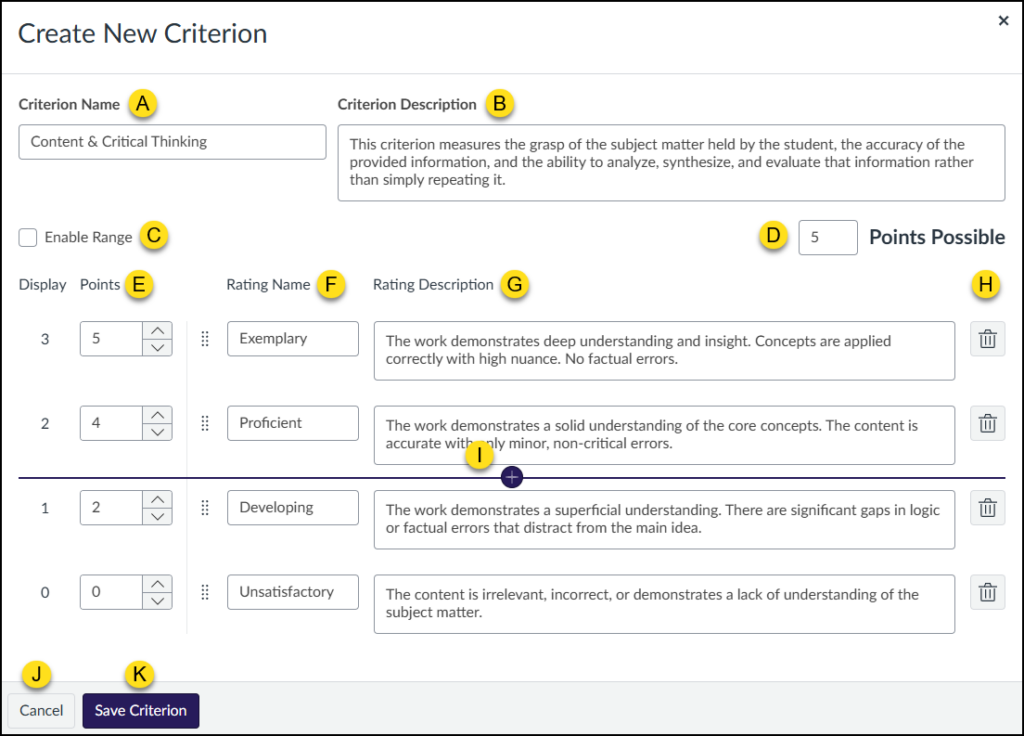
- Criterion Name: Enter the name of a criterion. This name can be a few words in length if you choose to use column B to add a longer description.
- Criterion Description (Optional): Enter a longer description for the Criterion Name field.
- Enable Range: Check this box if the rubric should include ranges of points for each Rating Name/Rating Description.
- Points Possible: Enter in the total number of points for the criterion. The points will automatically update in the Points column (E) depending on the number entered in the Points Possible text box.
- Points: Enter in the numerical rating scale for the criterion. The highest point value will also update in the Points Possible text box (D).
- Rating Name: Enter a rating name. (Example: Exceeds, Master, Near, Below, etc.)
- Use the eight-dot drag handle icon in this column (immediately to the left of any Rating Name text box) to move items up or down.
- Rating Description: Enter a description for the rating.
- Delete: Click the 🗑️ trash can icon to delete a row from the criterion.
- Add Row: Place your cursor above/below any row to display a ➕ plus icon to add a row to the criterion.
- Cancel: Exit out of the criterion editing screen. A Warning message will display asking to confirm your selection.
- Save Criterion: Save the criterion for the rubric.
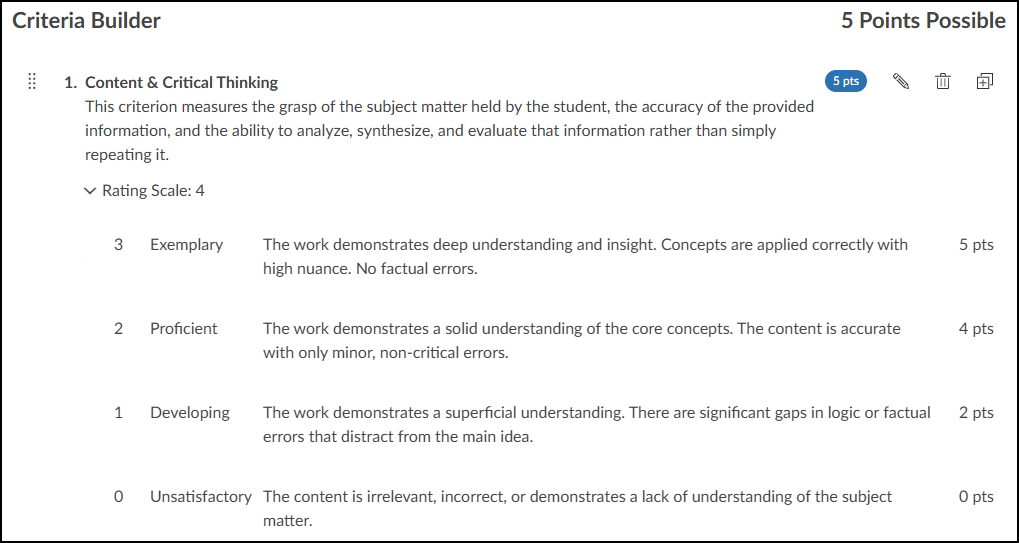
The screenshot below shows an example of what a completed criterion may look like using the Enhanced Rubrics interface.
Additional Resources
The following resources are related to using the Enhanced Rubrics feature of Canvas.